In this tutorial, we will show you how to install Google Chrome on Ubuntu 18.04 LTS. For those of you who didn’t know, Google Chrome is a freeware web browser developed by Google, that uses the WebKit layout engine. It is available for Linux, Android, iOS, Windows, and Mac OS X operating systems. But Google Chrome is more than a web browser, as it combines sophisticated open source technology, borrowed from the Chromium application, into a minimal design, all in order to help users surf the web much faster, a lot easier, and safer than ever before.
This article assumes you have at least basic knowledge of Linux, know how to use the shell, and most importantly, you host your site on your own VPS. The installation is quite simple and assumes you are running in the root account, if not you may need to add ‘sudo‘ to the commands to get root privileges. I will show you the step-by-step installation of Google Chrome on a Ubuntu 18.04 LTS (Bionic Beaver) server.
Prerequisites
- A server running one of the following operating systems: Ubuntu 18.04 LTS (Bionic Beaver).
- It’s recommended that you use a fresh OS install to prevent any potential issues.
- SSH access to the server (or just open Terminal if you’re on a desktop).
- A
non-root sudo useror access to theroot user. We recommend acting as anon-root sudo user, however, as you can harm your system if you’re not careful when acting as the root.
Install Google Chrome on Ubuntu 18.04 Bionic Beaver
Method 1. Install Google Chrome on Ubuntu 18.04 LTS from the Command-Line.
Step 1. First, make sure that all your system packages are up-to-date by running the following apt-get commands in the terminal.
sudo apt-get update
sudo apt-get upgrade
Step 2. Installing Google Chrome on Ubuntu 18.04 LTS.
First, create a source list file for the Google Chrome browser:
nano /etc/apt/sources.list.d/google-chrome.list
Next, copy the following APT line and paste it into google-chrome.list file:
deb [arch=amd64] http://dl.google.com/linux/chrome/deb/ stable main
After that, run the following command to download Google’s signing key:
wget https://dl.google.com/linux/linux_signing_key.pub
apt-key add linux_signing_key.pub
Now update the package list and install the stable version of Google Chrome:
apt update
apt install google-chrome-stable
Step 3. Accessing Google Chrome.
Once installed, open Google Chrome from Ubuntu Dash or Terminal:
google-chrome-stable
If you wish to uninstall and remove Google Chrome from Ubuntu, run the following commands:
apt-get purge google-chrome-stable
apt-get autoremove
Method 2. Install Google Chrome on Ubuntu 18.04 in the Graphical Way
Step 1. Go to https://www.google.com/chrome. Click the Download Chrome button.
Step 2. Then select the first option (64-bit .deb package), and click Accept and Install.
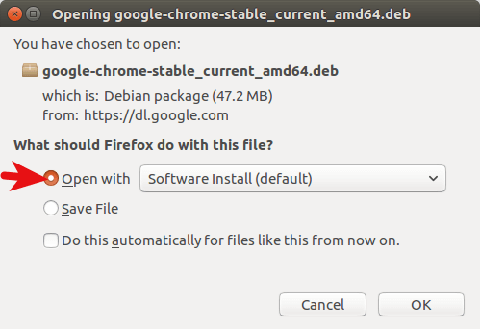
Step 3. When Firefox asks you how to open this deb file, choose the default option to open it in Ubuntu Software (formerly Ubuntu Software Center).

If you choose the first option, the Google Chrome deb package will be downloaded to /tmp/mozilla_$username directory. Once the download is complete, Ubuntu Software will automatically open. Click the Install button to install google-chrome-stable to Ubuntu 18.04. The version and installation size information can be seen in the Details section. 189.4MB of disk space! That’s huge for a Web browser.
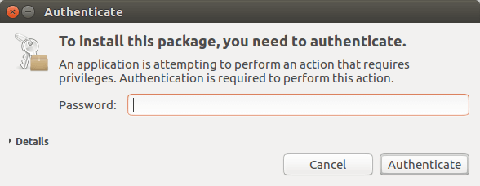
Because software installation on Linux requires root privilege, so you have to enter your password to authenticate.

Step 4. Once the installation is complete, you can start the Chrome browser in the Unity Dash or by typing the following command in the terminal.
google-chrome-stable
Congratulations! You have successfully installed Google Chrome. Thanks for using this tutorial for installing the Google Chrome web browser in Ubuntu 18.04 Bionic Beaver system. For additional help or useful information, we recommend you to check the official Google Chrome website.