How To Install HandBrake on Fedora 41

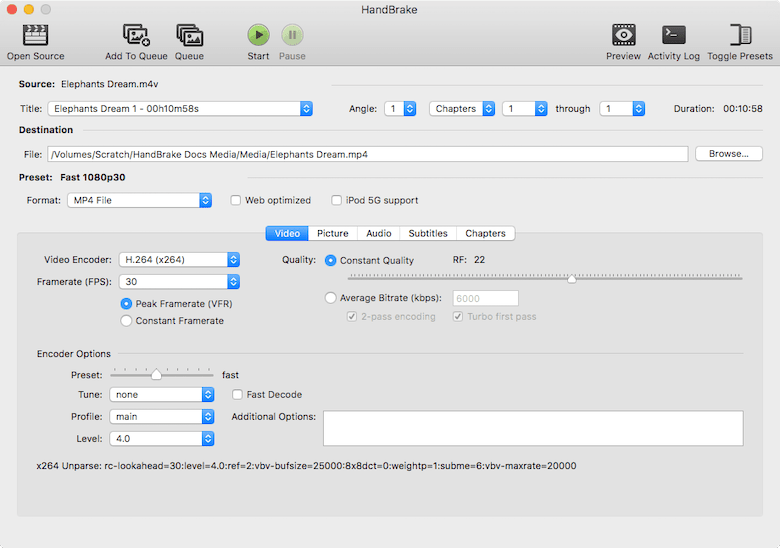
HandBrake is a powerful, open-source video transcoder that allows users to convert video files from nearly any format to a selection of modern, widely supported codecs. Whether you’re looking to compress videos for easier sharing, convert files for compatibility with specific devices, or simply want to edit your media, HandBrake provides a comprehensive solution. This guide will walk you through the installation process of HandBrake on Fedora 41, ensuring you can start utilizing its features effectively.
What is HandBrake?
HandBrake is an open-source video transcoding tool that has gained popularity due to its versatility and user-friendly interface. It supports a wide array of video formats and codecs, making it an essential tool for anyone working with digital media. Some of its key features include:
- Support for Various Formats: HandBrake can handle formats such as MP4, MKV, and more.
- User-Friendly Interface: The intuitive GUI allows users of all skill levels to navigate easily.
- Batch Processing: Users can queue multiple files for processing at once.
- Hardware Acceleration: HandBrake supports hardware encoding, which speeds up the transcoding process significantly.
Whether you are a casual user wanting to convert home videos or a professional needing to prepare media for distribution, HandBrake offers the tools necessary to get the job done efficiently.
Prerequisites for Installation
Before installing HandBrake on Fedora 41, ensure your system meets the following requirements:
- Fedora 41 Installed: Make sure you are running the latest version of Fedora.
- Updated System: It’s crucial to have an updated system to avoid compatibility issues. You can update your system using the following command:
sudo dnf upgrade --refreshThis command refreshes the package repository and upgrades all installed packages to their latest versions.
Method 1: Installing HandBrake via RPM Fusion
The first method involves using the RPM Fusion repositories, which provide additional software packages not included in the default Fedora repositories. Follow these steps to install HandBrake via RPM Fusion:
Step 1: Enable RPM Fusion Repositories
To install HandBrake from RPM Fusion, you first need to enable both the Free and Non-Free repositories. This step is essential as it allows you access to a wider range of software options. Execute the following commands in your terminal:
sudo dnf install https://download1.rpmfusion.org/free/fedora/rpmfusion-free-release-$(rpm -E %fedora).noarch.rpmsudo dnf install https://download1.rpmfusion.org/nonfree/fedora/rpmfusion-nonfree-release-$(rpm -E %fedora).noarch.rpmThe first command enables the Free repository, while the second adds the Non-Free repository. Once completed, you can confirm that both repositories are enabled by running:
dnl repolistStep 2: Install HandBrake
Now that you have enabled RPM Fusion repositories, you can proceed with installing HandBrake. Use the following command:
sudo dnf install handbrake handbrake-guiThis command installs both the command-line version and graphical user interface (GUI) version of HandBrake. The GUI version is particularly useful for users who prefer a visual interface over command-line operations.
Step 3: Launching HandBrake
Once installed, you can launch HandBrake in two ways: using the command line or through the graphical interface.
- Command Line: Open your terminal and type:
handbrake- Graphical Interface: You can also find HandBrake in your Activities menu. Simply search for “HandBrake” and click on its icon to launch it.
Method 2: Installing HandBrake via Flatpak
If you prefer using Flatpak as an installation method, follow these steps. Flatpak provides a sandboxed environment for applications, enhancing security and ease of use.
Step 1: Enable Flathub Repository
The first step in installing HandBrake via Flatpak is enabling the Flathub repository, which hosts a wide variety of applications. Run this command in your terminal:
flatpak remote-add --if-not-exists flathub https://flathub.org/repo/flathub.flatpakrepoThis command adds Flathub as a source for Flatpak applications.
Step 2: Install HandBrake via Flatpak
You can now install HandBrake using Flatpak with this command:
flatpak install flathub fr.handbrake.ghb -yThe `-y` flag automatically confirms any prompts during installation, streamlining the process.
Step 3: Launching HandBrake from Flatpak
To launch HandBrake installed via Flatpak, use the following command in your terminal:
flatpak run fr.handbrake.ghbYou can also find it in your Applications menu under “HandBrake.” The Flatpak version runs independently from any other installations you may have made through RPM Fusion.

Troubleshooting Common Issues
If you encounter issues during installation or while running HandBrake, consider these common problems and their solutions:
- Error: “No package found”: This usually indicates that the repositories are not enabled correctly. Double-check that both Free and Non-Free RPM Fusion repositories are enabled.
- Error: Dependency issues: If there are missing dependencies during installation, try updating your system again with
sudo dnf upgrade --refresh, then retry installing HandBrake. - Error: Unable to launch application: If HandBrake doesn’t start after installation, ensure that it was installed correctly by checking with
dnl list installed | grep handbrake. If it’s missing, reinstall using the appropriate method. - Error: Performance issues or crashes: Ensure that your system meets the hardware requirements for video processing and check if there are updates available for your graphics drivers.
Congratulations! You have successfully installed HandBrake. Thanks for using this tutorial for installing the HandBrake video transcoder on Fedora 41 system. For additional help or useful information, we recommend you check the HandBrake website.