How To Install Hestia Control Panel on Debian 12
![]()
In this tutorial, we will show you how to install Hestia Control Panel on Debian 12. Hestia Control Panel (HestiaCP) is a powerful, lightweight, and open-source web hosting control panel that simplifies server administration tasks through an intuitive web interface. Originally forked from VestaCP, Hestia has evolved into a robust solution for managing web servers, email services, DNS configurations, and databases from a centralized dashboard. For system administrators and web developers working with Debian 12 (Bookworm), HestiaCP offers a streamlined way to handle multiple websites, domains, and services without extensive command-line operations.
Installing Hestia Control Panel on Debian 12 provides a comprehensive server management solution that integrates essential components including NGINX, Apache, PHP-FPM, Bind DNS Server, Exim Mail Server, Dovecot POP3/IMAP Server, MariaDB, and Vsftpd FTP Server. This makes it ideal for both production environments and development servers.
This guide will walk you through the complete installation process, from preparing your server to configuring and securing HestiaCP. Whether you’re a seasoned Linux administrator or new to server management, this step-by-step tutorial will help you get HestiaCP up and running on your Debian 12 system efficiently.
Understanding HestiaCP
Hestia Control Panel stands out as one of the most popular, user-friendly web server management solutions available today. It provides a comprehensive suite of tools designed to simplify complex server administration tasks through an accessible web interface. As a fork of VestaCP, Hestia has maintained the core functionality that made its predecessor successful while introducing numerous improvements and modern features.
Core Components and Services
HestiaCP integrates several critical server components:
- Web servers: NGINX (as a frontend/proxy) and Apache (as a backend)
- PHP-FPM for application processing
- Bind DNS Server for domain name resolution
- Exim Mail Server with SpamAssassin for email handling
- Dovecot for POP3/IMAP services
- MariaDB for database management
- Vsftpd for FTP file transfers
- Firewall (iptables) with Fail2Ban for security
Prerequisites and System Requirements
Before installing Hestia Control Panel on your Debian 12 system, ensure your server meets the necessary requirements to support smooth operation. Proper preparation will help avoid complications during installation and ensure optimal performance afterward.
Hardware Requirements
HestiaCP is relatively lightweight compared to other control panels, but still requires adequate resources to run efficiently:
- CPU: 64-bit AMD64 or x86_64 Intel processor (ARM servers are also supported)
- RAM: Minimum 1GB (2GB or more recommended for production environments)
- Storage: At least 10GB of free disk space (more recommended for hosting websites and emails)
- Network: Stable internet connection with reasonable bandwidth
Software Requirements
The foundation for a successful HestiaCP installation includes:
- A clean installation of Debian 12 (Bookworm)
- No pre-existing web servers, mail services, or control panels
- Updated package repositories
- SSH access to your server
- Root privileges or a user with sudo access
Network Configuration
Proper network setup is crucial for HestiaCP functionality:
- A static IP address assigned to your server
- Correctly configured DNS records pointing to your server
- Fully Qualified Domain Name (FQDN) properly set up
- Essential ports open on your firewall (22, 80, 443, 8083, etc.)
Pre-Installation Server Preparation
Proper server preparation is crucial for a successful Hestia Control Panel installation. These preliminary steps create a clean, optimized environment that helps avoid conflicts and ensures smooth operation of all HestiaCP components.
Update System Packages
Begin by updating your Debian 12 system to ensure all packages are current:
sudo apt update
sudo apt upgrade -y
This updates the package lists and upgrades all installed packages to their latest versions, providing a stable foundation for the HestiaCP installation.
Install Essential Utilities
Next, install the necessary dependencies required by the HestiaCP installer:
sudo apt install -y build-essential apt-utils apt-transport-https ca-certificates curl gnupg2 rsyslog wgetThese packages provide essential tools for downloading files, handling package transportation securely, and managing certificates—all critical for the installation process.
Configure Server Hostname
Setting the correct hostname is important for HestiaCP to function properly. Use the following command to set your server’s Fully Qualified Domain Name (FQDN):
sudo hostnamectl set-hostname server.yourdomain.comReplace “server.yourdomain.com” with your actual domain name. Verify the hostname is set correctly:
hostname -fThis should return your fully qualified domain name.
Verify Network Configuration
Ensure your server has a static IP address and that DNS records correctly point to your server. You can check your current IP configuration with:
ip addr showSystem Time Configuration
Accurate system time is essential for proper log records and certificate validation. Set your timezone with:
sudo timedatectl set-timezone Your/TimezoneReplace “Your/Timezone” with your appropriate timezone (e.g., Asia/Jakarta).
Disable Conflicting Services
If you have any previously installed web servers, mail servers, or other control panels, it’s best to remove them completely to prevent conflicts:
sudo apt purge apache2 nginx mysql-* postfix exim4 bind9
sudo apt autoremove -y
Create a Backup (Optional)
If you’re working with an existing server that contains important data, create a backup before proceeding:
sudo tar -czf /root/server-backup-$(date +%F).tar.gz /etc /var/www /homeWith these preparation steps completed, your Debian 12 server is now ready for the HestiaCP installation process.
Downloading the HestiaCP Installation Script
The first step in the actual installation process is obtaining the official HestiaCP installation script. This script automates the installation of all required components and configures them to work together seamlessly.
Official Sources
The recommended way to obtain the HestiaCP installation script is directly from the official GitHub repository. This ensures you’re getting the latest version with all security patches and features.
Downloading via wget
Use the wget command to download the installation script:
wget https://raw.githubusercontent.com/hestiacp/hestiacp/release/install/hst-install.shThis command fetches the installation script from the official HestiaCP GitHub repository and saves it to your current directory.
Verifying Script Integrity
After downloading, it’s good practice to verify the script’s integrity to ensure it hasn’t been tampered with:
ls -la hst-install.shCheck that the file size seems reasonable (it should be several kilobytes) and that the modification date is recent.
Setting Execution Permissions
Before running the script, you need to make it executable:
chmod +x hst-install.shThis grants execution permissions to the script file, allowing you to run it.
Understanding Installation Flags
The HestiaCP installation script supports various flags that customize the installation process:
--force: Skips interactive prompts and uses default settings-n, --nginx: Installs nginx web server-a, --apache: Installs apache web server-w, --phpfpm: Installs PHP-FPM-v, --vsftpd: Installs Vsftpd FTP server-j, --proftpd: Installs ProFTPD server-k, --named: Installs Bind DNS server-m, --mysql: Installs MariaDB server-e, --exim: Installs Exim mail server-d, --dovecot: Installs Dovecot POP3/IMAP server
You can combine these flags to customize your installation, though for most users, the default installation includes all necessary components.
With the installation script downloaded and properly set up, you’re now ready to proceed with running the script to install HestiaCP on your Debian 12 server.
Running the Installation Script
With the HestiaCP installation script downloaded, you’re now ready to execute it and begin the actual installation process. This stage involves running the script and responding to several configuration prompts to customize your installation.
Execution Methods
There are two main approaches to executing the installation script:
- Interactive Installation: Allows you to configure options during installation
- Non-interactive Installation: Uses default settings or predefined options
For most users, the interactive installation provides the best experience as it allows customization of key parameters.
Starting the Installation
To begin the interactive installation, run the script as root or with sudo:
sudo bash hst-install.shIf you prefer a non-interactive installation with default settings, use the --force flag:
sudo bash hst-install.sh --forceUpon execution, you’ll see a welcome message displaying the HestiaCP logo and a list of components that will be installed.
Installation Wizard Prompts
During the interactive installation, you’ll be prompted to provide several important pieces of information:
- Installation Confirmation: You’ll be asked to confirm that you want to proceed with the installation. Type
yand press Enter to continue. - Admin Email: Enter a valid email address for administrative notifications. This email will receive important system alerts and security notifications.
- FQDN Hostname: Confirm or enter your server’s fully qualified domain name (e.g., server.yourdomain.com).
- Password: The installer will automatically generate a secure password for the admin account, or you can set your own in the non-interactive mode.
Understanding Console Output
As the installation progresses, you’ll see detailed output in your terminal showing:
- Repository configuration
- Package installations
- Service configurations
- Security setup
- Component integration
The entire installation process typically takes 10-15 minutes, depending on your server’s performance and internet connection speed.
Installation Progress Monitoring
The script will display progress information for each major component being installed. You can monitor this output to ensure everything is proceeding correctly. If any errors occur, they will be displayed in the console output.
Handling Interruptions
If the installation process is interrupted for any reason (like network issues or server reboots), you can generally resume by running the installation script again. The script is designed to handle partial installations and will pick up where it left off in most cases.
Once all components are installed and configured, the script will display a completion message with your login credentials and instructions for accessing the HestiaCP web interface.
Installation Configuration Options
HestiaCP offers a variety of configuration options during installation, allowing you to tailor the system to your specific needs. Understanding these options helps you create an optimized server environment that aligns with your requirements.
Web Server Options
HestiaCP supports multiple web server configurations:
- NGINX + Apache: The default and recommended setup. NGINX serves as the frontend proxy while Apache handles backend processing, offering the best balance of performance and compatibility.
- NGINX Only: A lightweight option that uses fewer resources but may have compatibility issues with some applications that require Apache-specific features.
- Apache Only: Traditional setup with broader application compatibility but potentially lower performance on high-traffic sites.
Database Server Selection
For database management, HestiaCP offers:
- MariaDB: The default option, a community-developed fork of MySQL offering excellent performance and compatibility.
- PostgreSQL: Available as an alternative for applications that specifically require PostgreSQL support.
Mail Server Configuration
The mail server components include:
- Exim: Highly configurable mail transfer agent for sending emails.
- Dovecot: Secure IMAP and POP3 server for email retrieval.
- SpamAssassin: For spam filtering and protection.
- ClamAV: Optional antivirus scanning for email attachments.
DNS Server Options
For domain name resolution:
- Bind: Full-featured DNS server that allows complete control over DNS zones and records.
- No DNS: Option to skip DNS server installation if you’re using external DNS management.
PHP Configuration
HestiaCP installs multiple PHP versions, allowing you to:
- Set different PHP versions per website
- Configure PHP settings individually for each site
- Optimize PHP-FPM pools for performance
FTP Server Choices
For file transfers, choose between:
- Vsftpd: The default option, known for security and simplicity.
- ProFTPD: Alternative with additional features for complex setups.
Firewall and Security Tools
Security components include:
- Firewall: Configures iptables or nftables rules to protect your server.
- Fail2Ban: Monitors logs and blocks suspicious activity.
- Let’s Encrypt integration: For free SSL certificates.
Advanced Installation Parameters
For experienced users, additional options can be specified when running the installation script:
sudo bash hst-install.sh --interactive no --nginx yes --apache yes --phpfpm yes --vsftpd yes --mysql yes --exim yes --dovecot yesThis example shows a non-interactive installation with specific components explicitly enabled. You can customize this command to include only the components you need.
Understanding these configuration options allows you to create a server environment that balances performance, security, and functionality according to your specific requirements.
Post-Installation Setup
After the HestiaCP installation completes, several important steps are needed to finalize the setup and ensure everything is working correctly. This post-installation phase is crucial for securing your server and preparing it for production use.
System Reboot
Once the installation finishes, the installer will prompt you to reboot your system. This reboot is necessary to ensure all services start properly with their new configurations:
sudo rebootAfter the reboot, wait a minute or two for all services to initialize completely.
Accessing the Web Interface
To access the HestiaCP admin panel, open a web browser and navigate to:
https://your-server-ip:8083or
https://your-domain-name:8083Your browser may show a security warning due to the self-signed SSL certificate. This is normal for a fresh installation. You can proceed safely and address the SSL certificate later.
First Login
Log in using the credentials provided at the end of the installation:
- Username:
admin - Password: (The password generated during installation)
It’s crucial to save these credentials securely, as they provide full administrative access to your server.
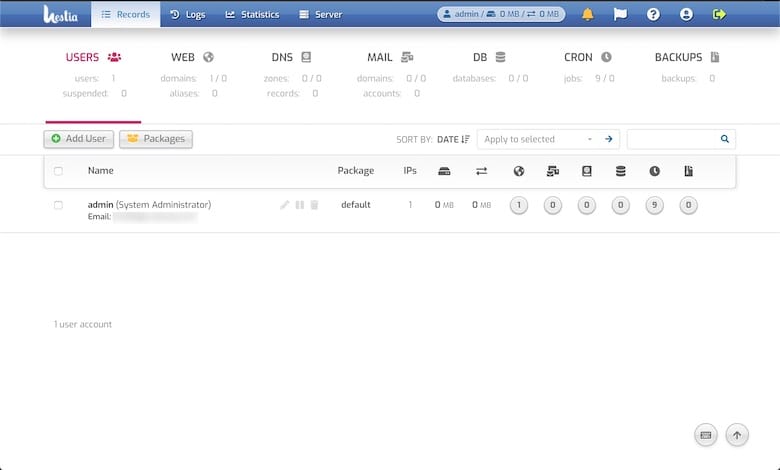
Dashboard Navigation Overview
Upon first login, take some time to familiarize yourself with the dashboard layout:
- Top navigation bar: Contains user information, notifications, and logout option
- Left sidebar: Main menu for accessing different management sections
- Main panel: Displays information and configuration options for the selected section
- Server statistics: Shows resource usage and system status
Initial Configuration Tasks
Complete these essential initial tasks:
- Change the default admin password: Go to User > Account > Change Password
- Set up backup configurations: Configure storage locations and schedule
- Verify service status: Check that all installed services show as running
- Configure server hostname and DNS: Ensure proper name resolution
- Test email functionality: Send a test email to verify mail server operation
Verifying Component Installation
Confirm that all components were installed correctly by checking:
- Web server access (
http://your-server-ipshould show a default page) - Database connection (try connecting with a client)
- Mail server functionality (send and receive test emails)
- DNS resolution (use
digornslookupcommands)
If any component isn’t functioning correctly, check the relevant logs in /var/log/ to identify and resolve issues. With these post-installation steps completed, your HestiaCP installation is ready for further configuration and customization.
Securing Your HestiaCP Installation
Security should be a top priority after installing HestiaCP. A properly secured server protects your data and ensures reliable service for your users. Follow these comprehensive steps to harden your HestiaCP installation against potential threats.
Change Default Credentials
The first security measure is to change the default admin password:
- Log in to HestiaCP web interface
- Navigate to “User” > “Account” > “Change Password”
- Create a strong password with a mix of uppercase and lowercase letters, numbers, and special characters
- Update the password and log in again with the new credentials
Implement SSL Certificates
Secure all web traffic with SSL certificates:
- For the HestiaCP panel itself:
- Go to “Server” > “Configure” > “Web Server”
- Enable “SSL Support” and apply
- For hosted websites:
- Navigate to “Web” > select a domain > “Edit”
- Enable “SSL Support” and apply
- Use Let’s Encrypt for free, trusted certificates:
- Select the domain > “Edit” > “SSL” > “Let’s Encrypt”
- Check both “Add www domain” and “Enable automatic SSL renewal”
Configure Firewall Protection
HestiaCP includes firewall functionality, but it requires proper configuration:
- Navigate to “Server” > “Firewall”
- Ensure only necessary ports are open:
- SSH (22) – limit to your IP if possible
- HTTP (80)
- HTTPS (443)
- HestiaCP (8083)
- Mail ports (25, 465, 587, 110, 995, 143, 993) if needed
- DNS (53) if you’re running a DNS server
- Add custom rules to restrict access to sensitive services
Set Up Fail2Ban Protection
Fail2Ban helps prevent brute force attacks:
- Verify Fail2Ban is running:
sudo systemctl status fail2ban - Configure Fail2Ban for HestiaCP:
- Edit
/etc/fail2ban/jail.local - Ensure jail settings for ssh, hestia, and other services are enabled
- Edit
- Restart Fail2Ban after changes:
sudo systemctl restart fail2ban
Restrict Admin Panel Access
Limit access to the HestiaCP admin panel by IP address:
- Navigate to “Server” > “Configure” > “Security”
- Add your IP address to the “Allowed IP for control panel” field
- Apply changes to restrict access to listed IPs only
Regular Security Updates
Keep your server secure with regular updates:
- Set up automated security updates:
sudo apt install unattended-upgrades sudo dpkg-reconfigure -plow unattended-upgrades - Regularly update HestiaCP itself through the web interface:
- Navigate to “Server” > “Updates” > “Check for updates”
- Apply available updates when they appear
Security Audit
Perform regular security audits:
- Review login attempts in “Server” > “Logs”
- Check for unusual processes or resource usage
- Monitor
/var/log/auth.logfor unauthorized access attempts - Consider using additional security tools like Rootkit Hunter (rkhunter) or LMD (Linux Malware Detect)
By implementing these security measures, you’ll significantly reduce the risk of unauthorized access and potential data breaches on your HestiaCP server. Remember that security is an ongoing process that requires regular attention and updates.
Working with Websites and Domains
Hestia Control Panel excels at simplifying website and domain management. This section covers the essential tasks for creating and managing websites through the HestiaCP interface.
Creating Your First Website
Adding a new website in HestiaCP is straightforward:
- Log in to the HestiaCP web interface
- Navigate to the “Web” tab in the left sidebar
- Click the “+” button to add a new domain
- Enter the domain name (e.g., example.com)
- Select the necessary options:
- Web: Enable web hosting
- SSL: Enable SSL support (recommended)
- Let’s Encrypt: Automatically issue free SSL certificates
- Proxy Support: Enable if using Nginx as a proxy
- Click “Add” to create the website
Managing Domain Settings
Once your domain is created, you can manage various aspects:
- Access domain settings by clicking on the domain name in the Web list
- From here, you can:
- Edit domain configuration
- Manage SSL certificates
- Set up redirects
- Configure proxy templates
- Set up additional FTP accounts
Document Root Configuration
The document root is where your website files are stored:
- By default, website files are located at
/home/username/web/example.com/public_html/ - You can access and modify these files via:
- FTP/SFTP
- HestiaCP’s built-in File Manager (click the “Open” button next to your domain)
- SSH command line
Web Application Deployment
HestiaCP makes it easy to deploy common web applications:
- Navigate to “Web” > select your domain > “Web App Installer”
- Choose from popular applications like WordPress, Joomla, or Drupal
- Follow the installation wizard to set up the application
- Alternatively, upload your custom application files to the document root
PHP Version Management
Different websites may require different PHP versions:
- Go to “Web” > select your domain > “Edit”
- Under “Advanced Options,” select the required PHP version
- Click “Save” to apply the changes
- PHP settings can be further customized via PHP-FPM pools
Website Statistics and Logs
Monitor your website performance with built-in tools:
- Access statistics by clicking the “Stats” button next to your domain
- View access and error logs from the “Logs” button
- Set up additional analytics tools as needed
Backup and Restore Procedures
Regular backups are crucial for website security:
- Create a backup: “Backup” tab > “+” button > select domains to backup
- Download backups: Click the download icon next to any backup
- Restore: Upload a backup file and click “Restore”
- Schedule automatic backups through “Server” > “Backup” > “Scheduled Backups”
By mastering these domain and website management features, you’ll be able to efficiently administer multiple websites through the HestiaCP interface. The intuitive design makes these tasks accessible even for those with limited technical experience.
Email Server Configuration
HestiaCP includes a complete email solution with Exim (SMTP) and Dovecot (POP3/IMAP) servers. Setting up and managing email accounts through HestiaCP is straightforward and doesn’t require deep technical knowledge of mail server configurations.
Setting Up Mail Domains
To enable email for your domains:
- Navigate to the “Mail” tab in the HestiaCP sidebar
- Click the “+” button to add a new mail domain
- Select the domain name from the dropdown menu
- Click “Add” to enable mail services for this domain
The system automatically configures the necessary DNS records, but you should verify they’re properly propagated using DNS lookup tools.
Creating Mail Accounts
Once your mail domain is set up, you can create email accounts:
- Click on your mail domain in the list
- Click the “+” button to add a new account
- Enter the desired username (the part before the @ symbol)
- Set a strong password or use the auto-generated one
- Optionally adjust quota limits
- Click “Add” to create the account
These accounts can be accessed via webmail or email clients using POP3/IMAP protocols.
Configuring Mail Forwarding
To forward emails to another address:
- Select your mail domain
- Click on the specific email account
- Go to the “Forward” tab
- Enter the destination email address
- Click “Add” to activate forwarding
Anti-spam Configuration
HestiaCP installs SpamAssassin for spam filtering:
- Go to “Server” > “Mail Server” > “Configure”
- Adjust SpamAssassin settings:
- Enable or disable SpamAssassin
- Set spam tag level
- Configure blacklists and whitelists
Email Authentication Setup
Proper email authentication helps prevent spoofing and improves deliverability:
- Enable SPF (Sender Policy Framework):
- Go to “DNS” > select your domain
- Add an SPF record with appropriate settings
- Set up DKIM (DomainKeys Identified Mail):
- Navigate to “Server” > “Mail Server” > “Configure”
- Enable DKIM signing
- Generate DKIM keys for your domains
- Configure DMARC (Domain-based Message Authentication, Reporting, and Conformance):
- Add a DMARC DNS record with your policy preferences
Webmail Access
HestiaCP typically includes webmail solutions for browser-based email access:
- Access webmail by navigating to:
https://your-domain.com/webmail - Log in with your full email address and password
Testing Mail Delivery
After configuration, test your mail server functionality:
- Send a test email to an external address
- Check that you can receive emails from external sources
- Verify mail logs if issues occur: “Server” > “Logs” > “Mail”
By following these steps, you’ll have a fully functional email server with spam protection and modern authentication mechanisms. Regular monitoring of mail logs and spam scores will help maintain good email deliverability and security.
Database Management
Database management is a core functionality of HestiaCP, providing an intuitive interface for creating and managing databases without requiring direct SQL commands. This section covers the essential database operations you can perform through the HestiaCP interface.
Creating Databases
To create a new database:
- Navigate to the “DB” tab in the left sidebar
- Click the “+” button to add a new database
- Select or enter the following information:
- Database name (prefix is automatically added)
- Database user (can be the same as the database name)
- Strong password (or use the auto-generated one)
- Database type (MariaDB/MySQL or PostgreSQL if installed)
- Click “Add” to create the database
The system automatically creates the database and assigns the specified user with full privileges.
Managing Database Users
To manage database users and their permissions:
- Click on the database name in the list
- Go to the “Users” tab
- From here you can:
- Add additional users to the database
- Change user passwords
- Modify user privileges
- Delete users
Creating separate users with limited privileges for different applications is a good security practice.
phpMyAdmin Integration
HestiaCP integrates phpMyAdmin for graphical database management:
- Click the “Open” button next to any database
- Log in using the database username and password
- Use phpMyAdmin’s interface to:
- Create, modify, or delete tables
- Run SQL queries
- Import or export data
- Optimize database performance
Database Backup Strategies
Regular database backups are crucial for data protection:
- Manual backups:
- In the “DB” section, select a database
- Click “Backup” to create an immediate backup
- Automated backups:
- Configure through “Server” > “Backup” > “Scheduled Backups”
- Include database selection in backup jobs
- Backup retention:
- Manage through “Server” > “Backup” settings
- Set appropriate retention periods based on data importance
Import/Export Procedures
To move databases between servers or create local copies:
- Export database:
- Click on the database name
- Click “Backup” to create a backup file
- Download the file using the download icon
- Import database:
- Create a new empty database
- Use phpMyAdmin’s import function
- Or restore from a backup file through the HestiaCP interface
Remote Access Configuration
By default, database access is limited to the local server for security. To enable remote access:
- Navigate to “DB” > select your database > “Edit”
- Set “Database host” to “%” to allow connections from any IP
- Or specify allowed IP addresses for more security
- Remember to open the database port in the firewall: “Server” > “Firewall”
Following these database management practices will help you maintain efficient, secure, and reliable database operations on your HestiaCP-managed server.
DNS Server Management
The DNS server component in HestiaCP provides a complete solution for managing domain name resolution directly from your control panel. This eliminates the need for third-party DNS services and gives you full control over your domain’s DNS records.
Adding DNS Zones
To create a new DNS zone:
- Navigate to the “DNS” tab in the left sidebar
- Click the “+” button to add a new DNS zone
- Select the domain name from the dropdown or enter it manually
- Choose the template (default is usually sufficient)
- Click “Add” to create the DNS zone
HestiaCP automatically creates standard DNS records including A, CNAME, MX, and TXT records based on your server configuration.
Managing DNS Records
To add or modify DNS records:
- Click on the domain name in the DNS list
- Click the “+” button to add a new record
- Select the record type (A, AAAA, CNAME, MX, TXT, etc.)
- Enter the required information:
- Record: Subdomain or @ for root domain
- Value: IP address, hostname, or text value depending on record type
- Priority: For MX records
- TTL: Time to live in seconds
- Click “Add” to create the record
You can edit existing records by clicking on them or delete records with the “Delete” button.
DNS Templates
Templates streamline the creation of commonly used DNS configurations:
- Navigate to “Server” > “Templates” > “DNS”
- Create or modify templates based on your needs
- Templates can include standard records for web, mail, and other services
- Applied when creating new DNS zones
DNSSEC Implementation
Domain Name System Security Extensions (DNSSEC) adds an additional layer of security:
- Navigate to “DNS” > select your domain > “Edit”
- Enable the DNSSEC option
- Configure your domain registrar to use the provided DS records
- Verify DNSSEC implementation using online validation tools
DNS Propagation Understanding
DNS changes aren’t immediately effective worldwide due to propagation:
- TTL values control how long records are cached
- Lower TTL values (300-3600 seconds) speed up propagation
- Plan ahead for critical DNS changes by lowering TTL values in advance
- Most changes propagate globally within 24-48 hours
DNS Record Validation
Verify your DNS configuration with these tools:
- Use the “nslookup” or “dig” command from terminal:
dig @your-server-ip yourdomain.com any - Online DNS lookup tools can verify proper propagation
- Check DNS resolution from multiple geographic locations
Troubleshooting DNS Issues
Common DNS problems and solutions:
- Records not resolving:
- Verify nameserver configuration at your registrar
- Check that Bind service is running:
systemctl status named - Review Bind logs in
/var/log/named/
- Zone transfer issues:
- Check zone file syntax
- Verify secondary nameserver configurations
- Propagation delays:
- Temporarily reduce TTL values
- Use DNS propagation checker tools
Proper DNS management ensures reliable access to your websites and services. By understanding these DNS management principles in HestiaCP, you can maintain full control over your domain’s name resolution system.
Troubleshooting Common Installation Issues
Even with careful preparation, you might encounter issues during or after HestiaCP installation. This section addresses common problems and provides solutions to help you resolve them quickly.
Connection Problems to Web Interface
If you cannot access the HestiaCP web interface:
- Verify the correct port in the URL (https://your-server-ip:8083)
- Check firewall settings to ensure port 8083 is open:
sudo nft list ruleset | grep 8083or for iptables:
sudo iptables -L -n | grep 8083 - Verify the web service is running:
sudo systemctl status nginx - Check for SSL certificate issues by trying HTTP instead of HTTPS temporarily
- Examine web server logs:
sudo tail -n 100 /var/log/hestia/nginx-error.log
Authentication Issues
If you’re having trouble logging in:
- Reset the admin password from command line:
sudo v-change-user-password admin new_passwordNote: Using
passwd adminmight not work correctly with HestiaCP - Check if there’s a disk space issue preventing session creation:
df -h - Verify session directory permissions:
sudo ls -la /usr/local/hestia/data/sessions - Clear browser cookies and cache, then try again
Service Startup Failures
If services fail to start after installation:
- Check service status:
sudo systemctl status hestia sudo systemctl status nginx sudo systemctl status apache2 sudo systemctl status mariadb - Look for errors in service logs:
sudo journalctl -u service-name - Verify configuration files for syntax errors:
sudo nginx -t sudo apache2ctl configtest - Restart failed services:
sudo systemctl restart service-name
GPG Key and Repository Issues
If you encounter GPG key problems during installation:
- Manually add the HestiaCP repository key:
curl -fsSL https://apt.hestiacp.com/pub.key | sudo gpg --dearmor -o /usr/share/keyrings/hestiacp.gpg - Create the repository configuration file:
echo "deb [signed-by=/usr/share/keyrings/hestiacp.gpg] https://apt.hestiacp.com bookworm main" | sudo tee /etc/apt/sources.list.d/hestiacp.list - Update package information:
sudo apt update
Installation Failure Recovery
If installation fails completely:
- Check installation logs:
tail -n 200 /var/log/hestia/hestia.log - Try running the installer with debug output:
sudo bash hst-install.sh --debug - Ensure your system meets all requirements
- For clean retry:
sudo apt purge hestia*
sudo apt autoremove
Then restart the installation process.
Congratulations! You have successfully installed HestiaCP. Thanks for using this tutorial for installing the latest version of the HestiaCP open-source control panel on Debian 12 “Bookworm” system. For additional help or useful information, we recommend you check the official HestiaCP website.