How To Install Icinga on Fedora 38

In this tutorial, we will show you how to install Icinga on Fedora 38. Icinga, a powerful open-source monitoring solution, offers a robust platform to ensure the stability and performance of your IT infrastructure.
This article assumes you have at least basic knowledge of Linux, know how to use the shell, and most importantly, you host your site on your own VPS. The installation is quite simple and assumes you are running in the root account, if not you may need to add ‘sudo‘ to the commands to get root privileges. I will show you the step-by-step installation of the Icinga on a Fedora 38.
Prerequisites
- A server running one of the following operating systems: Fedora 38.
- It’s recommended that you use a fresh OS install to prevent any potential issues.
- SSH access to the server (or just open Terminal if you’re on a desktop).
- An active internet connection. You’ll need an internet connection to download the necessary packages and dependencies for Icinga.
- A
non-root sudo useror access to theroot user. We recommend acting as anon-root sudo user, however, as you can harm your system if you’re not careful when acting as the root.
Install Icinga on Fedora 38
Step 1. Before we can install Icinga on Fedora 38, it’s important to ensure that our system is up-to-date with the latest packages. This will ensure that we have access to the latest features and bug fixes and that we can install Icinga without any issues:
sudo dnf update
Step 2. Installing Necessary Packages.
Icinga’s web interface relies on the Apache web server and PHP. Install these packages by running the following commands:
sudo dnf install httpd
sudo dnf install php php-cli php-xml php-json php-mbstring
Step 3. Installing Icinga on Fedora 38.
Icinga 2 is the core monitoring engine, while Icinga Web 2 provides the web-based front end. Install both of them with the following command:
sudo dnf install icinga2 icinga2-ido-mysql icingaweb2
sudo dnf install mariadb-server
sudo mysql_secure_installation
mysql -u root -p
CREATE DATABASE icinga;
GRANT ALL PRIVILEGES ON icinga.* TO 'icinga'@'localhost' IDENTIFIED BY 'icinga_password';
FLUSH PRIVILEGES;
exit
sudo nano /etc/icinga2/features-available/api.conf
object ApiListener "api" {
...
accept_config = true
accept_commands = true
...
}
sudo systemctl enable icinga2
sudo systemctl start icinga2
sudo icingacli setup config webserver apache
sudo icingacli setup config webserver
sudo setsebool -P httpd_can_connect_icinga 1
sudo firewall-cmd --add-service=http
sudo firewall-cmd --add-service=https
sudo firewall-cmd --add-port=5665/tcp
sudo firewall-cmd --runtime-to-permanent
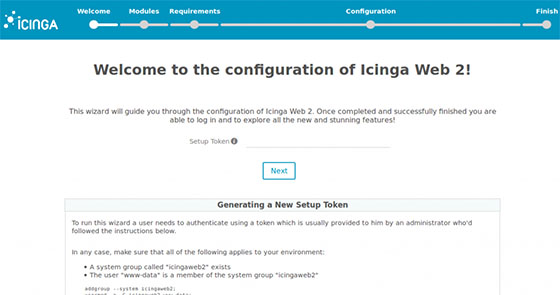
http://your_server_IP/icingaweb2
