How To Install Icinga on Fedora 40

Icinga is a powerful open-source monitoring tool that helps system administrators keep track of their IT infrastructure. With its ability to monitor hosts, services, and network components, Icinga ensures that you are always informed about the health of your systems. In this guide, we will walk you through the detailed steps to install Icinga on Fedora 40, ensuring your monitoring setup is efficient and effective.
Prerequisites
Before diving into the installation process, ensure your system meets the following prerequisites:
- System Requirements: A machine running Fedora 40 with at least 1 GB of RAM and 2 GB of disk space.
- Permissions: You will need root or sudo access to install packages and configure services.
- Recommended Packages: It’s advisable to have certain packages installed beforehand. This includes the EPEL repository and basic utilities for package management.
Step 1: Update Your System
Keeping your system updated is crucial for security and stability. Start by updating your Fedora system to ensure you have the latest packages and security patches. Open your terminal and run the following command:
sudo dnf update -yThis command will refresh your package manager and install any available updates. It’s a good practice to perform this step regularly.
Step 2: Install Dependencies
Icinga requires several dependencies to function correctly. Installing these beforehand will streamline the installation process. Use the following command to install necessary dependencies:
sudo dnf install epel-release yum-utils -yThe EPEL (Extra Packages for Enterprise Linux) repository contains additional packages that are not included in the default Fedora repositories. Yum-utils provides additional utilities for managing packages.
Step 3: Add Icinga Repository
To install Icinga, you need to add its official repository to your system. This ensures that you can access the latest versions of Icinga packages. Execute the following commands in your terminal:
sudo rpm --import https://packages.icinga.com/icinga.key
wget https://packages.icinga.com/fedora/ICINGA-release.repo -O /etc/yum.repos.d/ICINGA-release.repo
The first command imports the GPG key used to sign Icinga packages, ensuring their authenticity. The second command downloads the repository configuration file into your system.
Step 4: Install Icinga
With the repository added, you can now install Icinga itself. Run the following command:
sudo dnf install icinga2 icinga2-doc -yThis command installs both Icinga and its documentation package, which is useful for reference during configuration.
Step 5: Start and Enable Icinga Service
After installation, it’s essential to start the Icinga service and enable it to run at boot time. Use these commands:
sudo systemctl start icinga2sudo systemctl enable icinga2The first command starts the Icinga service immediately, while the second ensures it starts automatically on system boot. You can check the status of the service with:
sudo systemctl status icinga2Step 6: Configure Icinga
Icinga’s configuration is vital for its operation. The main configuration file is located at `/etc/icinga2/icinga2.conf`. Open this file in your preferred text editor:
sudo nano /etc/icinga2/icinga2.confYou may need to adjust settings such as defining zones or endpoints based on your network architecture. After making changes, restart the service to apply them:
sudo systemctl restart icinga2Troubleshooting Configuration Issues
If you encounter issues after restarting Icinga, check the logs located at `/var/log/icinga2/icinga2.log`. Common issues include syntax errors in configuration files or missing dependencies.
Step 7: Install Icinga Web
The web interface provides a user-friendly way to manage and visualize monitoring data. To install Icinga Web, execute:
sudo dnf install icingaweb2 icingacli -yThis installs both the web interface and a command-line tool for managing it. After installation, you will need to configure it.
Icinga Web Configuration Steps
- Create a database for Icinga Web using MariaDB or MySQL.
- Edit configuration files located in `
/etc/icingaweb2` as needed. - Set up authentication methods (e.g., using a database or LDAP).
Troubleshooting Web Installation Issues
If you face issues accessing the web interface, check that Apache or Nginx is running properly (if used as a web server) and that firewall rules allow traffic on port 80 (HTTP) or 443 (HTTPS).
Step 8: Set Up Database for Icinga Web
Icinga Web requires a database for storing its configuration and monitoring data. Here’s how to set it up using MariaDB:
# Log into MariaDB
sudo mysql -u root -p
Create a new database and user with appropriate privileges:
# Inside MariaDB shell
CREATE DATABASE icingaw;
GRANT ALL PRIVILEGES ON icingaw.* TO 'icingaw'@'localhost' IDENTIFIED BY 'your_password';
FLUSH PRIVILEGES;
EXIT;
This creates a new database named `icingaw` and grants all privileges to a user named `icingaw`. Replace `your_password` with a strong password of your choice.
Troubleshooting Database Issues
If you encounter issues connecting to the database from Icinga Web, ensure that MariaDB is running and that you’ve correctly configured user permissions.
Step 9: Accessing Icinga Web Interface
Your final step is accessing the Icinga Web interface via a web browser. Open your preferred browser and navigate to:
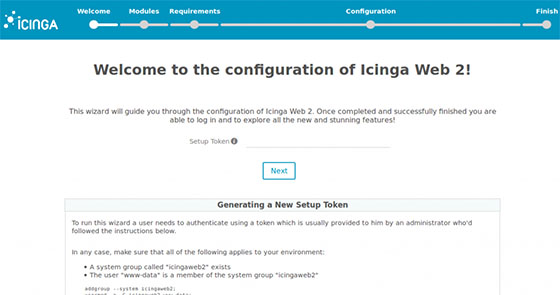
http:///icingaweb2/setupThis URL will direct you to the setup wizard where you can finalize configuration settings such as database connection details and authentication methods.

Troubleshooting Access Issues
If you cannot access the web interface, check if Apache or Nginx is running correctly and ensure that firewall settings allow HTTP traffic on port 80 or HTTPS on port 443.