How To Install Inkscape on Linux Mint 22

Inkscape is a powerful, open-source vector graphics editor that has become an essential tool for designers, illustrators, and artists worldwide. As Linux Mint 22 continues to gain popularity among users seeking a stable and user-friendly operating system, many are looking to harness the creative potential of Inkscape on this platform. This comprehensive guide will walk you through the process of installing Inkscape on Linux Mint 22, exploring various methods and providing valuable insights to ensure a smooth experience.
What is Inkscape?
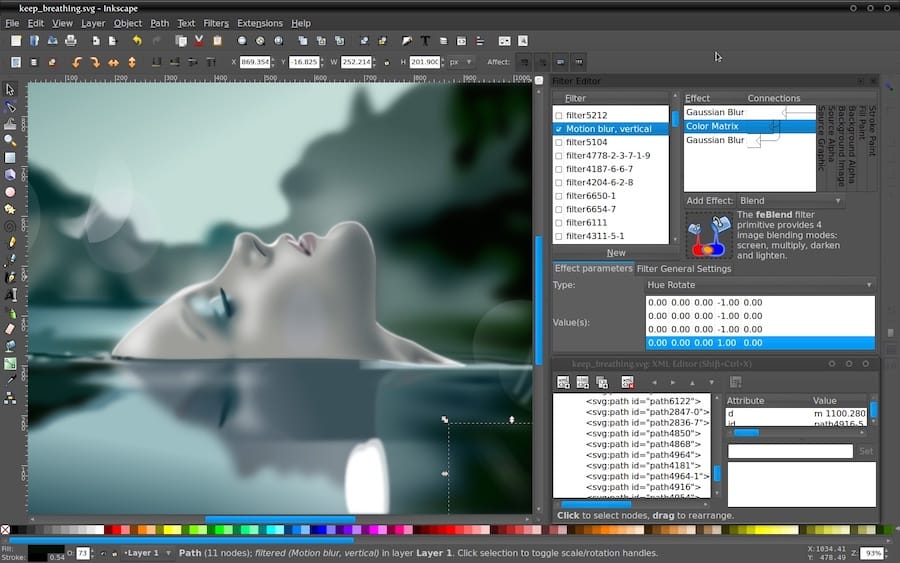
Inkscape is a professional-grade vector graphics software that offers a free and open-source alternative to proprietary programs like Adobe Illustrator. It provides a wide array of tools and features for creating and editing vector graphics, making it ideal for tasks such as logo design, illustrations, and technical drawings.
Key features of Inkscape include:
- Robust drawing tools
- Advanced path operations
- Text manipulation capabilities
- Support for various file formats
- Extensibility through plugins
For Linux Mint users, Inkscape offers several advantages:
- Native Linux support
- Integration with the GNOME desktop environment
- Regular updates and community-driven development
- Compatibility with other open-source design tools
System Requirements
Before proceeding with the installation, ensure that your Linux Mint 22 system meets the following requirements:
Hardware Requirements:
- 1 GHz processor or faster
- 512 MB RAM (2 GB recommended for complex drawings)
- 200 MB free disk space
- Graphics card with OpenGL 2.0 support
Software Prerequisites:
- Linux Mint 22 (Vera) installed and up to date
- Internet connection for downloading packages
Inkscape is fully compatible with Linux Mint 22, which is based on Ubuntu 22.04 LTS. This ensures stability and long-term support for the software.
Methods to Install Inkscape on Linux Mint 22
There are several ways to install Inkscape on Linux Mint 22, each with its own advantages. We’ll explore four primary methods: using the Software Manager, using the Terminal (APT), installing from Flatpak, and building from source.
1. Using the Software Manager
The Software Manager is the most user-friendly method for installing Inkscape on Linux Mint 22. Here’s how to do it:
- Open the Software Manager from the application menu or by searching for it in the system search.
- In the search bar, type “Inkscape” and press Enter.
- Locate Inkscape in the search results and click on it.
- Click the “Install” button next to Inkscape.
- Enter your system password when prompted to authorize the installation.
- Wait for the installation to complete.
Pros:
- Simple and intuitive process
- No need for command-line knowledge
- Automatic dependency resolution
Cons:
- May not always have the latest version available
- Limited control over installation options
2. Using the Terminal (APT)
For users comfortable with the command line, installing Inkscape using APT (Advanced Package Tool) is quick and efficient:
- Open the Terminal by pressing Ctrl+Alt+T or searching for “Terminal” in the application menu.
- Update the package list by running:
sudo apt update - Install Inkscape by executing:
sudo apt install inkscape - Enter your password when prompted and press Y to confirm the installation.
- Wait for the installation to complete.
Advantages:
- Fast and straightforward installation
- Easy to update and manage through the command line
- Allows for scripting and automation
Potential issues:
- Requires basic command-line knowledge
- May not install the absolute latest version
3. Installing from Flatpak
Flatpak is a universal package management system that allows for easy installation and updates of applications across different Linux distributions. To install Inkscape using Flatpak:
- First, ensure Flatpak is installed on your system. If not, open Terminal and run:
sudo apt install flatpak - Add the Flathub repository:
flatpak remote-add --if-not-exists flathub https://flathub.org/repo/flathub.flatpakrepo - Install Inkscape via Flatpak:
flatpak install flathub org.inkscape.Inkscape - Follow the on-screen prompts to complete the installation.
Benefits of using Flatpak:
- Access to the latest Inkscape versions
- Isolated from system libraries, reducing conflicts
- Easy to update and manage
- Consistent experience across different Linux distributions
4. Building from Source
For advanced users who want complete control over the installation process or need the absolute latest features, building Inkscape from source is an option:
- Install the necessary build dependencies:
sudo apt install build-essential cmake pkg-config libtool - Install Inkscape-specific dependencies:
sudo apt install libgc-dev libgsl-dev libpoppler-glib-dev libpotrace-dev libreadline-dev libsigc++-2.0-dev libspiro-dev libtool libxml2-dev libxslt1-dev - Clone the Inkscape repository:
git clone https://gitlab.com/inkscape/inkscape.git - Navigate to the Inkscape directory:
cd inkscape - Create a build directory and navigate to it:
mkdir build && cd build - Configure the build:
cmake .. - Compile Inkscape:
make - Install the compiled program:
sudo make install
Pros:
- Access to the latest development version
- Ability to customize compilation options
- Full control over the installation process
Cons:
- Time-consuming process
- Requires advanced knowledge of Linux systems
- May introduce instability or compatibility issues
Post-Installation Steps
After successfully installing Inkscape on Linux Mint 22, follow these steps to ensure everything is set up correctly:
Verifying the Installation
- Open Inkscape from the application menu or by typing “
inkscape” in the Terminal. - Check the version number by going to Help > About Inkscape.
- Ensure all tools and features are working correctly.

Basic Configuration
- Go to Edit > Preferences to customize Inkscape settings.
- Set up your preferred units, grid, and snap settings.
- Configure keyboard shortcuts for frequently used tools.
Updating Inkscape
To keep Inkscape up to date:
- If installed via Software Manager or APT, use the Update Manager or run
sudo apt upgradein Terminal. - For Flatpak installations, use
flatpak update org.inkscape.Inkscape. - If built from source, pull the latest changes and recompile.
Troubleshooting Common Issues
While installing Inkscape on Linux Mint 22 is generally straightforward, you may encounter some issues. Here are solutions to common problems:
Dependency Problems
If you encounter dependency errors during installation, try the following:
- Update your system:
sudo apt update && sudo apt upgrade - Install missing dependencies manually using apt
- Use the
--fix-brokenoption:sudo apt install -f
Installation Errors
For general installation errors:
- Clear the APT cache:
sudo apt clean - Ensure you have sufficient disk space
- Check system logs for detailed error messages
Performance Issues
If Inkscape runs slowly or crashes:
- Increase available RAM by closing unnecessary applications
- Update your graphics drivers
- Try running Inkscape with hardware acceleration disabled:
inkscape --no-gpu
Tips for Using Inkscape on Linux Mint 22
To make the most of Inkscape on your Linux Mint 22 system:
Keyboard Shortcuts
- Learn essential shortcuts like Ctrl+D for duplicating objects and Ctrl+G for grouping
- Customize shortcuts in Edit > Preferences > Interface > Keyboard
Customizing the Interface
- Arrange toolbars and panels to suit your workflow
- Create custom workspaces for different projects
Recommended Plugins
- Explore extensions like “Inkscape Figures” for technical drawings
- Install additional plugins from the Inkscape Extensions repository
Congratulations! You have successfully installed Inkscape. Thanks for using this tutorial for installing the latest version of Inkscape open source vector graphics editor on the Linux Mint 22 system. For additional help or useful information, we recommend you check the official Inkscape website.