How To Install ISPConfig on AlmaLinux 9

ISPConfig is a powerful open-source control panel that simplifies the management of web hosting environments and server configurations. It provides a user-friendly interface for administering websites, email accounts, databases, and more. AlmaLinux 9, a community-driven, enterprise-grade Linux distribution, serves as an ideal foundation for hosting servers due to its stability, security, and long-term support. By combining ISPConfig with AlmaLinux 9, you can create a robust and efficient hosting platform that caters to the needs of both administrators and end-users. In this article, we will guide you through the step-by-step process of installing ISPConfig on AlmaLinux 9, enabling you to leverage the benefits of this powerful control panel on a reliable and secure operating system.
Prerequisites
Before proceeding with the installation of ISPConfig on AlmaLinux 9, ensure that your system meets the following requirements:
- A fresh installation of AlmaLinux 9 with a minimum of 2 GB RAM and 20 GB disk space.
- Access to the server with root privileges or a non-root user with sudo permissions.
- A stable internet connection to download and install the necessary packages.
To begin, log in to your AlmaLinux 9 server using SSH as the root user or a non-root user with sudo privileges. If you are using a non-root user, make sure to prefix the commands with sudo when executing tasks that require elevated permissions.
Step 1: Preparing the Server
Before installing ISPConfig, it’s essential to update the system packages to ensure you have the latest versions and security patches. Run the following command to update the package repositories and upgrade the installed packages:
sudo dnf update -yNext, set the hostname of your server to a fully qualified domain name (FQDN). This step is crucial for proper network configuration. Use the following command to set the hostname, replacing your_hostname with your desired hostname:
sudo hostnamectl set-hostname your_hostnameOpen the /etc/hosts file using a text editor and add an entry for your hostname. For example:
127.0.0.1 your_hostname.example.com your_hostnameSave the file and exit the editor.
Step 2: Installing Dependencies
ISPConfig requires several dependencies to function correctly. Install the essential packages, including Apache, PHP, and MariaDB, by running the following command:
sudo dnf install -y httpd mariadb-server php php-mysqlnd php-fpm php-gd php-imap php-ldap php-mbstring php-opcache php-pdo php-pear php-xml php-xmlrpcAdditionally, install the following tools and libraries that are necessary for ISPConfig:
sudo dnf install -y wget unzip net-tools perl python3 bind bind-utils webalizer awstats quota autoconf automake libtool flex bison openssl openssl-devel gd gd-devel libxml2 libxml2-devel zlib zlib-devel rpm-build gcc make rsyslog mailx postfix dovecot dovecot-mysqlStep 3: Downloading the ISPConfig Auto-Installer
ISPConfig provides an auto-installer script that simplifies the installation process. Download the script by running the following command:
wget -O installer.tgz "https://github.com/servisys/ispconfig_setup/tarball/master"Extract the downloaded archive using the following command:
tar xzf installer.tgzBefore proceeding with the installation, ensure that all prerequisites are met by running the following command:
cd */ispconfig_setup/
./install.php --check
If any missing prerequisites are reported, install them before continuing.
Step 4: Running the Installer
To start the ISPConfig installation, execute the auto-installer script with the following command:
./install.phpThe installer will guide you through a series of configuration options. Here are some key settings to consider:
- Services to Configure: Select the services you want to install and configure, such as Apache, MySQL, Postfix, Dovecot, and more.
- MySQL Root Password: Set a secure password for the MySQL root user.
- ISPConfig Admin Password: Choose a strong password for the ISPConfig administrator account.
- SSL Configuration: Decide whether to use a self-signed SSL certificate or provide your own trusted certificate.
Review the configuration summary and confirm the installation by entering “y” when prompted.
During the installation process, if you encounter any errors, refer to the ISPConfig documentation or seek assistance from the ISPConfig community forums. Common issues can often be resolved by ensuring that all prerequisites are met and that the server has sufficient resources.
Step 5: Configuring ISPConfig
Once the installation is complete, open a web browser and access the ISPConfig control panel by entering your server’s IP address or domain name followed by :8080. For example:
https://your_server_ip:8080Log in using the ISPConfig admin username and password you set during the installation.
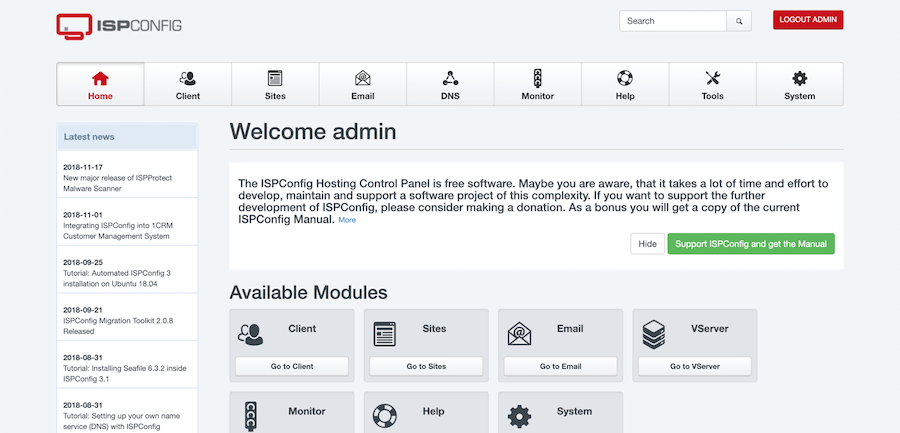
Upon logging in, you will be presented with the ISPConfig dashboard. Take some time to familiarize yourself with the interface and explore the various settings and options available. Some essential settings to configure include:
- System: Customize system-wide settings, such as server hostname, language, and theme.
- Mail: Configure email settings, including mail server options and spam filters.
- Web: Set up web server settings, create websites, and manage domains.
- DNS: Configure DNS zones and records for your domains.
Adjust the settings according to your specific requirements and preferences.

Step 6: Firewall Settings
To ensure the security of your server, configure the firewall to allow necessary traffic for ISPConfig and related services. AlmaLinux 9 uses FirewallD as the default firewall management tool.
Open the necessary ports by running the following commands:
sudo firewall-cmd --permanent --add-port={22,25,53,80,443,8080,8081,8443}/tcp
sudo firewall-cmd --reload
This allows traffic on the specified ports for SSH, email, DNS, web, and ISPConfig services.
Step 7: Post Installation Tasks
After completing the installation and initial configuration, perform the following post-installation tasks:
- Verify that all services are running correctly by accessing them through their respective ports or URLs.
- Check the system logs for any errors or warnings and address them accordingly.
- Implement additional security measures, such as configuring SSL/TLS certificates for secure connections.
- Optimize server performance by fine-tuning Apache, PHP, and MySQL settings based on your specific requirements.
- Regularly update the system packages and ISPConfig to ensure you have the latest security patches and bug fixes.
Congratulations! You have successfully installed ISPConfig. Thanks for using this tutorial for installing the ISPConfig on your AlmaLinux 9 system. For additional help or useful information, we recommend you check the official ISPConfig website.