How To Install JasperReports on Debian 12

In this tutorial, we will show you how to install JasperReports on Debian 12. JasperReports is a powerful, open-source reporting tool that has become indispensable for businesses seeking robust business intelligence and reporting capabilities. This versatile software allows organizations to create, manage, and distribute complex reports with ease, transforming raw data into meaningful insights.
This article assumes you have at least basic knowledge of Linux, know how to use the shell, and most importantly, you host your site on your own VPS. The installation is quite simple and assumes you are running in the root account, if not you may need to add ‘sudo‘ to the commands to get root privileges. I will show you the step-by-step installation of the JasperReports open source Java reporting tool on Debian 12 (Bookworm).
Prerequisites
Before proceeding with the installation, make sure your Debian 12 system meets the following requirements:
- A server running one of the following operating systems: Debian 12 (Bookworm).
- It’s recommended that you use a fresh OS install to prevent any potential issues.
- SSH access to the server (or just open Terminal if you’re on a desktop).
- An active internet connection. You’ll need an internet connection to download the necessary packages and dependencies.
- A user account with sudo privileges to execute administrative commands.
Install JasperReports on Debian 12
Step 1. Update Your System Package.
Before proceeding with the installation, make sure to update your Debian 12 system to the latest stable version. Open a terminal and run the following commands:
sudo apt update
sudo apt upgrade
These commands will ensure that your system packages are up to date and that any necessary dependencies are installed.
Step 2. Installing Java JDK.
Before installing JasperReports on Debian 12, it’s essential to have Java Development Kit (JDK) installed on your system. Java is a prerequisite for running JasperReports, as it is built on the Java platform.
To install Java JDK on Debian 12, follow these steps:
sudo apt install default-jdk
Verify the Java installation by checking the version:
java -version
If the installation was successful, you should see output similar to the following:
openjdk version "17.0.1" 2021-10-19
OpenJDK Runtime Environment (build 17.0.1+12-39)
OpenJDK 64-Bit Server VM (build 17.0.1+12-39, mixed mode, sharing)
In some cases, you may need to set the JAVA_HOME environment variable to point to the installed Java directory. Here’s how to do it:
sudo nano /etc/environment
Add the following lines to the file, replacing the path with the actual path to your Java installation:
JAVA_HOME="/usr/lib/jvm/java-17-openjdk-amd64"
PATH="$PATH:$JAVA_HOME/bin"
Save the file and exit the text editor then, apply the changes by sourcing the /etc/environment file:
source /etc/environment
Verify that the JAVA_HOME variable is set correctly:
echo $JAVA_HOME
Step 3. Installing and Configuring the MariaDB Server.
MariaDB is a popular, open-source database management system that works seamlessly with JasperReports. It will store the metadata and report definitions for your JasperReports server. Follow these steps to install and configure MariaDB:
sudo apt install mariadb-server
Start the MariaDB service and enable it to start on boot:
sudo systemctl start mariadb
sudo systemctl enable mariadb
Secure your MariaDB installation:
sudo mysql_secure_installation
During this process, you’ll be prompted to:
-
- Set a root password (if not already set)
- Remove anonymous users
- Disallow root login remotely
- Remove test database and access to it
- Reload privilege tables
It’s recommended to answer “Y” (yes) to all these prompts for enhanced security.
Log in to MariaDB as root:
sudo mysql -u root -p
Create a database and user for JasperReports:
CREATE DATABASE jasperdb;
CREATE USER 'jasper'@'localhost' IDENTIFIED BY 'securepassword';
GRANT ALL PRIVILEGES ON jasperdb.* TO 'jasper'@'localhost';
FLUSH PRIVILEGES;
EXIT;
With these steps completed, you have successfully set up MariaDB for use with JasperReports.
Step 4. Installing Tomcat Server.
Apache Tomcat is a web server and servlet container that will host the JasperReports web application. Here’s how to install and configure Tomcat on Debian 12:
sudo apt install tomcat9
Start the Tomcat service and enable it to start on boot:
sudo systemctl start tomcat9
sudo systemctl enable tomcat9
Verify that Tomcat is running:
sudo systemctl status tomcat9
Configure Tomcat users by editing the tomcat-users.xml file:
sudo nano /etc/tomcat9/tomcat-users.xml
Add the following lines within the <tomcat-users> tags:
<role rolename="manager-gui"/>
<role rolename="admin-gui"/>
<user username="admin" password="securepassword" roles="manager-gui,admin-gui"/>
Restart Tomcat to apply the changes:
sudo systemctl restart tomcat9
You can now access the Tomcat default page by navigating to http://your_server_ip:8080 in a web browser. If you see the Tomcat welcome page, the installation was successful.
Step 5. Installing JasperReports on Debian 12.
With the prerequisites in place, we can now proceed to download and install JasperReports:
wget https://sourceforge.net/projects/jasperserver/files/JasperServer/JasperReports%20Server%20Community%20Edition%208.2.0/TIB_js-jrs-cp_8.2.0_bin.zip/download -O jasperreports_8.2.0.zip
Unzip the downloaded file:
unzip jasperreports_8.2.0.zip
Navigate to the buildomatic directory:
cd jasperreports-server-cp-8.2.0-bin/buildomatic/
Copy the sample configuration file for MySQL/MariaDB:
cp sample_conf/mysql_master.properties default_master.properties
Edit the default_master.properties file:
nano default_master.properties
Update the following properties:
appServerType=tomcat
dbType=mysql
dbHost=localhost
dbUsername=jasper
dbPassword=securepassword
dbName=jasperdb
Also, set the CATALINA_HOME and CATALINA_BASE properties to point to your Tomcat installation (typically /usr/share/tomcat9).
Next, run the installation script:
./js-install-ce.sh
This script will create the necessary database tables and deploy the JasperReports web application to Tomcat.
If the installation is successful, you’ll see a message indicating that the JasperReports Server has been deployed to Tomcat.
Once done, now configure Tomcat policies to allow JasperReports to function properly:
sudo nano /etc/tomcat9/catalina.policy
Add the following lines at the end of the file:
grant codeBase "file:${catalina.home}/webapps/jasperserver/-" {
permission java.security.AllPermission;
};
Restart Tomcat to apply the changes:
sudo systemctl restart tomcat9
Step 6. Configure Firewall.
To configure the firewall for JasperReports on Debian 12, you’ll need to use UFW (Uncomplicated Firewall) to allow the necessary ports. Here’s how to set it up:
sudo ufw allow 8080/tcp
Verify the rules:
sudo ufw status verbose
Step 7. Accessing JasperReports Web UI.
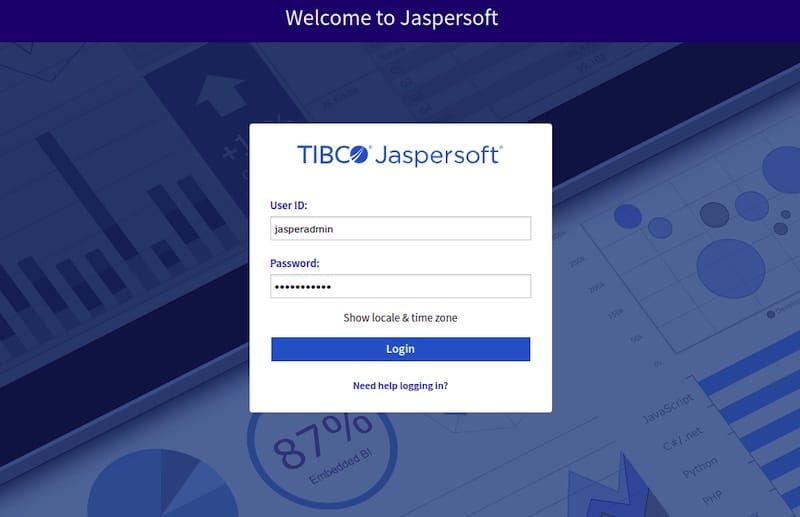
Once successfully installed, open your web browser and access the JasperReports installation wizard using the URL http://your-IP-address:8080/jasperserver/.
You should see the JasperReports login page. The default credentials are:
-
- Username: jasperadmin
- Password: jasperadmin

Congratulations! You have successfully installed JasperReports. Thanks for using this tutorial to install the latest version of the JasperReports open-source Java reporting tool on Debian 12 Bookworm. For additional help or useful information, we recommend you check the official JasperReports website.