How To Install Jellyfin on AlmaLinux 9

In the digital age, managing and streaming your media collection has become an essential part of our entertainment ecosystem. Jellyfin, an open-source media server, has emerged as a powerful solution for those seeking complete control over their media libraries. This guide will walk you through the process of installing Jellyfin on AlmaLinux 9, a robust and enterprise-grade Linux distribution.
AlmaLinux 9, known for its stability and performance, provides an excellent foundation for hosting a media server like Jellyfin. By combining these two technologies, you’ll create a reliable and feature-rich media streaming solution that puts you in control of your digital content.
What is Jellyfin?
Jellyfin is a free, open-source media server software that allows you to organize, manage, and stream your digital media collection. It supports a wide range of media formats, including movies, TV shows, music, and photos. Jellyfin stands out from other media servers due to its commitment to user privacy, absence of premium features or subscription requirements, and its active community-driven development.
Some key features of Jellyfin include:
- Cross-platform support for various devices and operating systems
- Live TV and DVR capabilities
- User management with customizable permissions
- Transcoding for optimal playback on different devices
- Metadata fetching and organization
- Customizable interface and plugins
Compared to proprietary alternatives like Plex or Emby, Jellyfin offers complete control over your media and doesn’t rely on central servers for authentication or metadata. This makes it an ideal choice for users who prioritize privacy and want full ownership of their media server solution.
Prerequisites
Before we begin the installation process, ensure that you have the following:
- A system running AlmaLinux 9 with at least 2GB of RAM and 20GB of free disk space
- Root access or sudo privileges on your AlmaLinux 9 system
- Basic familiarity with the Linux command line interface
- A stable internet connection for downloading packages and updates
It’s also recommended to have your media files organized and accessible on your AlmaLinux 9 system or on network-attached storage that can be mounted to your server.
Updating AlmaLinux 9
Before installing Jellyfin, it’s crucial to ensure your AlmaLinux 9 system is up to date. This step helps prevent potential conflicts and ensures you have the latest security patches. To update your system, open a terminal and run the following commands:
sudo dnf check-update
sudo dnf upgrade -y
These commands will check for available updates and then apply them to your system. The -y flag automatically answers “yes” to any prompts during the upgrade process.
Installing Required Dependencies
Jellyfin requires certain dependencies to function properly on AlmaLinux 9. We’ll start by enabling the EPEL (Extra Packages for Enterprise Linux) repository, which provides additional packages not included in the default AlmaLinux repositories.
To enable EPEL, run the following command:
sudo dnf install epel-release -yNext, install the necessary packages for Jellyfin:
sudo dnf install wget curl https://repo.jellyfin.org/releases/server/centos/stable/server/jellyfin-server-10.8.4-1.el9.x86_64.rpm -yThis command installs wget and curl utilities, which are useful for downloading files, and also installs the Jellyfin server package directly from the official repository.
Adding the Jellyfin Repository
To ensure you can easily update Jellyfin in the future and access all its components, it’s important to add the official Jellyfin repository to your system. Create a new repository file by running:
sudo tee /etc/yum.repos.d/jellyfin.repo <<EOF
[jellyfin]
name=Jellyfin
baseurl=https://repo.jellyfin.org/releases/server/centos/stable
enabled=1
gpgcheck=1
gpgkey=https://repo.jellyfin.org/jellyfin_team.gpg.key
EOF
This command creates a new file named jellyfin.repo in the /etc/yum.repos.d/ directory, which contains the necessary information for the package manager to access the Jellyfin repository.
Installing Jellyfin
With the repository added, you can now install Jellyfin using the following command:
sudo dnf install jellyfin -yThis command will download and install the latest version of Jellyfin along with any additional required dependencies. The installation process may take a few minutes, depending on your internet connection speed and system performance.
To verify that Jellyfin has been installed correctly, you can check its version by running:
jellyfin --versionThis should display the installed version of Jellyfin, confirming a successful installation.
Configuring Jellyfin
After installation, it’s time to configure Jellyfin for your specific needs. The initial setup involves several steps:
1. Initial Setup
Start the Jellyfin service for the first time:
sudo systemctl start jellyfin2. Creating User Accounts
Access the Jellyfin web interface (we’ll cover how to do this in the next section) and create your admin account. It’s recommended to use a strong, unique password for this account.
3. Adding Media Libraries
In the web interface, navigate to the “Library” section and click “Add Media Library.” Choose the type of media (Movies, TV Shows, Music, etc.) and specify the folder where your media is stored. Jellyfin will scan these folders and organize your media accordingly.
4. Configuring Network Settings
By default, Jellyfin listens on all network interfaces. If you want to restrict access or configure specific network settings, you can edit the configuration file located at /etc/jellyfin/system.xml. Always make a backup of configuration files before editing them:
sudo cp /etc/jellyfin/system.xml /etc/jellyfin/system.xml.bak
sudo nano /etc/jellyfin/system.xml
Look for the <PublicPort> and <PublicHttpsPort> tags to modify the ports Jellyfin uses, if needed.
Starting and Enabling Jellyfin Service
To ensure Jellyfin starts automatically when your system boots, enable the service with:
sudo systemctl enable jellyfinIf you haven’t already started Jellyfin, or if you’ve made configuration changes, restart the service:
sudo systemctl restart jellyfinTo check the status of the Jellyfin service, use:
sudo systemctl status jellyfinThis command will show you whether Jellyfin is active and running without any errors.
Accessing Jellyfin Web Interface
To access the Jellyfin web interface, you’ll need to know your server’s IP address. You can find this by running:
ip addr showLook for the IP address associated with your main network interface (usually starting with 192.168.x.x or 10.x.x.x).
Once you have the IP address, open a web browser and navigate to:
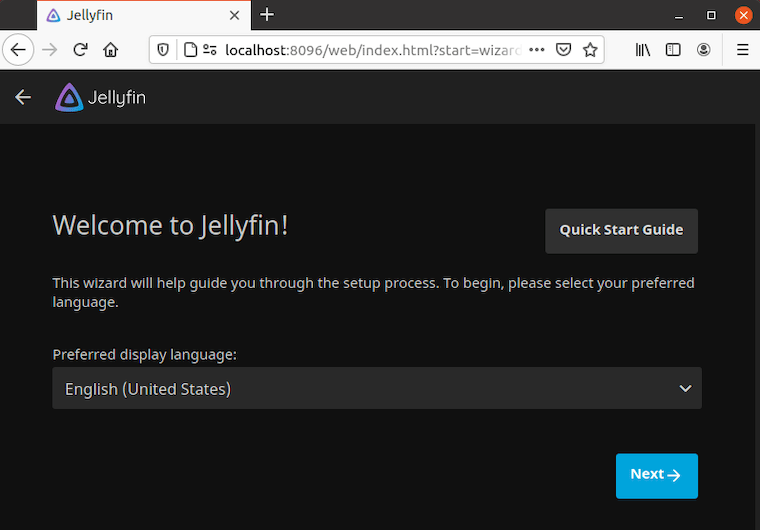
http://YOUR_SERVER_IP:8096Replace YOUR_SERVER_IP with the actual IP address of your AlmaLinux 9 server. You should now see the Jellyfin web interface, where you can complete the initial setup, create your admin account, and start adding your media libraries.

Firewall Configuration
AlmaLinux 9 uses firewalld as its default firewall. To allow access to Jellyfin through the firewall, you need to open the necessary ports. By default, Jellyfin uses port 8096 for HTTP and 8920 for HTTPS connections.
To open these ports, run the following commands:
sudo firewall-cmd --permanent --add-port=8096/tcp
sudo firewall-cmd --permanent --add-port=8920/tcp
sudo firewall-cmd --reload
These commands add rules to allow incoming traffic on ports 8096 and 8920, then reload the firewall to apply the changes.
To verify that the ports are open, you can use:
sudo firewall-cmd --list-portsThis should display the ports you’ve just opened among any others that were previously configured.
Troubleshooting Common Issues
While setting up Jellyfin on AlmaLinux 9, you might encounter some common issues. Here are a few troubleshooting tips:
Connection Problems
- Double-check that the Jellyfin service is running:
sudo systemctl status jellyfin - Verify that the firewall is properly configured and the correct ports are open
- Ensure that your router is forwarding the correct ports if you’re trying to access Jellyfin from outside your local network
Media Playback Issues
- Check that your media files are in supported formats
- Verify that Jellyfin has read permissions for your media directories
- Monitor system resources to ensure your server isn’t overloaded during transcoding
Performance Optimization Tips
- Consider using hardware acceleration for transcoding if your CPU supports it
- Optimize your media files to reduce the need for transcoding
- Adjust the number of simultaneous transcoding jobs based on your server’s capabilities
Updating Jellyfin
Keeping Jellyfin updated is crucial for security and to benefit from the latest features and bug fixes. To update Jellyfin on AlmaLinux 9, simply run:
sudo dnf update jellyfin -yThis command will check for updates and install them if available. After updating, restart the Jellyfin service:
sudo systemctl restart jellyfinIt’s a good practice to check for updates regularly or set up automatic updates for your system.
Congratulations! You have successfully installed Jellyfin. Thanks for using this tutorial for installing the Jellyfin software media system on the AlmaLinux 9 system. For additional help or useful information, we recommend you check the official Jellyfin website.