How To Install Jellyfin on Fedora 41

In the digital age, managing and streaming personal media libraries has become increasingly important. Jellyfin, a free and open-source media server, allows users to organize their video, music, and photo collections seamlessly. Unlike proprietary solutions, Jellyfin offers complete control over your media, making it an ideal choice for those who value privacy and customization. This article provides a comprehensive guide on how to install Jellyfin on Fedora 41, ensuring a smooth setup process.
Prerequisites
System Requirements
Before diving into the installation process, it’s crucial to ensure that your system meets the necessary requirements. For optimal performance, consider the following minimum hardware specifications:
- CPU: Dual-core processor or better
- RAM: At least 2 GB (4 GB recommended)
- Storage: Sufficient disk space for your media files (SSD recommended for faster access)
- Network: A stable internet connection for updates and remote access
Software Dependencies
Jellyfin requires several software dependencies to function correctly. Ensure you have the following packages installed:
wgetffmpegcurlhtop
You can install these dependencies using DNF with the following command:
sudo dnf install wget ffmpeg curl htopStep 1: Update Your System
The first step in preparing your Fedora system for Jellyfin is to ensure that all packages are up to date. Keeping your system updated helps prevent compatibility issues and security vulnerabilities. Run the following command:
sudo dnf updateThis command will refresh your package repository and install any available updates. After completing this step, you are ready to proceed with the installation of Jellyfin.
Step 2: Add Jellyfin Repository
Why Use the Official Repository?
The official Jellyfin repository provides the latest stable releases and ensures that you receive timely updates. Using this repository simplifies the installation process and guarantees that you are using a version optimized for Fedora.
Adding the Repository
Add the Jellyfin repository by executing the following command:
sudo wget -O /etc/yum.repos.d/jellyfin.repo https://repo.jellyfin.org/releases/server/fedora/jellyfin-10.repoThis command downloads the repository configuration file directly from Jellyfin’s official site. After adding the repository, refresh your package cache with:
sudo dnf updateStep 3: Install Jellyfin
With the repository successfully added, you can now install Jellyfin. Execute the following command to install the media server:
sudo dnf install jellyfinThis command will download and install Jellyfin along with its dependencies. During installation, you may be prompted to confirm the installation; type ‘y’ and press Enter to proceed.
Step 4: Configure Jellyfin Service
Starting Jellyfin
Once installed, you need to start the Jellyfin service. Use this command:
sudo systemctl start jellyfinThis command initiates the Jellyfin service, allowing it to begin managing your media library.
Enabling Automatic Start on Boot
If you want Jellyfin to start automatically whenever your system boots up, run this command:
sudo systemctl enable jellyfinThis ensures that your media server is always available without manual intervention.
Checking Service Status
You can verify whether Jellyfin is running properly by checking its status with this command:
sudo systemctl status jellyfinIf everything is functioning correctly, you should see an output indicating that the service is active (running).
Step 5: Configure Firewall Settings
A firewall is essential for protecting your server from unauthorized access. By default, Fedora’s firewall may block incoming connections to Jellyfin. To allow traffic through the necessary port (8096), execute these commands:
sudo firewall-cmd --add-service=jellyfin --permanent
sudo firewall-cmd --reload
The first command adds a rule to permit traffic for Jellyfin, while the second reloads the firewall configuration to apply changes immediately.
Step 6: Accessing Jellyfin Web Interface
Your Jellyfin server is now running and accessible via a web browser. Open your preferred browser and enter the following URL format:
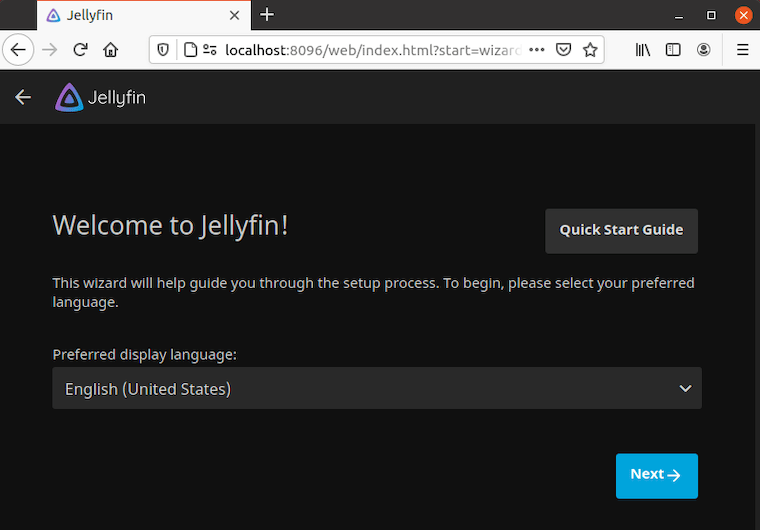
http://localhost:8096If you are accessing it locally, replace with localhost. Upon visiting this URL, you will be greeted by the Jellyfin setup wizard.

Step 7: Post-installation Configuration
Setting Up Libraries
The first step in using Jellyfin is configuring your media libraries. The setup wizard will guide you through adding folders containing your media files—be it movies, TV shows, music, or photos. Follow these steps:
- Select “Add Media Library” in the setup wizard.
- Name your library (e.g., Movies or Music).
- Select the folder path where your media files are stored.
- Select appropriate metadata options for automatic retrieval of information about your media.
- Click “OK” or “Next” to save changes.
User Management
If you’re sharing your media server with family or friends, consider setting up user accounts. From the admin dashboard, navigate to “Users” and follow these steps:
- Select “Add User”.
- Name the user and set a password.
- Select permissions based on what content they can access.
- Create additional users as needed.
Advanced Settings
Dive into advanced settings for further customization of your server experience. You can enable hardware acceleration for transcoding videos or explore plugins that enhance functionality. To access these settings:
- Navigating to “Dashboard”.
- Select “Playback” for transcoding options.
- Select “Plugins” to browse available extensions.
Congratulations! You have successfully installed Jellyfin. Thanks for using this tutorial for installing Jellyfin Media Server on your Fedora 41 system. For additional help or useful information, we recommend you check the official Jellyfin website.