How To Install Jellyfin on Linux Mint 22

In the ever-evolving world of digital media consumption, having a reliable and versatile media server is crucial for managing and streaming your personal media collection. Jellyfin, an open-source media server software, has gained popularity among tech enthusiasts and home media aficionados alike. This guide will walk you through the process of installing Jellyfin on Linux Mint 22, a user-friendly and stable Linux distribution that provides an excellent foundation for your media server needs.
Linux Mint 22, with its robust package management system and compatibility with a wide range of software, offers an ideal platform for hosting Jellyfin. By the end of this tutorial, you’ll have a fully functional Jellyfin server running on your Linux Mint system, ready to organize and stream your media collection across your local network and beyond.
What is Jellyfin?
Jellyfin is a free, open-source media server software that allows you to organize, manage, and stream your digital media collection. It supports a wide variety of media formats, including movies, TV shows, music, and photos. Jellyfin stands out from other media server solutions due to its commitment to privacy, lack of premium features or subscription requirements, and active community-driven development.
Some key features of Jellyfin include:
- Cross-platform support for various devices and operating systems
- Live TV and DVR capabilities
- User management with customizable permissions
- Transcoding for optimal playback on different devices
- Metadata scraping and organization
- Plugins and add-ons for extended functionality
Compared to proprietary alternatives like Plex or Emby, Jellyfin offers a fully open-source solution without any locked features or subscription costs. This makes it an attractive option for users who value privacy, customization, and community-driven development.
System Requirements
Before proceeding with the installation of Jellyfin on Linux Mint 22, ensure that your system meets the following requirements:
Hardware Requirements:
- 64-bit x86 processor (Intel or AMD)
- Minimum 1GB RAM (4GB or more recommended for better performance)
- Sufficient storage space for your media files
- Network connection (Ethernet recommended for stability)
Software Prerequisites:
- Linux Mint 22 (or later) installed and updated
- Administrative access to the system
- Basic familiarity with terminal commands
While Jellyfin can run on modest hardware, for optimal performance, especially when transcoding high-quality video, consider using a system with a more powerful processor and additional RAM. The storage requirements will depend on the size of your media library.
Preparing Your Linux Mint 22 System
Before installing Jellyfin, it’s essential to prepare your Linux Mint 22 system by updating it and installing necessary dependencies. Follow these steps to ensure your system is ready:
1. Update Your System
Open a terminal and run the following commands to update your system:
sudo apt update
sudo apt upgrade -y
This will ensure that all your system packages are up to date, reducing the likelihood of compatibility issues during the Jellyfin installation.
2. Install Necessary Dependencies
Jellyfin requires certain dependencies to function correctly. Install them using the following command:
sudo apt install apt-transport-https ca-certificates curl gnupg2 software-properties-commonThese packages will enable secure APT transactions, certificate management, and the ability to add new repositories.
3. Configure Firewall Settings
If you have a firewall enabled on your Linux Mint system, you’ll need to open the necessary ports for Jellyfin. By default, Jellyfin uses port 8096 for HTTP traffic and port 8920 for HTTPS traffic. To open these ports using the UFW firewall, run:
sudo ufw allow 8096/tcp
sudo ufw allow 8920/tcp
sudo ufw reload
This ensures that Jellyfin can communicate properly over your network.
Installation Methods
There are multiple ways to install Jellyfin on Linux Mint 22. In this guide, we’ll cover two popular methods:
- Installing Jellyfin via the official repository
- Installing Jellyfin using Docker
Choose the method that best suits your needs and level of expertise. The repository method is straightforward and integrates well with the system package manager, while the Docker method offers better isolation and easier updates.
Method 1: Installing Jellyfin via Repository
Installing Jellyfin through the official repository is the recommended method for most users. It ensures that you receive official updates and integrates well with your system’s package management. Follow these steps:
1. Add the Jellyfin Repository
First, add the Jellyfin repository to your system’s software sources:
echo "deb [arch=$( dpkg --print-architecture )] https://repo.jellyfin.org/ubuntu focal main" | sudo tee /etc/apt/sources.list.d/jellyfin.list2. Import the GPG Key
Import the repository’s GPG key to verify package integrity:
wget -O - https://repo.jellyfin.org/ubuntu/jellyfin_team.gpg.key | sudo apt-key add -3. Update Package Lists
Update your system’s package lists to include the new repository:
sudo apt update4. Install Jellyfin
Now, install Jellyfin using the following command:
sudo apt install jellyfin5. Start the Jellyfin Service
After installation, start the Jellyfin service:
sudo systemctl start jellyfinTo ensure Jellyfin starts automatically on system boot, run:
sudo systemctl enable jellyfinMethod 2: Installing Jellyfin using Docker
Docker provides a containerized environment for running applications, offering benefits such as isolation and easier management. Here’s how to install Jellyfin using Docker on Linux Mint 22:
1. Install Docker
First, install Docker on your system:
sudo apt install docker.io
sudo systemctl start docker
sudo systemctl enable docker
2. Pull the Jellyfin Docker Image
Pull the official Jellyfin Docker image:
sudo docker pull jellyfin/jellyfin3. Create and Run the Jellyfin Container
Create a Docker container for Jellyfin, mapping the necessary volumes and ports:
sudo docker run -d \
 --name jellyfin \
 --user uid:gid \
 --net=host \
 --volume /path/to/config:/config \
 --volume /path/to/cache:/cache \
 --volume /path/to/media:/media \
 --restart=unless-stopped \
 jellyfin/jellyfin
Replace “uid:gid” with your user and group IDs, and adjust the volume paths according to your system’s configuration.
4. Access Jellyfin through Docker
Once the container is running, you can access Jellyfin by opening a web browser and navigating to http://localhost:8096.
Configuring Jellyfin
After successfully installing Jellyfin, it’s time to configure it for optimal use. Follow these steps to set up your media server:
1. Access the Web Interface
Open a web browser and navigate to http://localhost:8096. If you’re accessing Jellyfin from another device on your network, replace “localhost” with your server’s IP address.

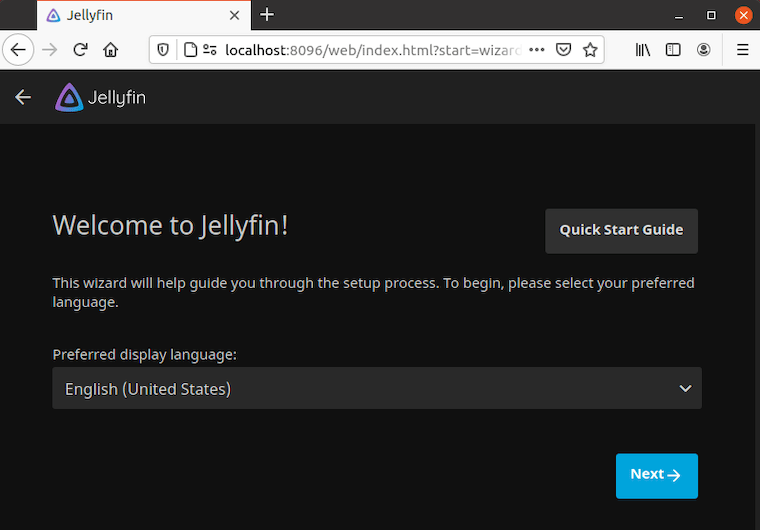
2. Initial Setup Wizard
The first time you access Jellyfin, you’ll be greeted with a setup wizard. Follow the prompts to:
- Choose your preferred language
- Create an admin account
- Set up your media libraries
- Configure network settings
3. Adding Media Libraries
To add your media libraries:
- Go to the “Admin” dashboard
- Select “Libraries” from the sidebar
- Click “Add Media Library”
- Choose the content type (Movies, TV Shows, Music, etc.)
- Specify the folder path where your media is stored
- Configure metadata and display options
4. Configuring User Accounts and Permissions
To create additional user accounts:
- Go to the “Admin” dashboard
- Select “Users” from the sidebar
- Click “Add User”
- Set username, password, and permissions
Optimizing Jellyfin Performance
To ensure the best possible experience with Jellyfin, consider these optimization tips:
1. Hardware Acceleration Setup
Enable hardware acceleration to offload video processing to your GPU:
- Go to “Admin” > “Dashboard” > “Playback”
- Under “Transcoding,” enable “Hardware acceleration”
- Choose the appropriate acceleration method for your hardware
2. Transcoding Settings
Adjust transcoding settings based on your server’s capabilities and network conditions:
- Set appropriate bitrate limits for remote streaming
- Configure quality settings for different device types
- Enable or disable transcoding based on your server’s performance
3. Network Optimization Tips
Optimize your network for smoother streaming:
- Use a wired Ethernet connection for your server when possible
- Configure Quality of Service (QoS) on your router to prioritize Jellyfin traffic
- Consider using a Content Delivery Network (CDN) for remote access if you have many users
Securing Your Jellyfin Installation
Security is crucial when setting up any server. Here are some steps to secure your Jellyfin installation:
1. Enabling HTTPS
To enable HTTPS:
- Generate an SSL certificate (you can use Let’s Encrypt for free certificates)
- Go to “Admin” > “Networking”
- Under “HTTPS,” specify the paths to your certificate and key files
- Restart the Jellyfin service to apply changes
2. Implementing Strong Authentication
Enhance your Jellyfin security by:
- Using strong, unique passwords for all accounts
- Enabling two-factor authentication for admin accounts
- Limiting failed login attempts
3. Keeping Jellyfin Updated
Regularly update Jellyfin to ensure you have the latest security patches:
- For repository installations, use
sudo apt update && sudo apt upgrade - For Docker installations, pull the latest image and recreate the container
Congratulations! You have successfully installed Jellyfin. Thanks for using this tutorial for installing the Jellyfin software media system on the Linux Mint 22 system. For additional help or useful information, we recommend you check the official Jellyfin website.