How To Install Jellyfin on Rocky Linux 10

Setting up a media server has become essential for streaming personal content across multiple devices. Jellyfin stands out as the premier open-source media server solution, offering complete freedom from licensing restrictions and vendor lock-in. This comprehensive guide walks you through installing Jellyfin on Rocky Linux 10, ensuring optimal performance and security for your home entertainment setup.
Understanding Jellyfin Media Server
Jellyfin represents a revolutionary approach to media streaming, providing enterprise-grade functionality without the limitations of proprietary solutions. This free media server software supports extensive format compatibility, including movies, TV shows, music, and Live TV/DVR capabilities. Unlike commercial alternatives, Jellyfin offers unlimited users, no premium features locked behind paywalls, and complete control over your media collection.
The platform excels in hardware acceleration support, enabling efficient transcoding on modern processors and graphics cards. Advanced features include automatic metadata fetching from TheTVDB, TheMovieDB, and Rotten Tomatoes, ensuring your media library maintains professional organization. DLNA support and Chromecast compatibility extend streaming capabilities to various devices throughout your network.
Jellyfin’s architecture supports plugin systems, custom themes, and API integration, making it highly extensible for power users. The self-hosted media streaming approach ensures complete privacy and eliminates monthly subscription fees associated with commercial services.
Prerequisites and System Requirements
Rocky Linux 10 provides an excellent foundation for Jellyfin deployment, offering enterprise stability with modern package management. Your system should meet specific requirements for optimal performance and compatibility.
Hardware specifications directly impact streaming quality and concurrent user support. A minimum dual-core processor handles basic operations, while quad-core or higher processors accommodate multiple simultaneous streams. RAM requirements start at 2GB for basic functionality, with 4GB recommended for smooth operation. Storage considerations include adequate space for the Jellyfin application, metadata cache, and your media collection.
Network infrastructure plays a crucial role in streaming performance. Gigabit ethernet connections ensure smooth 4K streaming, while wireless networks require strong signal strength and sufficient bandwidth. Port availability becomes essential, as Jellyfin operates on port 8096 by default.
Administrative access requirements include root privileges for system modifications, firewall configuration, and service management. Ensure your user account possesses sudo capabilities before beginning installation procedures.
Preparing Rocky Linux 10 System
System preparation establishes the foundation for successful Jellyfin installation. Begin by updating your Rocky Linux 10 system to ensure compatibility with the latest packages and security patches.
sudo dnf update -yRepository configuration enables access to essential multimedia packages. The EPEL repository provides additional software not included in base Rocky Linux repositories:
sudo dnf install -y epel-releaseRPM Fusion repositories contain multimedia codecs and FFmpeg packages crucial for Jellyfin operation:
sudo dnf install -y https://mirrors.rpmfusion.org/free/el/rpmfusion-free-release-$(rpm -E %rhel).noarch.rpm
sudo dnf install -y https://mirrors.rpmfusion.org/nonfree/el/rpmfusion-nonfree-release-$(rpm -E %rhel).noarch.rpm
PowerTools repository activation provides development packages and additional dependencies:
sudo dnf config-manager --enable powertoolsInstall essential utilities for package management and network operations:
sudo dnf install -y wget curl dnf-utilsInstalling FFmpeg and Media Dependencies
FFmpeg serves as the backbone of Jellyfin’s media processing capabilities, handling transcoding, format conversion, and streaming optimization. This multimedia framework supports virtually all audio and video formats, making it indispensable for comprehensive media server functionality.
Install FFmpeg and related multimedia libraries from RPM Fusion repositories:
sudo dnf install -y ffmpeg ffmpeg-devel x264 x265SDL2 libraries provide additional multimedia support essential for certain media formats:
sudo dnf install -y SDL2 SDL2-develVerify FFmpeg installation and codec availability:
ffmpeg -version
ffmpeg -codecs | grep h264
Additional multimedia packages enhance format support and performance:
sudo dnf install -y libva libva-utils intel-media-driverThese packages enable hardware acceleration on Intel systems, significantly improving transcoding performance and reducing CPU usage during streaming operations.
Method 1: Installing Jellyfin via RPM Packages
Direct RPM installation provides the most straightforward approach for deploying Jellyfin on Rocky Linux 10. This method offers better integration with system services and package management.
Create a dedicated directory for Jellyfin packages:
mkdir ~/jellyfin-install && cd ~/jellyfin-installDownload the latest Jellyfin server package from the official repository:
wget https://repo.jellyfin.org/releases/server/centos/stable/server/jellyfin-server-10.8.13-1.el7.x86_64.rpmDownload the Jellyfin web interface package:
wget https://repo.jellyfin.org/releases/server/centos/stable/web/jellyfin-web-10.8.13-1.el7.noarch.rpmInstall both packages using dnf, which automatically resolves dependencies:
sudo dnf localinstall jellyfin-server-*.rpm jellyfin-web-*.rpmThe installation process creates system users, directories, and service files automatically. Enable and start the Jellyfin service:
sudo systemctl enable jellyfin
sudo systemctl start jellyfin
Verify successful installation and service status:
sudo systemctl status jellyfinThis method integrates Jellyfin with Rocky Linux’s service management system, enabling automatic startup, proper logging, and system-wide configuration management.
Method 2: Installing Jellyfin via Docker
Docker deployment offers containerized isolation, simplified updates, and consistent environments across different systems. This approach particularly benefits users managing multiple applications or requiring easy backup and migration capabilities.
Install Docker Engine on Rocky Linux 10:
sudo dnf config-manager --add-repo https://download.docker.com/linux/centos/docker-ce.repo
sudo dnf install -y docker-ce docker-ce-cli containerd.io
Start and enable Docker service:
sudo systemctl enable docker
sudo systemctl start docker
Create directory structure for Jellyfin data persistence:
sudo mkdir -p /srv/jellyfin/{config,cache,media}
sudo chown -R $USER:$USER /srv/jellyfin
Deploy Jellyfin using Docker with proper volume mounts:
docker run -d \
  --name jellyfin \
  --user $(id -u):$(id -g) \
  --net=host \
  --volume /srv/jellyfin/config:/config \
  --volume /srv/jellyfin/cache:/cache \
  --volume /srv/jellyfin/media:/media \
  --restart=unless-stopped \
  jellyfin/jellyfin:latest
Docker Compose provides more sophisticated container management:
version: "3.8"
services:
  jellyfin:
    image: jellyfin/jellyfin:latest
    container_name: jellyfin
    user: 1000:1000
    network_mode: host
    volumes:
      - /srv/jellyfin/config:/config
      - /srv/jellyfin/cache:/cache
      - /srv/jellyfin/media:/media
    restart: unless-stopped
This containerized approach simplifies updates, provides environment isolation, and enables easy backup of configuration data.
Configuring System Services and Firewall
Firewall configuration ensures secure access to your Jellyfin server while protecting against unauthorized connections. Rocky Linux 10 uses firewalld for network security management.
Configure firewall rules for Jellyfin’s default port:
sudo firewall-cmd --zone=public --add-port=8096/tcp --permanent
sudo firewall-cmd --reload
For HTTPS access and additional services, configure supplementary ports:
sudo firewall-cmd --zone=public --add-port=8920/tcp --permanent
sudo firewall-cmd --zone=public --add-port=1900/udp --permanent
sudo firewall-cmd --zone=public --add-port=7359/udp --permanent
sudo firewall-cmd --reload
Service management commands for RPM-based installations:
# Start Jellyfin service
sudo systemctl start jellyfin

# Enable automatic startup
sudo systemctl enable jellyfin

# Check service status
sudo systemctl status jellyfin

# Restart service after configuration changes
sudo systemctl restart jellyfin
Monitor service logs for troubleshooting:
sudo journalctl -u jellyfin -fSELinux considerations may require policy adjustments for optimal functionality. Check SELinux status and configure appropriate contexts if needed:
sudo setsebool -P httpd_can_network_connect 1Initial Jellyfin Web Setup
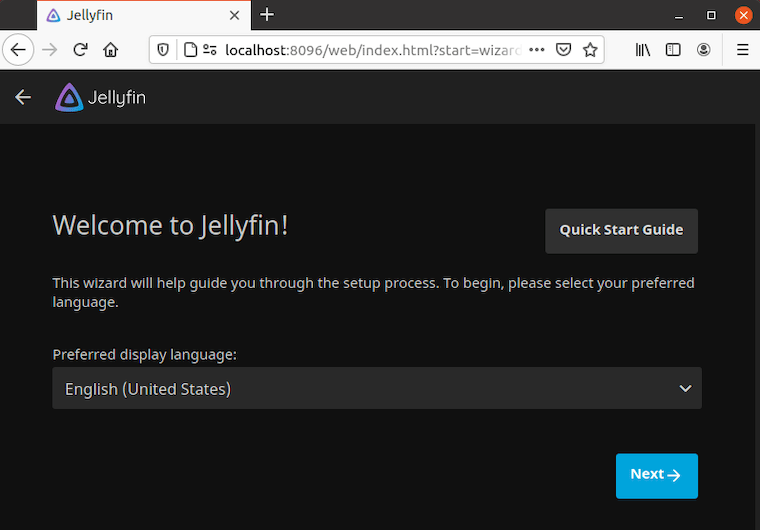
Web interface access begins your Jellyfin configuration journey. Navigate to your server’s IP address on port 8096:
http://your-server-ip:8096The first-time setup wizard guides you through essential configuration steps. Create an administrator account with a strong password, ensuring secure access to your media server.

Server identification settings include naming your server and configuring network access. Choose descriptive names that identify your server’s purpose and location within your network infrastructure.
Remote access configuration determines external connectivity options. Enable remote access for streaming outside your local network, but consider security implications and bandwidth limitations.
Media library setup represents the core functionality configuration. Add libraries for different content types:
- Movies: Point to directories containing movie files
- TV Shows: Configure television series collections
- Music: Set up audio library locations
- Photos: Enable picture sharing capabilities
Metadata providers automatically fetch information about your media content. Configure TheMovieDB, TheTVDB, and other providers based on your content types and preferences.
Language and region settings optimize metadata accuracy and interface localization. Select appropriate options matching your content language and geographic location.
Optimizing Jellyfin for Rocky Linux 10
Performance optimization maximizes your server’s capabilities while ensuring smooth streaming experiences across multiple devices. These configurations particularly benefit systems with limited resources or high concurrent usage.
Hardware acceleration significantly reduces CPU usage during transcoding operations. Configure GPU acceleration for supported hardware:
# For Intel systems
sudo usermod -a -G render jellyfin
sudo systemctl restart jellyfin
Transcoding settings balance quality with performance. Access transcoding options through the Jellyfin admin dashboard and configure:
- Hardware acceleration method (VAAPI, NVENC, QuickSync)
- Maximum simultaneous transcode sessions
- Transcoding temporary directory location
- Preferred codecs and quality settings
Memory optimization prevents system resource exhaustion during intensive operations. Configure Java heap sizes and cache settings based on available system memory.
Storage optimization improves file access and reduces wear on storage devices. Consider:
- Separating media storage from system drives
- Using SSD storage for Jellyfin databases and cache
- Implementing proper file permissions and ownership
- Regular cleanup of transcoding temporary files
Network optimization ensures smooth streaming across your infrastructure:
- Configure appropriate quality settings for different network speeds
- Enable bandwidth throttling for remote connections
- Optimize chunk sizes for streaming protocols
- Configure CDN settings if applicable
Adding and Managing Media Content
Media organization directly impacts user experience and system performance. Implement consistent naming conventions and directory structures for optimal Jellyfin functionality.
File naming best practices ensure accurate metadata detection:
Movies: Movie Title (Year).ext
TV Shows: Series Name/Season X/Series Name S0XE0Y - Episode Title.ext
Music: Artist/Album/Track Number - Song Title.ext
Directory permissions must allow Jellyfin access to media files:
sudo chown -R jellyfin:jellyfin /path/to/media
sudo chmod -R 755 /path/to/media
For Docker installations, ensure proper volume mounting and permissions:
sudo chown -R 1000:1000 /srv/jellyfin/mediaLibrary scanning configurations determine how Jellyfin monitors and updates your media collection. Enable real-time monitoring for frequently updated directories, while using scheduled scans for static collections.
Metadata management allows customization of content information, artwork, and organization. Jellyfin provides tools for manual metadata editing, custom artwork uploads, and collection organization.
Troubleshooting Common Issues
Service startup failures often result from permission issues or port conflicts. Check system logs for specific error messages:
sudo journalctl -u jellyfin --no-pagerPort binding conflicts occur when other services use Jellyfin’s default ports. Identify conflicting services:
sudo netstat -tulpn | grep :8096Permission problems frequently affect media file access. Verify file ownership and permissions:
ls -la /path/to/media
sudo chown -R jellyfin:jellyfin /path/to/media
Transcoding failures typically relate to FFmpeg configuration or missing codecs. Verify FFmpeg installation and codec availability:
ffmpeg -encoders | grep h264Network connectivity issues may stem from firewall configurations or network routing problems. Test local and remote access systematically:
curl -I http://localhost:8096
telnet your-server-ip 8096
Performance bottlenecks often indicate resource constraints or suboptimal configurations. Monitor system resources during operation:
htop
iotop
Database corruption occasionally requires manual intervention. Stop Jellyfin service and rebuild the database if necessary:
sudo systemctl stop jellyfin
sudo rm /var/lib/jellyfin/data/library.db*
sudo systemctl start jellyfin
Maintenance and Updates
Regular updates ensure security patches, bug fixes, and new features. For RPM installations, update through dnf:
sudo dnf update jellyfin-server jellyfin-webDocker container updates require pulling new images and recreating containers:
docker pull jellyfin/jellyfin:latest
docker stop jellyfin
docker rm jellyfin
# Recreate container with same parameters
Backup strategies protect against data loss and configuration corruption. Essential backup targets include:
- Configuration directory (/etc/jellyfin or container volume)
- Database files
- Custom artwork and metadata
- User preferences and settings
Create automated backup scripts for regular maintenance:
#!/bin/bash
backup_dir="/backup/jellyfin-$(date +%Y%m%d)"
mkdir -p "$backup_dir"
sudo cp -r /var/lib/jellyfin "$backup_dir/"
sudo cp -r /etc/jellyfin "$backup_dir/"
Database maintenance prevents corruption and optimizes performance. Jellyfin includes built-in maintenance routines, but manual cleanup occasionally benefits large libraries.
Log rotation prevents disk space exhaustion from extensive logging:
sudo logrotate -f /etc/logrotate.d/jellyfinSystem monitoring helps identify potential issues before they impact service availability. Monitor disk usage, memory consumption, and network activity regularly.
Advanced Configuration Options
Reverse proxy setup enables HTTPS access and advanced routing capabilities. Configure Nginx for SSL termination and load balancing:
server {
    listen 443 ssl http2;
    server_name jellyfin.yourdomain.com;

    ssl_certificate /path/to/cert.pem;
    ssl_certificate_key /path/to/key.pem;

    location / {
        proxy_pass http://127.0.0.1:8096;
        proxy_set_header Host $host;
        proxy_set_header X-Real-IP $remote_addr;
        proxy_set_header X-Forwarded-For $proxy_add_x_forwarded_for;
        proxy_set_header X-Forwarded-Proto $scheme;
        proxy_set_header X-Forwarded-Protocol $scheme;
        proxy_set_header X-Forwarded-Host $http_host;
    }
}
SSL/TLS certificate configuration secures communications and enables external access. Use Let’s Encrypt for free certificates:
sudo dnf install certbot python3-certbot-nginx
sudo certbot --nginx -d jellyfin.yourdomain.com
LDAP integration centralizes user management for enterprise environments. Configure authentication through Jellyfin’s LDAP plugin for Active Directory or OpenLDAP integration.
Plugin management extends functionality through community-developed addons. Popular plugins include subtitle downloaders, notification systems, and metadata enhancers.
API automation enables programmatic control and integration with other systems. Jellyfin’s REST API supports custom applications, monitoring systems, and automated workflows.
Congratulations! You have successfully installed Jellyfin. Thanks for using this tutorial for installing the Jellyfin software media system on the Rocky Linux 10 system. For additional help or useful information, we recommend you check the official Jellyfin website.