How To Install JFrog Artifactory on Ubuntu 24.04 LTS

In today’s fast-paced software development environment, managing binaries and artifacts efficiently is crucial for any organization. JFrog Artifactory serves as a universal repository manager that streamlines the process of storing, sharing, and managing software packages. This guide will provide you with a comprehensive step-by-step process to install JFrog Artifactory on Ubuntu 24.04, ensuring that you have all the necessary information to get started smoothly.
What is JFrog Artifactory?
JFrog Artifactory is an advanced repository manager that supports various package formats, including Maven, Gradle, Docker, npm, and more. It acts as a central hub for managing dependencies and binaries throughout the software development lifecycle. By using Artifactory, teams can enhance their CI/CD pipelines, improve collaboration, and maintain a single source of truth for all artifacts.
Some key features of JFrog Artifactory include:
- Universal package support: Manage multiple package formats from a single platform.
- High availability: Ensure continuous access to your artifacts with clustered installations.
- Integration capabilities: Seamlessly integrate with CI/CD tools like Jenkins, GitLab, and CircleCI.
- Secure access: Implement role-based access control to manage permissions effectively.
Prerequisites for Installation
- Operating System: Ubuntu 24.04 LTS.
- System Requirements: At least 4 GB of RAM and 10 GB of free disk space.
- Software Dependencies: OpenJDK 17 or later is required to run Artifactory.
- User Permissions: You must have sudo access to install packages and modify system settings.
Step-by-Step Installation Guide
Step 1: Update Your System
The first step in installing JFrog Artifactory is to ensure your system is up to date. Open your terminal and run the following commands:
sudo apt update && sudo apt upgrade -yThis command updates the package index and upgrades all installed packages to their latest versions, ensuring compatibility with new software installations.
Step 2: Install Java Development Kit (JDK)
JFrog Artifactory requires Java to function properly. You can install OpenJDK 17 by running the following command:
sudo apt install openjdk-17-jdk -yAfter installation, verify that Java has been installed correctly by checking its version:
java -versionYou should see output indicating that OpenJDK 17 is installed. If not, troubleshoot the installation process before proceeding.
Step 3: Add JFrog Artifactory Repository
The next step involves adding the JFrog repository to your system. This ensures you can easily install and update Artifactory in the future. First, download and add the GPG key for the repository:
wget -qO - https://releases.jfrog.io/artifactory/api/gpg/key/public | sudo apt-key add -Next, add the repository to your sources list with the following command:
echo "deb https://releases.jfrog.io/artifactory/artifactory-debs $(lsb_release -cs) main" | sudo tee /etc/apt/sources.list.d/jfrog.listThis command appends the JFrog repository to your system’s sources list, allowing you to install Artifactory directly from it.
Step 4: Install JFrog Artifactory OSS
With the repository added, you can now install JFrog Artifactory OSS (Open Source Software) using the following command:
sudo apt update && sudo apt install jfrog-artifactory-oss -yThis command will download and install JFrog Artifactory along with its dependencies. The installation process may take a few minutes depending on your internet speed and system performance.
Step 5: Start and Enable Artifactory Service
After installation is complete, start the Artifactory service using this command:
sudo systemctl start artifactory.serviceYou should also enable it to start automatically on boot:
sudo systemctl enable artifactory.serviceThis ensures that your JFrog Artifactory instance runs whenever your server starts up.
Step 6: Verify Installation
To confirm that JFrog Artifactory is running correctly, check its status with this command:
sudo systemctl status artifactory.serviceIf everything is set up correctly, you should see an output indicating that the service is active (running). If not, review any error messages for troubleshooting.
Step 7: Accessing JFrog Artifactory Web UI
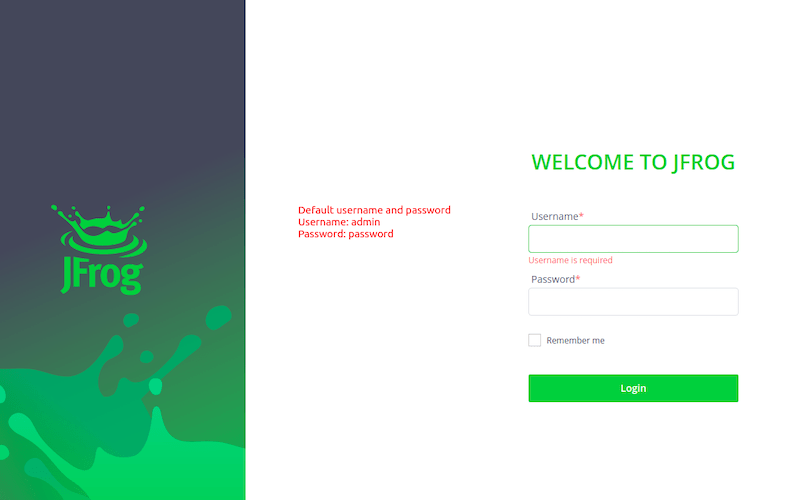
You can access the JFrog Artifactory web interface by navigating to http://localhost:8081/artifactory in your web browser. The default login credentials are:
- User: admin
- Password: password
Please change these credentials upon first login for security purposes.

Configuring JFrog Artifactory
Once logged into the web interface, you’ll want to configure your instance properly. Here are some initial setup steps:
- Change Default Admin Password: Navigate to “Admin” > “Security” > “Users” and select the admin user to change the password.
- Configure Base URL: Set up your base URL under “Admin” > “General” > “Artifactory Settings”. This ensures proper linking within your CI/CD pipelines.
- Create Repositories: Go to “Admin” > “Repositories” > “Local” or “Remote” depending on your needs. Create repositories for different package types as per your project requirements.
Troubleshooting Common Issues
If you encounter issues during installation or configuration, consider these common problems and their solutions:
- Error: Service not starting?: Check if there are any conflicting services using port 8081 or review logs in
/var/opt/jfrog/artifactory/logsfor detailed error messages. - Error: Unable to connect to database?: Ensure that your database service is running if you are using an external database like PostgreSQL or MySQL. Verify connection settings in artifactory.config.xml.
- Error: Access denied on web UI?: Make sure you are using correct credentials and have not locked out the admin account during configuration changes.
Congratulations! You have successfully installed JFrog. Thanks for using this tutorial for installing the JFrog Artifactory open-source repository management on Ubuntu 24.04 LTS system. For additional help or useful information, we recommend you check the official JFrog website.