How To Install Jupyter Notebook on Ubuntu 20.04 LTS

In this tutorial, we will show you how to install Jupyter Notebook on Ubuntu 20.04 LTS. For those of you who didn’t know, Jupyter Notebook is an open-source web application that allows you to create and share documents containing live code, visualizations, and narrative text. It has become an essential tool for data scientists, researchers, and developers working with Python, R, Julia, and other programming languages.
This article assumes you have at least basic knowledge of Linux, know how to use the shell, and most importantly, you host your site on your own VPS. The installation is quite simple and assumes you are running in the root account, if not you may need to add ‘sudo‘ to the commands to get root privileges. I will show you the step-by-step installation of the Jupyter Notebook on Ubuntu 20.04 (Focal Fossa). You can follow the same instructions for Ubuntu 18.04, 16.04, and any other Debian-based distribution like Linux Mint.
Prerequisites
- A server running one of the following operating systems: Ubuntu 20.04, 18.04, 16.04, and any other Debian-based distribution like Linux Mint.
- It’s recommended that you use a fresh OS install to prevent any potential issues.
- SSH access to the server (or just open Terminal if you’re on a desktop).
- A
non-root sudo useror access to theroot user. We recommend acting as anon-root sudo user, however, as you can harm your system if you’re not careful when acting as the root.
Install Jupyter Notebook on Ubuntu 20.04 LTS Focal Fossa
Step 1. Before installing any new software, it’s a good practice to update and upgrade your system’s package index to ensure you have the latest package versions available:
sudo apt update
sudo apt upgrade
sudo apt install software-properties-common apt-transport-https
Step 2. Installing Python.
Now we install Python 3, pip, and other required packages to build Python dependencies:
sudo apt install python3-pip python3-dev
As Pip 3 is already installed on your system, we’ll move forward toward the pip upgrade command:
sudo - pip3 install --upgrade pip
Next, install a Python package for setting a virtual python environment:
sudo - pip3 install virtualenv
Next, we build the Python virtual environment:
mkdir notebook
cd notebook
virtualenv jupyter_env
After that, run the following command to activate this virtual environment:
source jupyter_env/bin/activate
Step 3. Installing Jupyter Notebook on Ubuntu 20.04.
By default, Jupyter Notebook is not available on Ubuntu 20.04 base repository. Now run the following command below to install Jupyter using pip:
pip install jupyter
With the installation and configuration complete, you’re now ready to start the Jupyter Notebook server:
jupyter notebook
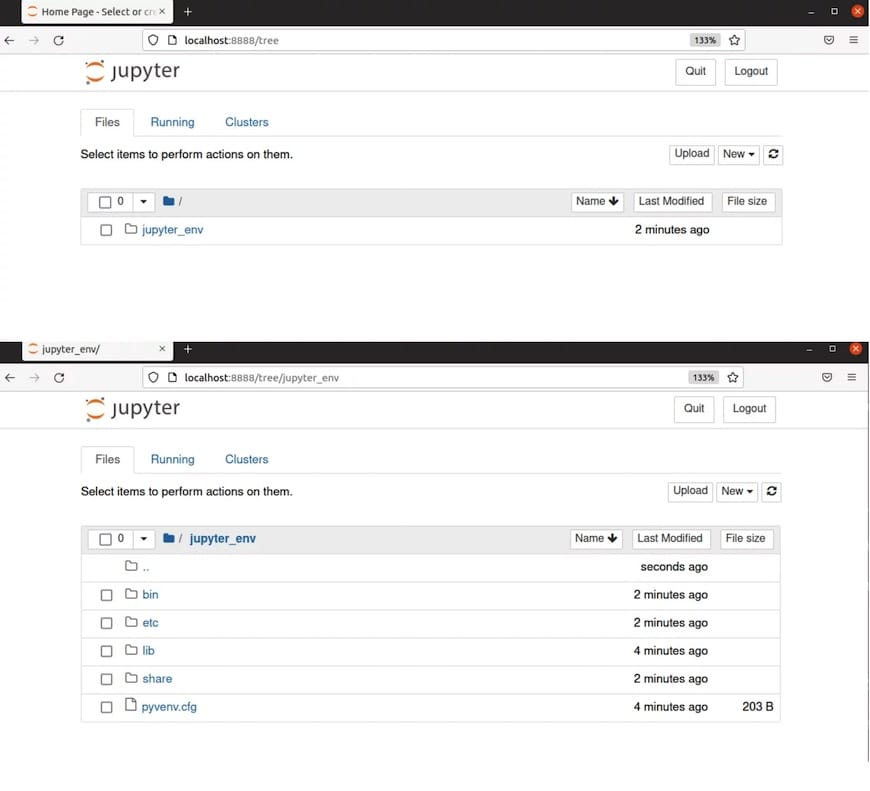
After executing the command, the browser will open the home screen of Jupyter Notebook. You can see your virtual environment on the home screen:

Step 4. Create Jupyter Application Menu.
Now create a new file called run-jupyter.sh in your notebook directory:
#!/bin/bash

source /home/username/jupyterenvironment/bin/activate
jupyter notebook
Next, go to the /usr/share/applications directory and create a file named jupyter.desktop with the following code to create an application menu item:
[Desktop Entry]
Name=Jupyter Notebook
Exec=/home/username/notebook/run-jupyter.sh
Type=Application
Terminal=true
Congratulations! You have successfully installed Jupyter. Thanks for using this tutorial for installing the Jupyter Notebook on Ubuntu 20.04 LTS Focal Fossa system. For additional help or useful information, we recommend you check the official Jupyter website.