How To Install JupyterLab on Fedora 41

JupyterLab is a powerful web-based interactive development environment that allows users to create and share documents that contain live code, equations, visualizations, and narrative text. As a popular tool among data scientists and researchers, installing JupyterLab on Fedora 41 can enhance your productivity and streamline your workflow. This guide will walk you through the step-by-step process of installing JupyterLab on Fedora 41, ensuring that you have all the necessary prerequisites and troubleshooting tips at your disposal.
Prerequisites
System Requirements
Before diving into the installation process, it’s important to ensure that your system meets the minimum hardware requirements:
- Processor: 64-bit processor (Intel or AMD)
- RAM: At least 4 GB (8 GB recommended)
- Disk Space: Minimum of 1 GB free space for installation
Software Requirements
JupyterLab is built on Python, so having Python installed is crucial. Fedora typically comes with Python pre-installed, but you can verify its presence by running:
python3 --versionIf Python is not installed, you can easily install it using the package manager. Additionally, you will need pip, the package installer for Python, to install JupyterLab.
Updating Fedora
Keeping your system updated is essential for security and stability. Before installing any new software, run the following command to update your system:
sudo dnf updateThis command refreshes your package database and installs any available updates. It’s a good practice to check for updates regularly.
Installing Python and pip
Installing Python
If Python is not already installed on your system, you can install it using the following command:
sudo dnf install python3This command will download and install the latest version of Python 3 available in the Fedora repositories.
Installing pip
Pip is essential for installing JupyterLab and other Python packages. To install pip, execute the following command:
sudo dnf install python3-pipVerifying Installation
After installing Python and pip, verify their installations by running these commands:
python3 --version
pip3 --version
You should see output indicating the installed versions of Python and pip. If you encounter any issues, revisit the installation steps.
Installing JupyterLab
Using pip to Install JupyterLab
With Python and pip ready, you can now install JupyterLab. Run the following command:
pip3 install jupyterlab --userThe --user flag installs JupyterLab for your user account only, avoiding permission issues that can arise during installation.
Setting Up Environment Variables
If you installed JupyterLab using the --user option, you may need to add its installation path to your system’s PATH variable. This ensures that you can run JupyterLab from any terminal session. Add the following line to your shell configuration file (e.g., .bashrc, .bash_profile, or .zshrc):
export PATH="$HOME/.local/bin:$PATH"After adding this line, reload your shell configuration by running:
source ~/.bashrcVerifying JupyterLab Installation
You can confirm that JupyterLab has been installed correctly by checking its version with this command:
jupyter lab --versionIf installed successfully, this command will display the version number of JupyterLab.
Running JupyterLab
Launching JupyterLab
You are now ready to launch JupyterLab! Simply run the following command in your terminal:
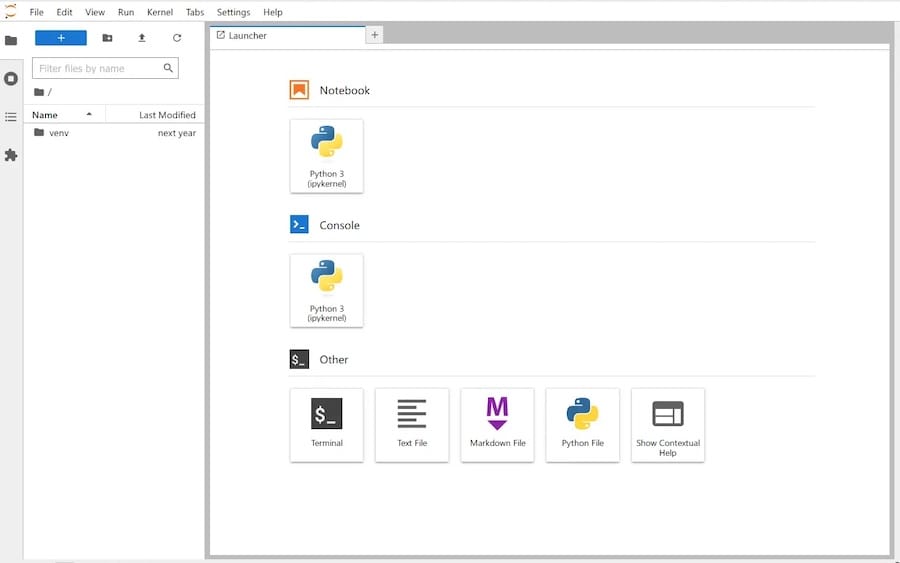
jupyter labThis command starts a local server and opens JupyterLab in your default web browser. The default URL is usually http://localhost:8888.
Accessing JupyterLab in a Browser
If your browser does not open automatically, you can manually navigate to http://localhost:8888. You should see the JupyterLab interface where you can create notebooks and access various tools.

Configuring Firewall Settings (if necessary)
If you encounter issues accessing JupyterLab from another device on your network, ensure that your firewall settings allow traffic on port 8888. Use these commands to open the necessary port:
sudo firewall-cmd --add-service=http --permanent
sudo firewall-cmd --reload
Customizing JupyterLab
Installing Extensions
You can enhance JupyterLab’s functionality by installing extensions. Some popular extensions include:
- @jupyter-widgets/jupyterlab-manager: For interactive widgets.
- @lckr/jupyterlab_variableinspector: To inspect variables in real-time.
- @jupyterlab/git: For version control integration.
You can install an extension using the following command:
jupyter labextension install <extension-name>Setting Up Password Protection
If you’re running a public server or want to restrict access to your notebooks, setting up a password is advisable. To set a password for your JupyterLab instance, run:
jupyter notebook passwordYou will be prompted to enter and verify a password. This adds an extra layer of security when accessing your notebooks.
Troubleshooting Common Issues
Common Installation Errors
- Error: Command not found: This usually indicates that either Python or pip was not installed correctly or is not in your PATH. Revisit the installation steps.
- Permission Denied: If you encounter permission errors during installation, ensure you’re using the
--userflag with pip or consider using a virtual environment. - Version Conflicts: If certain packages fail due to version conflicts, consider upgrading pip or installing specific versions of packages as needed.
Running into Path Issues
If you receive errors indicating that commands are not found after installation:
- Ensure you’ve added `
~/.local/bin` to your PATH variable as mentioned earlier. - Restart your terminal session or run `
source ~/.bashrc` (or equivalent) after making changes.
Congratulations! You have successfully installed JupyterLab. Thanks for using this tutorial for installing the JupyterLab computational environment on Fedora 41 system. For additional or useful information, we recommend you check the official Jupyter website.