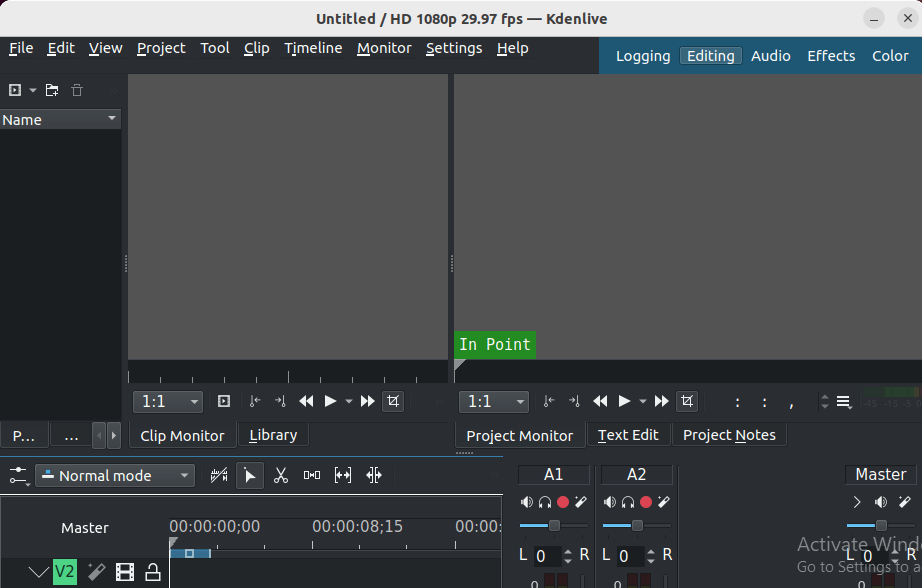
How To Install Kdenlive on Linux Mint 22

Kdenlive is a powerful open-source video editing software that provides a robust platform for both amateur and professional video editors. If you’re using Linux Mint 22, installing Kdenlive can enhance your video editing experience significantly. This guide will walk you through various methods to install Kdenlive, ensuring you have all the tools you need to get started with video editing on Linux Mint.
Understanding Kdenlive
What is Kdenlive?
Kdenlive stands for KDE Non-Linear Video Editor and is part of the KDE project. It offers a wide range of features, including multi-track editing, a customizable interface, and support for various video formats. With Kdenlive, users can edit videos in a non-linear fashion, meaning they can arrange clips in any order without being restricted to a sequential timeline.
Why Choose Kdenlive?
- Open Source: Kdenlive is free to use and regularly updated by a dedicated community.
- Feature-Rich: It includes advanced features like effects, transitions, and audio mixing.
- User-Friendly: The interface is designed to be intuitive, making it accessible for beginners while still offering depth for advanced users.
Prerequisites for Installation
System Requirements
Before installing Kdenlive, ensure your system meets the following minimum requirements:
- Processor: Dual-core CPU or better
- RAM: 4 GB or more (8 GB recommended)
- Storage: At least 1 GB of free disk space
- Graphics: A graphics card capable of OpenGL 2.0 or higher
Preparing Your System
Start by updating your system to ensure all packages are current. Open your terminal and run the following commands:
sudo apt update
sudo apt upgrade
This command will refresh your package list and install any available updates.
Installation Methods
Kdenlive can be installed on Linux Mint 22 using several methods. Below are detailed instructions for each method.
Method 1: Installing via AppImage
What is AppImage?
An AppImage is a portable application format that allows you to run software without installation. This method is great for users who want to try Kdenlive without modifying their system.
Installation Steps
- Download the AppImage: Visit the official Kdenlive download page, and download the AppImage file for Linux.
- Make it Executable: Open your terminal and navigate to the directory where you downloaded the AppImage file. Run the following command:
chmod +x kdenlive.AppImageReplace “
kdenlive.AppImage” with the actual name of the file if necessary. - Run the AppImage: Execute the AppImage by double-clicking it or running this command in the terminal:
./kdenlive.AppImage
Method 2: Installing via PPA
What is a PPA?
A Personal Package Archive (PPA) allows developers to distribute software directly to users. This method ensures you get the latest stable version of Kdenlive.
Installation Steps
- Add the PPA Repository: Enter the following command in your terminal:
sudo add-apt-repository ppa:kdenlive/kdenlive-stable - Update Package Lists: Refresh your package list with:
sudo apt update - Install Kdenlive: Finally, install Kdenlive using:
sudo apt install kdenlive
Method 3: Installing via Snap
What is Snap?
Snap packages are self-contained applications that work across various Linux distributions. They simplify installation and management of applications.
Installation Steps
- If Snapd is Not Installed: Install Snapd first by running:
sudo apt install snapd - Install Kdenlive Using Snap: After setting up Snapd, use this command:
sudo snap install kdenlive
Method 4: Installing via Flatpak
What is Flatpak?
A Flatpak is another universal packaging format that provides application isolation from the host system, improving security and compatibility.
Installation Steps
- If Flatpak is Not Installed: Please ensure Flatpak is installed on your system:
sudo apt install flatpak - Add Flathub Repository: This repository hosts many popular Flatpak applications.
(if not already added) flatpak remote-add --if-not-exists flathub https://flathub.org/repo/flathub.flatpakrepo - Install Kdenlive via Flatpak: You can now install Kdenlive using:
flatpak install flathub org.kde.kdenlive
Method 5: Installing from Software Manager
User-Friendly GUI Installation
If you prefer a graphical interface, you can use the Software Manager provided by Linux Mint.
Installation Steps
- Navigating to Software Manager: Select “Software Manager” from your applications menu.
- SearcK for Kdenlive: Your search results will display available applications. Click on “Kdenlive” and select “Install.”
- Password Prompt: You may be prompted to enter your password to authorize the installation.
- Kdenlive Installed! The application will be installed automatically once authorization is provided.
Post-installation Steps
You can launch Kdenlive from your application menu or by typing `kdenlive` in the terminal. The first time you run it, you’ll be greeted with an initial setup wizard that helps configure basic settings according to your preferences.
- Select your preferred language and theme.
- Create or select a default project folder for saving your projects.
- Tweak performance settings based on your hardware capabilities for optimal editing experience.

Troubleshooting Common Issues
- Error: Unable to locate package: If you encounter this error while using apt or PPA methods, ensure that you have correctly added the repository and updated your package lists.
- Error: Snap not found: If Snap commands fail, make sure Snapd is installed correctly by re-running `
sudo apt install snapd`. - Error: Flatpak not found: If Flatpak commands fail, ensure that Flatpak is installed by running `
sudo apt install flatpak` again. - Error: Permissions issues with AppImage: If you cannot run the AppImage, double-check that you’ve made it executable with `
chmod +x` command as described above. - Avoid running resource-intensive applications while editing videos in Kdenlive to improve performance.
- If experiencing lag during playback, consider lowering preview quality in settings.
- Caching options can also be adjusted in project settings for smoother playback during editing sessions.
Congratulations! You have successfully installed Kdenlive. Thanks for using this tutorial to installing the latest version of the Kdenlive video editor on the Linux Mint 22 system. For additional help or useful information, we recommend you check the official Kdenlive website.