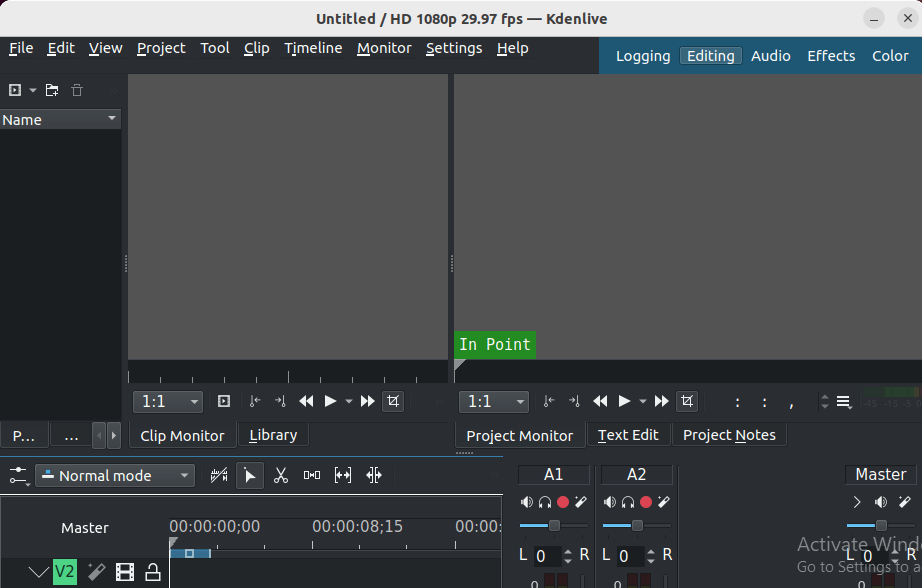
How To Install Kdenlive on Manjaro

In the world of Linux-based operating systems, Manjaro has gained popularity for its user-friendly interface and rolling release model. For video enthusiasts and content creators, having a reliable video editing software is crucial. Kdenlive, a powerful open-source video editor, stands out as an excellent choice for Manjaro users. This guide will walk you through the process of installing Kdenlive on Manjaro, ensuring you have the tools needed to bring your creative visions to life.
What is Kdenlive?
Kdenlive, short for KDE Non-Linear Video Editor, is a feature-rich, open-source video editing software. It offers a wide range of tools and effects, making it suitable for both beginners and advanced users. Some key features include:
- Multi-track video editing
- A wide range of transitions and effects
- Support for various video and audio formats
- Keyframe animation
- Proxy editing for smoother performance with high-resolution footage
Kdenlive’s compatibility with Manjaro makes it an ideal choice for users of this Linux distribution. Its integration with the KDE desktop environment, which Manjaro often uses, ensures a seamless user experience.
System Requirements
Before installing Kdenlive, ensure your Manjaro system meets the following requirements:
Minimum Hardware Specifications:
- 2 GHz dual-core processor
- 4 GB RAM
- 1 GB free disk space
- OpenGL 2.0 compatible graphics card
Recommended Hardware for Optimal Performance:
- 3 GHz quad-core processor or better
- 8 GB RAM or more
- Solid State Drive (SSD) with at least 5 GB free space
- Dedicated graphics card with OpenGL 3.0 support or higher
Additionally, ensure your Manjaro system is up-to-date and has the necessary multimedia codecs installed for handling various video and audio formats.
Preparing Your Manjaro System
Before installing Kdenlive, it’s essential to prepare your Manjaro system. Follow these steps:
1. Update Your System
Open a terminal and run the following commands:
sudo pacman -SyuThis command updates your system packages to their latest versions.
2. Install Necessary Dependencies
Kdenlive requires certain dependencies to function properly. Install them using:
sudo pacman -S ffmpeg frei0r-plugins3. Configure Package Managers
Ensure that your package managers are properly configured. For Manjaro, the default package manager is pacman, but you might also want to set up pamac for a graphical package management experience:
sudo pacman -S pamac-gtkInstallation Methods
There are several ways to install Kdenlive on Manjaro. We’ll cover the three most common methods: using the Manjaro Package Manager, Flatpak, and building from source.
A. Using the Manjaro Package Manager
This is the simplest and recommended method for most users.
Step-by-step guide:
- Open a terminal window.
- Run the following command:
sudo pacman -S kdenlive - Enter your password when prompted.
- Confirm the installation by pressing ‘Y’ when asked.
- Wait for the installation to complete.
Advantages: Quick, easy, and ensures compatibility with your Manjaro system.
Disadvantages: May not always have the latest version immediately available.
B. Installing via Flatpak
Flatpak is a universal package management system that can be used to install Kdenlive.
Setting up Flatpak:
- Install Flatpak if not already installed:
sudo pacman -S flatpak - Add the Flathub repository:
flatpak remote-add --if-not-exists flathub https://flathub.org/repo/flathub.flatpakrepo
Installation process:
- Install Kdenlive using Flatpak:
flatpak install flathub org.kde.kdenlive - Follow the prompts to complete the installation.
Pros: Often provides the latest version, sandboxed for security.
Cons: Larger download size, potential integration issues with system themes.
C. Building from Source
Building Kdenlive from source is recommended for advanced users who want the latest features or need to customize the installation.
When to choose this method: If you need the absolute latest version or want to contribute to Kdenlive’s development.
Brief overview of the process:
- Install development tools and dependencies.
- Clone the Kdenlive repository.
- Compile and install the software.
Note: This method requires more technical knowledge and time.
Post-Installation Setup
After installing Kdenlive, follow these steps for optimal setup:
First-time Launch
- Open Kdenlive from your application menu or run
kdenlivein the terminal. - On first launch, Kdenlive will perform initial setup and may prompt you to install additional codecs.

Configuring Kdenlive Settings
- Go to Settings > Configure Kdenlive.
- Adjust video rendering settings based on your hardware capabilities.
- Set up default project settings that match your typical workflow.
Installing Additional Codecs and Plugins
To enhance Kdenlive’s capabilities, consider installing additional codecs and plugins:
sudo pacman -S gst-plugins-good gst-plugins-bad gst-plugins-ugly gst-libavThese packages provide support for a wider range of video and audio formats.
Troubleshooting Common Issues
Even with a smooth installation, you might encounter some issues. Here are solutions to common problems:
Dependency Problems
If you encounter dependency errors, try the following:
sudo pacman -Syu
sudo pacman -S --needed base-devel
This updates your system and installs necessary development packages.
Performance Issues
If Kdenlive runs slowly:
- Enable proxy clips for smoother editing of high-resolution footage.
- Adjust the playback resolution in the project settings.
- Ensure your graphics drivers are up-to-date.
Audio/Video Codec Issues
If you can’t play certain video or audio files:
- Install additional codecs as mentioned in the post-installation setup.
- Check if the file is corrupted by trying to play it in another media player.
Updating Kdenlive
Keeping Kdenlive updated ensures you have the latest features and bug fixes. The update process depends on your installation method:
- For package manager installations:
sudo pacman -Syu - For Flatpak:
flatpak update - For source installations: Pull the latest changes and recompile
Regular updates are crucial for maintaining the stability and security of your video editing environment.
Congratulations! You have successfully installed Kdenlive. Thanks for using this tutorial for installing the Kdenlive on your Manjaro system. For additional help or useful information, we recommend you check the official Kdenlive website.