How To Install KubeSphere on Debian 12

KubeSphere is a powerful, enterprise-grade container platform built on Kubernetes. It provides a user-friendly interface for managing containerized applications and infrastructure. In this comprehensive guide, we’ll walk you through the process of installing KubeSphere on Debian 12, step by step. Whether you’re a DevOps engineer, system administrator, or just curious about container orchestration, this tutorial will help you get up and running with KubeSphere quickly and efficiently.
System Requirements
Before we dive into the installation process, let’s ensure your system meets the minimum requirements for running KubeSphere on Debian 12:
Hardware Specifications
- CPU: 2 cores (4 cores recommended for optimal performance)
- RAM: 4GB (8GB or more recommended)
- Storage: 40GB of free space (SSD preferred for better performance)
Software Prerequisites
- Debian 12 (Bookworm) with a clean installation
- Root or sudo access
- Internet connectivity for downloading packages
It’s crucial to start with a fresh Debian 12 installation to avoid potential conflicts with existing software or configurations. This approach ensures a smooth installation process and reduces the likelihood of errors.
Preparing Your Environment
Before installing KubeSphere, we need to prepare our Debian 12 system. Follow these steps to ensure your environment is ready:
Update System Packages
First, let’s update the package lists and upgrade existing packages to their latest versions:
sudo apt update
sudo apt upgrade -y
Install Essential Dependencies
KubeSphere requires several packages to function correctly. Install them using the following command:
sudo apt install curl socat conntrack ebtables ipset -yDisable Swap
Kubernetes, which KubeSphere runs on, performs better with swap disabled. To turn off swap, execute:
sudo swapoff -aTo make this change permanent, edit the /etc/fstab file and comment out any swap entries by adding a # at the beginning of the line.
Configure Firewall
If you’re using a firewall, ensure the following ports are open:
- TCP 6443: Kubernetes API server
- TCP 2379-2380: etcd server client API
- TCP 10250: Kubelet API
- TCP 10251: kube-scheduler
- TCP 10252: kube-controller-manager
- TCP 30000-32767: NodePort Services
For UFW users, you can open these ports with:
sudo ufw allow 6443/tcp
sudo ufw allow 2379:2380/tcp
sudo ufw allow 10250/tcp
sudo ufw allow 10251/tcp
sudo ufw allow 10252/tcp
sudo ufw allow 30000:32767/tcp
Installing KubeKey
KubeKey is the installation tool for KubeSphere. It simplifies the process of setting up Kubernetes and KubeSphere. Let’s download and prepare KubeKey:
Download KubeKey
Run the following command to download KubeKey:
curl -sfL https://get-kk.kubesphere.io | VERSION=v3.0.13 sh -If you’re in a region with restricted access to GitHub, set the download zone first:
export KKZONE=cn
curl -sfL https://get-kk.kubesphere.io | VERSION=v3.0.13 sh -
Make KubeKey Executable
After downloading, make the KubeKey binary executable:
chmod +x kkDeploying Kubernetes and KubeSphere
Now that we have KubeKey ready, let’s proceed with the installation of Kubernetes and KubeSphere:
All-in-One Installation
For a quick setup on a single node, use the following command:
./kk create cluster --with-kubernetes v1.22.12 --with-kubesphere v3.4.1This command installs Kubernetes v1.22.12 and KubeSphere v3.4.1. Adjust these versions as needed, but ensure they’re compatible.
Custom Configuration
For more control over the installation, you can create a configuration file:
./kk create config --with-kubernetes v1.22.12 --with-kubesphere v3.4.1This generates a config-sample.yaml file. Edit this file to customize your installation, then run:
./kk create cluster -f config-sample.yamlMulti-Node Setup
For a production environment, it’s recommended to set up a multi-node cluster. Edit the configuration file to include multiple nodes, then run the create cluster command as shown above.
Verifying the Installation
After the installation completes, verify that KubeSphere is running correctly:
Check Pod Status
Run the following command to ensure all pods are running:
kubectl get pods --all-namespacesAccess KubeSphere Console
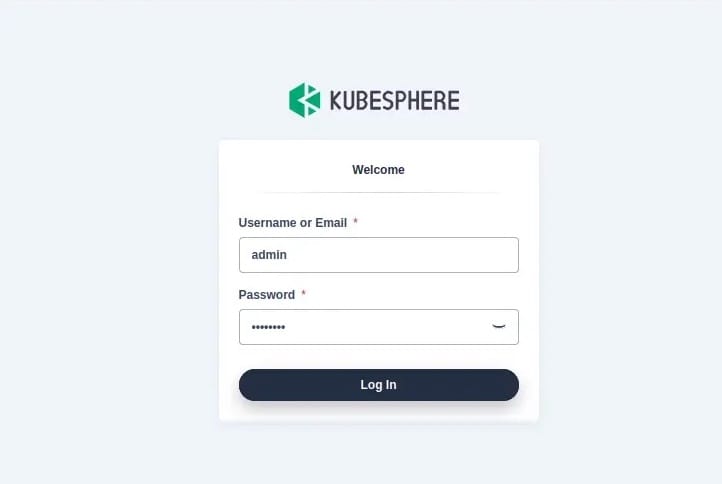
The KubeSphere console is typically accessible at http://<node-ip>:30880. Use these default credentials:
- Username: admin
- Password: P@88w0rd
Remember to change the default password upon first login for security reasons.

Post-Installation Configuration
After successfully installing KubeSphere, consider these post-installation steps:
Enable Additional Components
KubeSphere offers various optional components. To enable them, edit the KubeSphere configuration:
kubectl edit cm -n kubesphere-system ks-installerSet the desired components to “true” and save the file. KubeSphere will automatically start installing these components.
Configure Storage
For persistent storage, configure a storage class. KubeSphere supports various storage solutions. For local storage, you can use OpenEBS:
kubectl apply -f https://openebs.github.io/charts/openebs-operator.yamlSet Up Monitoring
Enable the built-in monitoring features in KubeSphere for comprehensive cluster insights:
kubectl patch cc ks-installer -n kubesphere-system --type merge --patch '{"spec":{"monitoring":{"enabled":true}}}'Troubleshooting Common Issues
Even with careful preparation, you might encounter some issues. Here are solutions to common problems:
Pod Startup Failures
If pods fail to start, check the logs:
kubectl describe pod <pod-name> -n <namespace>Common causes include insufficient resources or image pull errors.
Network Issues
Ensure your network plugin is correctly configured. For Calico:
kubectl get pods -n kube-system | grep calicoIf pods are not running, reinstall the network plugin.
Console Access Problems
If you can’t access the KubeSphere console, verify the ks-console service is running:
kubectl get svc ks-console -n kubesphere-systemCheck firewall settings and ensure the NodePort is accessible.
Optimizing KubeSphere Performance
To get the best performance out of your KubeSphere installation:
Resource Allocation
Adjust resource requests and limits for KubeSphere components based on your hardware:
kubectl edit deployment ks-console -n kubesphere-systemCaching and CDN
Implement a caching solution or CDN for the KubeSphere console to improve load times for remote users.
Regular Updates
Keep your KubeSphere installation up to date. Check for updates regularly:
./kk upgrade --with-kubernetes v1.22.12 --with-kubesphere v3.4.1Congratulations! You have successfully installed KubeSphere. Thanks for using this tutorial for installing the KubeSphere open-source container platform on Debian 12 “Bookworm” system. For additional help or useful information, we recommend you check the official KubeSphere website.