How To Install KubeSphere on openSUSE

KubeSphere is a powerful, open-source container platform built on Kubernetes that provides enterprises with a robust and feature-rich environment for cloud-native application management. In this comprehensive guide, we’ll walk you through the process of installing KubeSphere on openSUSE, offering detailed instructions, troubleshooting tips, and additional resources to ensure a smooth deployment.
KubeSphere has gained popularity among DevOps teams and system administrators for its user-friendly interface and comprehensive set of tools for managing containerized applications. By installing KubeSphere on openSUSE, you can leverage the stability and security of the openSUSE operating system while harnessing the power of a cutting-edge container orchestration platform.
Prerequisites
Before we dive into the installation process, let’s ensure your system meets the necessary requirements:
Hardware Requirements
- Minimum 2 vCPU
- 4GB RAM
- 80GB SSD storage
- Supported openSUSE Versions
- openSUSE Leap 15.2 and above
System Preparation Checklist
- Ensure your system is up-to-date
- Verify that you have root or sudo access
- Check that your network configuration allows for container communication
Pre-Installation Setup
To prepare your openSUSE system for KubeSphere installation, follow these steps:
System Updates and Package Management
First, update your system and install essential dependencies:
sudo zypper refresh
sudo zypper update
sudo zypper install -y curl socat conntrack-tools ebtables ipset
Network Configuration Requirements
Ensure that your network allows communication on the following ports:
- 6443 for Kubernetes API server
- 2379-2380 for etcd server client API
- 10250 for Kubelet API
- 10251 for kube-scheduler
- 10252 for kube-controller-manager
- 10255 for Kubelet’s read-only API
Firewall Settings
If you’re using firewalld, you may need to open these ports:
sudo firewall-cmd --permanent --add-port=6443/tcp
sudo firewall-cmd --permanent --add-port=2379-2380/tcp
sudo firewall-cmd --permanent --add-port=10250/tcp
sudo firewall-cmd --permanent --add-port=10251/tcp
sudo firewall-cmd --permanent --add-port=10252/tcp
sudo firewall-cmd --permanent --add-port=10255/tcp
sudo firewall-cmd --reload
KubeKey Installation Process
KubeKey is the next-generation installer for KubeSphere and Kubernetes. Here’s how to get it set up:
Downloading KubeKey
To download KubeKey, run the following command:
curl -sfL https://get-kk.kubesphere.io | VERSION=v3.0.2 sh -
Version Selection Considerations
When selecting a version, consider the following:
- Compatibility with your openSUSE version
- Desired Kubernetes version
- Specific KubeSphere features you need
Making KubeKey Executable
After downloading, make KubeKey executable:
chmod +x kk
Configuration Options
KubeKey offers various configuration options. You can create a config file using:
./kk create config --with-kubernetes v1.22.12 --with-kubesphere v3.4.1
This will create a YAML file that you can edit to customize your installation.
KubeSphere Deployment
Now that we have KubeKey ready, let’s deploy KubeSphere:
Cluster Creation Command Syntax
The basic syntax for creating a cluster is:
./kk create cluster [--with-kubernetes version] [--with-kubesphere version]
Version Compatibility Matrix
Ensure you’re using compatible versions of Kubernetes and KubeSphere. As of this writing, KubeSphere 3.4.1 is compatible with Kubernetes versions 1.19.x, 1.20.x, 1.21.x, and 1.22.x.
Installation Modes
KubeSphere offers two installation modes:
Minimal Installation
For a basic setup, use:
./kk create cluster --with-kubernetes v1.22.12 --with-kubesphere v3.4.1
Full Installation
For a complete installation with all features, use:
./kk create cluster --with-kubernetes v1.22.12 --with-kubesphere v3.4.1 -f config-sample.yaml
Container Runtime Selection
KubeSphere supports multiple container runtimes. To specify a runtime, add the –container-manager flag:
./kk create cluster --with-kubernetes v1.22.12 --with-kubesphere v3.4.1 --container-manager containerd
Cluster Initialization Process
The initialization process involves several steps:
- Preflight checks
- Dependency installation
- Kubernetes deployment
- KubeSphere component installation
- System configuration
This process can take 15-30 minutes depending on your system’s performance and network speed.
Post-Installation Configuration
After successful installation, there are several steps to configure and secure your KubeSphere deployment:
Accessing the KubeSphere Console
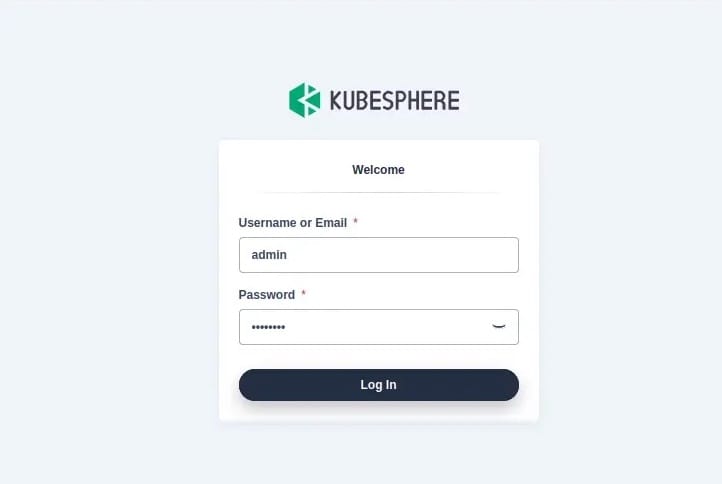
To access the KubeSphere console, open a web browser and navigate to:
http://<node_ip>:30880
Replace <node_ip> with your server’s IP address.

Default Credentials Management
The default login credentials are:
- Username: admin
- Password: P@88w0rd
It’s crucial to change these credentials immediately after your first login.
Basic Cluster Verification
Verify your cluster’s health by running:
kubectl get nodes
kubectl get pods --all-namespaces
Initial System Settings
After logging in, navigate to the System Settings to configure:
- Cluster roles and permissions
- Storage classes
- Network policies
- Monitoring and logging settings
Advanced Configuration
For more advanced setups, consider the following configurations:
Storage Class Setup
KubeSphere uses OpenEBS LocalPV by default. To configure other storage classes:
- Navigate to Platform > Cluster Management
- Select Storage > Storage Classes
- Click Create to add a new storage class
Network Policy Configuration
To enhance security with network policies:
- Go to Projects > Your Project > Network
- Click Create to define new network policies
Resource Management
Set resource quotas and limits:
- Navigate to Projects > Your Project > Quotas
- Click Edit Quotas to adjust CPU, memory, and storage limits
Multi-tenant Setup
To configure multi-tenancy:
- Go to Access Control > Workspaces
- Create new workspaces and assign users with appropriate roles
Troubleshooting Guide
Even with careful planning, issues may arise. Here are some common problems and their solutions:
Common Installation Issues
- **Node Not Ready**: Check network connectivity and ensure kubelet is running.
- **Pod Pending**: Verify that you have sufficient resources and no taints preventing scheduling.
- **ImagePullBackOff**: Ensure your nodes can access the container registry.
Error Resolution Steps
- Check logs:
kubectl logs <pod_name> -n <namespace> - Describe resources:
kubectl describe pod/node/deployment <name> - Verify services:
kubectl get services
Log Analysis
To analyze logs effectively:
- Use
kubectl logsfor individual pod logs - Employ
kubectl get eventsto see cluster-wide events - Check system logs in
/var/log/messagesorjournalctl
Performance Optimization
To optimize KubeSphere performance:
- Adjust resource limits for components
- Use node labels for efficient scheduling
- Implement horizontal pod autoscaling
Congratulations! You have successfully installed KubeSphere. Thanks for using this tutorial for installing the KubeSphere open-source container platform on openSUSE system. For additional help or useful information, we recommend you check the official KubeSphere website.