How To Install KubeSphere on Ubuntu 22.04 LTS

In this tutorial, we will show you how to install KubeSphere on Ubuntu 22.04 LTS. For those of you who didn’t know, KubeSphere is an enterprise-grade container platform that enables users to deploy, manage, and scale containerized applications on Kubernetes. It provides a unified interface for managing Kubernetes clusters and simplifies the deployment process for developers.
This article assumes you have at least basic knowledge of Linux, know how to use the shell, and most importantly, you host your site on your own VPS. The installation is quite simple and assumes you are running in the root account, if not you may need to add ‘sudo‘ to the commands to get root privileges. I will show you the step-by-step installation of KubeSphere on Ubuntu 22.04 (Jammy Jellyfish). You can follow the same instructions for Ubuntu 22.04 and any other Debian-based distribution like Linux Mint, Elementary OS, Pop!_OS, and more as well.
Prerequisites
- A server running one of the following operating systems: Ubuntu 22.04, 20.04, and any other Debian-based distribution like Linux Mint.
- It’s recommended that you use a fresh OS install to prevent any potential issues.
- An active internet connection. You’ll need an internet connection to download the necessary packages and dependencies for KubeSphere, and Kubernetes.
- SSH access to the server (or just open Terminal if you’re on a desktop).
- A
non-root sudo useror access to theroot user. We recommend acting as anon-root sudo user, however, as you can harm your system if you’re not careful when acting as the root.
Install KubeSphere on Ubuntu 22.04 LTS Jammy Jellyfish
Step 1. First, make sure that all your system packages are up-to-date by running the following apt commands in the terminal.
sudo apt update
sudo apt upgrade
sudo apt install curl socat conntrack ebtables ipset
Step 2. Setup Hosts.
Now open the file ‘/etc/hosts‘ using your favorite text editor:
nano /etc/hosts
Add details of server IP addresses and hostname to the file:
192.168.77.20    master    master
192.168.77.121   node1     node1
192.168.77.122   node2     node2
Step 3. Installing KubeKey on Master Node.
Now install KubeKey by running the following command:
curl -sfL https://get-kk.kubesphere.io | VERSION=v3.0.2 sh -
Next, make the file ‘kk‘ executable:
chmod +x kk
After KubeKey is downloaded, you will next start the configuration of Kubernetes and Kubesphere deployment via KubeKey. Now generate a new YAML configuration. In this example, you will generate a new YAML script ‘deployment-kubesphre.yml‘ and specify the Kubernetes version to v1.24.2 and the Kubesphere v3.3.2:
./kk create config -f deployment-kubesphre.yml --with-kubernetes v1.24.2 --with-kubesphere v3.3.2
After that, open the YAML file ‘deployment-kubesphre.yml‘ using your favorite text editor:
nano deployment-kubesphre.yml
Change the cluster name in the parameter ‘metadata: testdeployment‘, and change the detail host’s IP address, user, and private key for logging into the target servers. Lastly, on the ‘roleGroup‘, specify which host that will be used as the control plane and worker nodes:
apiVersion: kubekey.kubesphere.io/v1alpha2
kind: Cluster
metadata:
  name: testdeployment
spec:
  hosts:
  - {name: master, address: 192.168.77.20, internalAddress: 192.168.77.20, user: ubuntu, privateKeyPath: "~/.ssh/id_ed25519"}
  - {name: node1, address: 192.168.77.121, internalAddress: 192.168.77.121, user: ubuntu, privateKeyPath: "~/.ssh/id_ed25519"}
  - {name: node2, address: 192.168.77.122, internalAddress: 192.168.77.122, user: ubuntu, privateKeyPath: "~/.ssh/id_ed25519"}
  roleGroups:
    etcd:
    - master
    control-plane:
    - master
    worker:
    - node1
    - node2
Save the file and exit the editor when finished.
Step 4. Deploying Kubernetes and Kubesphere.
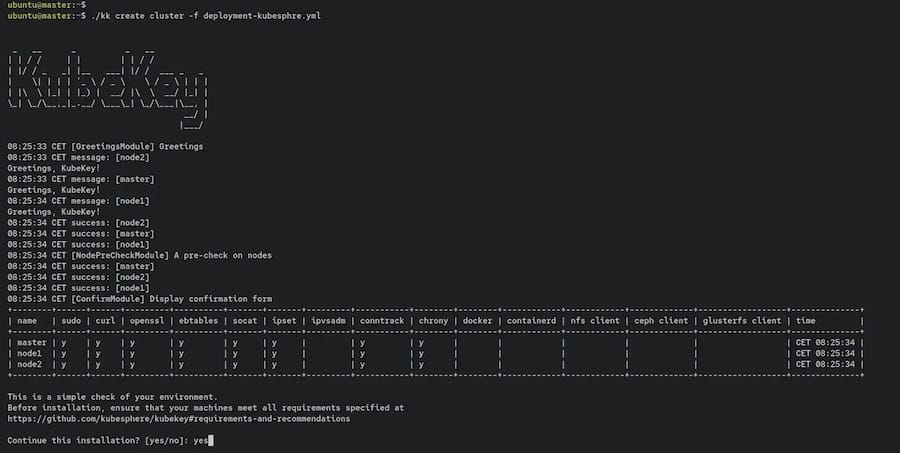
Now run the Kubekey ‘kk‘ binary file below to start the Kubernetes and Kubesphere deployment with the YAML file ‘deployment-kubesphre.yml‘.

This will take time like 5-10 minutes for the deployment to complete.
Step 5. Configure Firewall.
Now we set up an Uncomplicated Firewall (UFW) with KubeSphere to allow public access on default web ports for 30880:
sudo ufw allow OpenSSH
sudo ufw allow 30880
sudo ufw enable
Step 6. Accessing KubeSphere Web Interface.
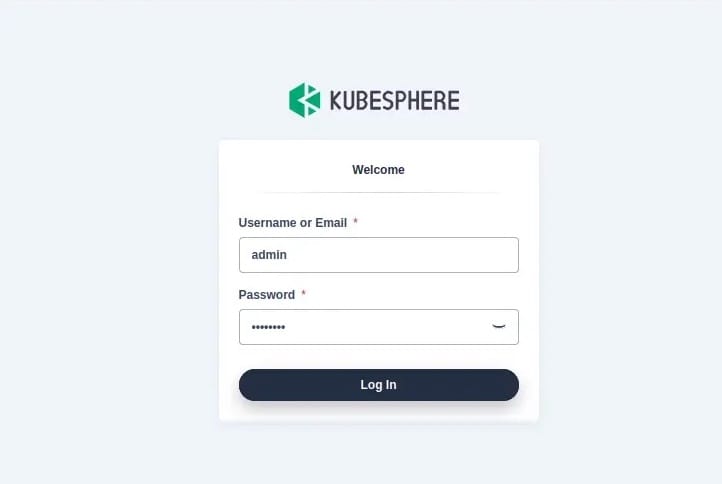
Once successfully installed, now open your web browser and access the KubeSphere Web UI using the URL http://192.168.77.20:30880/. You will be redirected to the following page:

Type the user as ‘admin‘ and the default password ‘your-strong-passwd‘, then click Log In.
Congratulations! You have successfully installed KubeSphere. Thanks for using this tutorial for installing KubeSphere open-source container platform on Ubuntu 22.04 LTS Jammy Jellyfish system. For additional help or useful information, we recommend you check the official KubeSphere website.