
In this tutorial, we will show you how to install KVM on Debian 11. For those of you who didn’t know, KVM (Kernel-based Virtual Machine) is an open-source full virtualization solution for Linux Systems running on x86 hardware with virtualization extensions (Intel VT or AMD-V). You can use KVM to run multiple operating systems such as Windows, *BSD, and Linux distribution using virtual machines. Each virtual machine has its private disk, graphics card, network card, and more.
This article assumes you have at least basic knowledge of Linux, know how to use the shell, and most importantly, you host your site on your own VPS. The installation is quite simple and assumes you are running in the root account, if not you may need to add ‘sudo‘ to the commands to get root privileges. I will show you the step-by-step installation of the KVM virtualization on a Debian 11 (Bullseye).
Prerequisites
- A server running one of the following operating systems: Debian 11 (Bullseye).
- It’s recommended that you use a fresh OS install to prevent any potential issues.
- A
non-root sudo useror access to theroot user. We recommend acting as anon-root sudo user, however, as you can harm your system if you’re not careful when acting as the root.
Install KVM on Debian 11 Bullseye
Step 1. Before we install any software, it’s important to make sure your system is up to date by running the following apt commands in the terminal:
sudo apt update
sudo apt upgrade
Step 2. Check Virtualization Support.
Before you begin installing KVM, check if your CPU supports hardware virtualization. Now open the command terminal and run the given commands:
egrep -c '(vmx|svm)' /proc/cpuinfo
grep -E --color '(vmx|svm)' /proc/cpuinfo
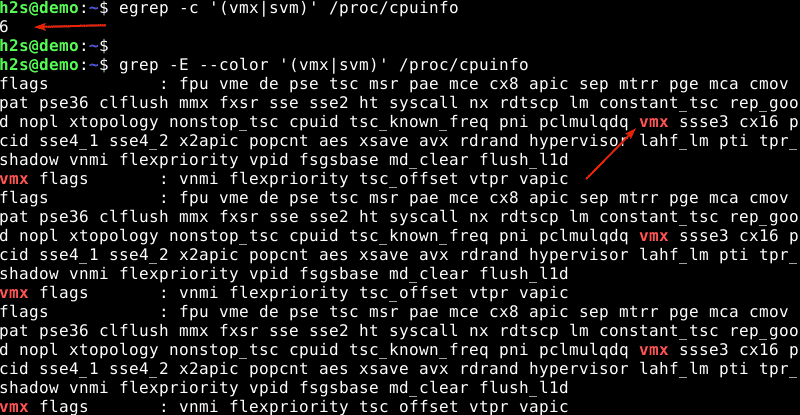
If the output of the above command is more than zero then we can say Virtualization technology is enabled on your system. If the output is zero then we must restart the system, go to bios settings and then enable VT-x (Virtualization Technology Extension) for the Intel processor and AMD-V for the AMD processor.
Step 3. Installing KVM on Debian 11.
Now we install all the required for the installation of Qemu, KVM hypervisor, and Libvirt on the Debian 11 system:
sudo apt install qemu-kvm libvirt-clients libvirt-daemon-system bridge-utils virtinst libvirt-daemon
After that, install essential KVM packages with the following command:
sudo apt install virt-manager
Next, run the virsh command to list available networks for KVM VMs:
sudo virsh net-list --all
Output:
 Name                 State      Autostart     Persistent
----------------------------------------------------------
 default              inactive   no            yes
As we can see in the above output, the default network is inactive so to make it active and auto-restart across the reboot by running the following commands below:
sudo virsh net-start default
sudo vrish net-autostart default
Step 4. Create Virtual Machines using Virt-Manager GUI.
First, open the Application launcher and search for “Virtual machine manager” (VVM) and run it. Before it opens, the system will ask to provide the root password.
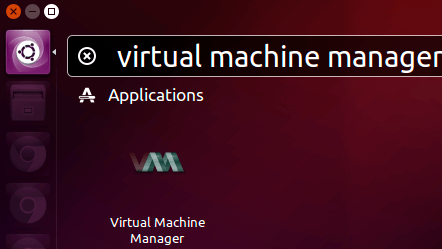
In the virtual machine manager window, click the first icon in the toolbar.

Next, choose the location of your installation media.
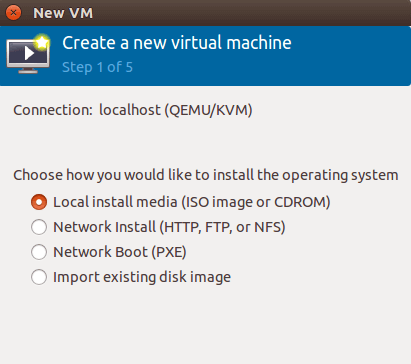
You can install it from a disc, ISO image, or even a network location.
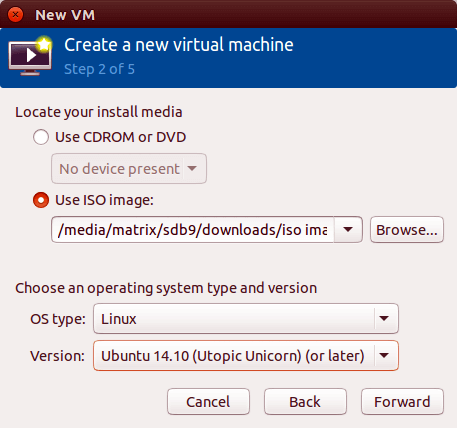
Next, allocate memory and CPU to your virtual machine.
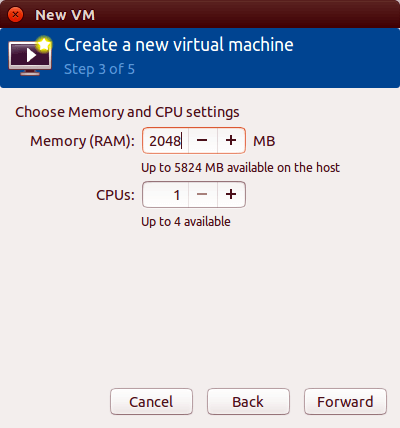
After that, specify the size of your virtual disk. If you check the box before allocating the entire disk now, then the disk size is fixed.
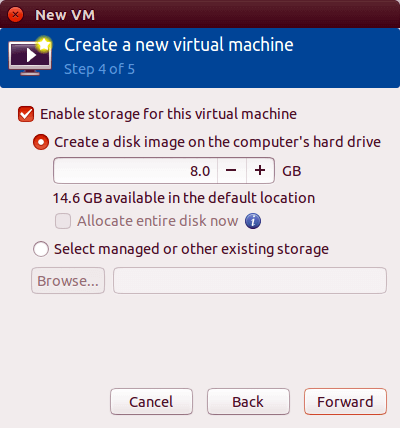
In the next window, you can give your virtual machine a name. Then click Finish to begin installing OS to your virtual machine.
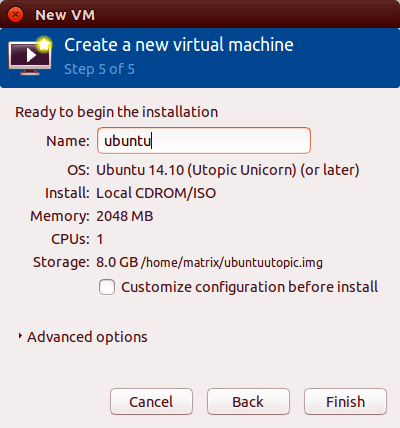
Once successfully set up, you will have a boot virtual machine that can be controlled just like any physical computer using a keyboard and mouse:
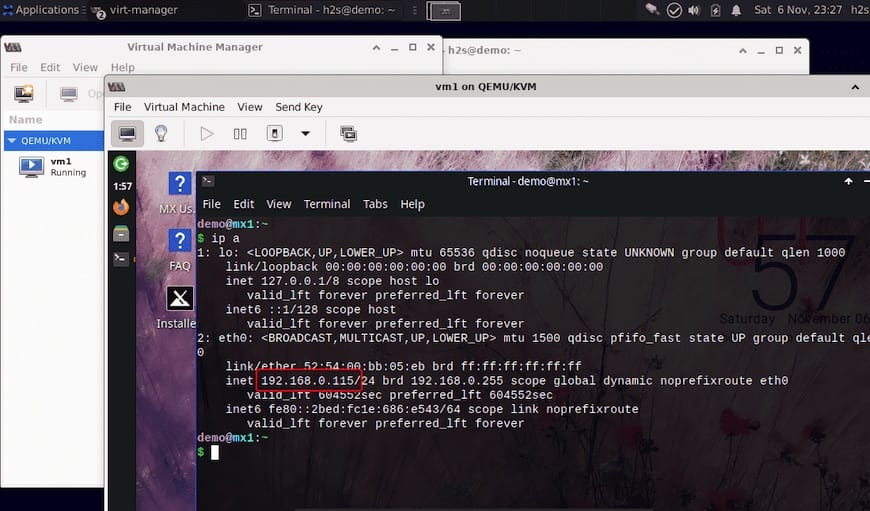
Congratulations! You have successfully installed KVM. Thanks for using this tutorial for installing the latest version of KVM (Kernel-based Virtual Machine) on Debian 11 Bullseye. For additional help or useful information, we recommend you check the official KVM website.