How To Install Laravel on Ubuntu 24.04 LTS

In this tutorial, we will show you how to install Laravel on Ubuntu 24.04 LTS. Laravel is one of the most popular PHP web frameworks known for its elegant syntax, powerful features, and excellent documentation. It provides developers with the tools they need to build modern, scalable web applications quickly and efficiently.
This article assumes you have at least basic knowledge of Linux, know how to use the shell, and most importantly, you host your site on your own VPS. The installation is quite simple and assumes you are running in the root account, if not you may need to add ‘sudo‘ to the commands to get root privileges. I will show you the step-by-step installation of Laravel on Ubuntu 24.04 (Noble Numbat). You can follow the same instructions for Ubuntu 22.04 and any other Debian-based distribution like Linux Mint, Elementary OS, Pop!_OS, and more as well.
Prerequisites
- A server running one of the following operating systems: Ubuntu and any other Debian-based distribution like Linux Mint.
- It’s recommended that you use a fresh OS install to prevent any potential issues.
- Basic knowledge of the Linux command line.
- SSH access to the server (or just open Terminal if you’re on a desktop).
- An active internet connection. You’ll need an internet connection to download the necessary packages and dependencies.
- An Ubuntu 24.04 system with root access or a user with sudo privileges.
Install Laravel on Ubuntu 24.04 LTS
Step 1. Update Your System.
To ensure a smooth installation, it’s essential to update your Ubuntu system to the latest stable release. Open your terminal and run the following commands:
sudo apt update
sudo apt upgrade
This will fetch the latest package information and upgrade any outdated packages to their newest versions.
Step 2. Installing PHP and Required Extensions.
Laravel requires PHP version 8.3 or higher to run. Ubuntu 24.04 LTS comes with PHP 8.3 in its default repositories. To install PHP and the necessary extensions, run:
sudo apt install php8.3 php8.3-cli php8.3-common php8.3-curl php8.3-mbstring php8.3-mysql php8.3-xml php8.3-zip
These packages include the PHP command-line interface, common PHP libraries, and extensions for cURL, multibyte string handling, MySQL, XML parsing, and ZIP archives.
Verify your PHP installation by checking the version:
php -v
You should see output similar to:
PHP 8.3.6 (cli) (built: May 20 2024 15:30:04) (NTS)
Copyright (c) The PHP Group
Zend Engine v4.3.6, Copyright (c) Zend Technologies
    with Zend OPcache v8.3.6, Copyright (c), by Zend Technologies
Step 3: Installing Composer.
Composer is a dependency manager for PHP that allows you to easily install and manage Laravel and its dependencies. To install Composer, run the following commands:
curl -sS https://getcomposer.org/installer | php
sudo mv composer.phar /usr/local/bin/composer
This downloads the Composer installer and moves it to the /usr/local/bin directory, making it globally accessible.
Verify your Composer installation:
composer --version
You should see the Composer version number, confirming a successful installation.
Step 4. Installing and configuring MySQL.
If your Laravel application requires a database, you can install MySQL. Run the following command:
sudo apt install mysql-server
After the installation, secure your MySQL installation:
sudo mysql_secure_installation
Follow the prompts to set a root password, remove anonymous users, disable remote root login, and remove the test database.
To create a new MySQL database and user for your Laravel application, log in to the MySQL shell:
sudo mysql -u root -p
Enter the root password you set during the secure installation. Then, create a new database and user:
CREATE DATABASE laravel_db;
CREATE USER 'laravel_user'@'localhost' IDENTIFIED BY 'your_password';
GRANT ALL PRIVILEGES ON laravel_db.* TO 'laravel_user'@'localhost';
FLUSH PRIVILEGES;
EXIT;
Step 5. Installing Laravel.
With PHP, Composer, and MySQL set up, you’re ready to install Laravel. Navigate to the directory where you want to create your Laravel project and run:
composer create-project --prefer-dist laravel/laravel your_project_name
Replace your_project_name with the desired name for your Laravel project. This command creates a new directory with the specified name and installs Laravel and its dependencies.
Once the installation is complete, navigate to your project directory:
cd your_project_name
Step 6. Configure Laravel.
Laravel comes with a .env file that stores environment-specific configuration. Create a copy of the .env.example file:
cp .env.example .env
Open the .env file with your preferred text editor and update the database connection settings:
DB_CONNECTION=mysql
DB_HOST=127.0.0.1
DB_PORT=3306
DB_DATABASE=laravel_db
DB_USERNAME=laravel_user
DB_PASSWORD=your_password
Next, generate an application key:
php artisan key:generate
This command generates a unique key for your Laravel application, which is used for encryption and other security-related tasks.
Step 7. Configure Firewall.
UFW (Uncomplicated Firewall) installed, which is the default firewall configuration tool for Ubuntu.
Enable UFW to start managing your firewall rules:
sudo ufw enable
You can configure additional firewall rules as needed. For example, to allow incoming connections on a specific port:
sudo ufw allow 8080
sudo ufw reload
Check the UFW status to ensure it is enabled and the rules are applied:
sudo ufw status
Step 8. Test Your Installation.
To verify that your Laravel installation is working correctly, start the built-in development server:
php artisan serve
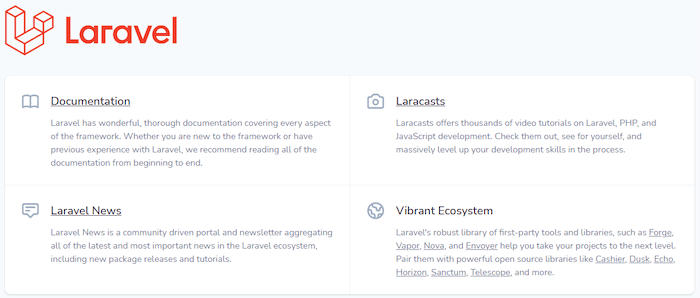
Open your web browser and visit http://localhost:8000. You should see the default Laravel welcome page.

Congratulations! You have successfully installed Laravel. Thanks for using this tutorial for installing Laravel on the Ubuntu 24.04 LTS system. For additional help or useful information, we recommend you check the Laravel website.