How To Install LEMP Stack on Ubuntu 22.04 LTS

In this tutorial, we will show you how to install LEMP Stack on Ubuntu 22.04 LTS. For those of you who didn’t know, LEMP Stack is a combination of free, open-source software. The acronym LEMP refers to the first letters of Linux (Operating system), Nginx Server, MariaDB (database software), and PHP components to build a viable general-purpose web server.
This article assumes you have at least basic knowledge of Linux, know how to use the shell, and most importantly, you host your site on your own VPS. The installation is quite simple and assumes you are running in the root account, if not you may need to add ‘sudo‘ to the commands to get root privileges. I will show you the step-by-step installation of the LEMP Stack on Ubuntu 22.04 (Jammy Jellyfish). You can follow the same instructions for Ubuntu 22.04 and any other Debian-based distribution like Linux Mint, Elementary OS, Pop!_OS, and more as well.
Prerequisites
- A server running one of the following operating systems: Ubuntu 22.04, 20.04, and any other Debian-based distribution like Linux Mint.
- It’s recommended that you use a fresh OS install to prevent any potential issues.
- SSH access to the server (or just open Terminal if you’re on a desktop).
- A
non-root sudo useror access to theroot user. We recommend acting as anon-root sudo user, however, as you can harm your system if you’re not careful when acting as the root.
Install LEMP Stack on Ubuntu 22.04 LTS Jammy Jellyfish
Step 1. First, make sure that all your system packages are up-to-date by running the following apt commands in the terminal.
sudo apt update
sudo apt upgrade
sudo apt install lsb-release ca-certificates apt-transport-https software-properties-common
Step 2. Installing Nginx on Ubuntu 22.04.
By default, the Nginx is available on Ubuntu 22.04 base repository. Now run the following command below to install the latest version of Nginx to your Ubuntu system:
sudo apt install nginx
After successfully installation, enable Nginx (to start automatically upon system boot), start, and verify the status using the commands below:
sudo systemctl enable nginx
sudo systemctl start nginx
sudo systemctl status nginx
Confirm the installation and check the installed build version of Nginx:
nginx -v
Step 3. Configure Firewall.
Ubuntu 22.04 has ufw a firewall running by default. Enable connection through ports 80 HTTP and 443 HTTPS:
sudo ufw allow 'Nginx FULL'
sudo ufw enable
sudo ufw status
Step 4. Accessing Nginx Web Server.
Once successfully installed, open a web browser on your system and type the server’s IP in the address bar. You will get the default Nginx server page:

Step 5. Installing MariaDB on Ubuntu 22.04.
By default, the MariaDB is available on Ubuntu 22.04 base repository. Now run the following command below to install the latest version of MariaDB to your Ubuntu system:
sudo apt install mariadb-server mariadb-client
After successful installation, enable MariaDB (to start automatically upon system boot), start, and verify the status using the commands below:
sudo systemctl enable mariadb
sudo systemctl start mariadb
sudo systemctl status mariadb
Confirm the installation and check the installed build version of MariaDB:
mariadb --version
Step 6. Secure MariaDB installation.
By default, MariaDB is not hardened. You can secure MariaDB using the mysql_secure_installation script. you should read and below each step carefully which will set a root password, remove anonymous users, disallow remote root login, and remove the test database and access to secure MariaDB:
mysql_secure_installation
Configure it like this:
- Set root password? [Y/n] y
- Remove anonymous users? [Y/n] y
- Disallow root login remotely? [Y/n] y
- Remove test database and access to it? [Y/n] y
- Reload privilege tables now? [Y/n] y
You can now connect to the MariaDB server using the new password:
mysql -u root -p
Output:
Enter password:
Welcome to the MariaDB monitor. Commands end with ; or \g.
Your MariaDB connection id is 46
Server version: 10.6.7-MariaDB-2ubuntu1 Ubuntu 22.04

Copyright (c) 2000, 2018, Oracle, MariaDB Corporation Ab and others.

Type 'help;' or '\h' for help. Type '\c' to clear the current input statement.

MariaDB [(none)]>
Step 7. Installing PHP on Ubuntu 22.04.
By default, the PHP is not available on Ubuntu 22.04 base repository. Now run the following command below to add the Ondrej PPA to your system:
sudo add-apt-repository ppa:ondrej/php
After the repository was added, Update the APT index then install PHP 8.1 using the following command below:
sudo apt update
sudo apt install php8.1 php8.1-common libapache2-mod-php8.1 php8.1-cli php8.1-fpm php8.1-xml
Confirm the installation and check the installed build version of PHP:
php --version
After successfully installation, enable php-fpm (to start automatically upon system boot), start, and verify the status using the commands below:
sudo systemctl enable php8.1-fpm
sudo systemctl start php8.1-fpm
sudo systemctl status php8.1-fpm
Step 8. Setting Up Nginx Server Blocks.
Now create a new server block file under /etc/nginx/conf.d/ directory:
nano /etc/nginx/conf.d/default.conf
Add the following file:
  server {
  listen 80;
  listen [::]:80;
  server_name _;
  root /var/www/html/;
  index index.php index.html index.htm index.nginx-debian.html;

  location / {
    try_files $uri $uri/ /index.php;
  }

  location ~ \.php$ {
    fastcgi_pass unix:/run/php/php8.1-fpm.sock;
    fastcgi_param SCRIPT_FILENAME $document_root$fastcgi_script_name;
    include fastcgi_params;
    include snippets/fastcgi-php.conf;
  }

 # A long browser cache lifetime can speed up repeat visits to your page
  location ~* \.(jpg|jpeg|gif|png|webp|svg|woff|woff2|ttf|css|js|ico|xml)$ {
       access_log        off;
       log_not_found     off;
       expires           360d;
  }

  # disable access to hidden files
  location ~ /\.ht {
      access_log off;
      log_not_found off;
      deny all;
  }
}
Save and close the file, then restart the Nginx web server to take the change effect:
nginx -t
sudo systemctl start nginx
Step 9. Test PHP.
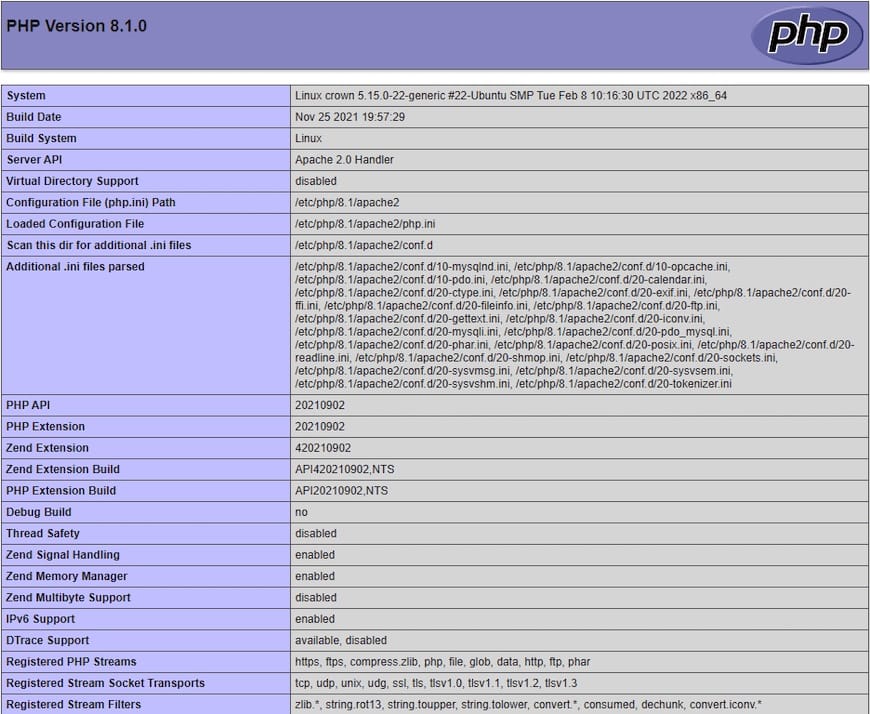
To test PHP scripts we need to add the info.php file in the document:
nano /var/www/html/info.php
Add the following to the file:
<?php phpinfo(); ?>
Let’s make sure that the server correctly displays the content generated by the PHP script by opening this page in the browser: http://your-IP-address/info.php

Step 10. Secure Nginx with Let’s Encrypt SSL.
Let’s Encrypt is a certificate authority that provides free SSL certificates for websites. Let’s Encrypt supports auto installation of certificates on Nginx. Now run the following command below to install it:
sudo apt install python3-certbot-nginx
Next, run the following command to start the creation of your certificate:
sudo certbot --nginx --agree-tos --redirect --hsts --staple-ocsp --email admin@domain.com -d www.domain.com
After that, we set up auto-renewal SSL because Let’s Encrypt is valid for 90 days only, so you need to renew them often using the following command:
sudo certbot renew --dry-run
Step 11. Test SSL.
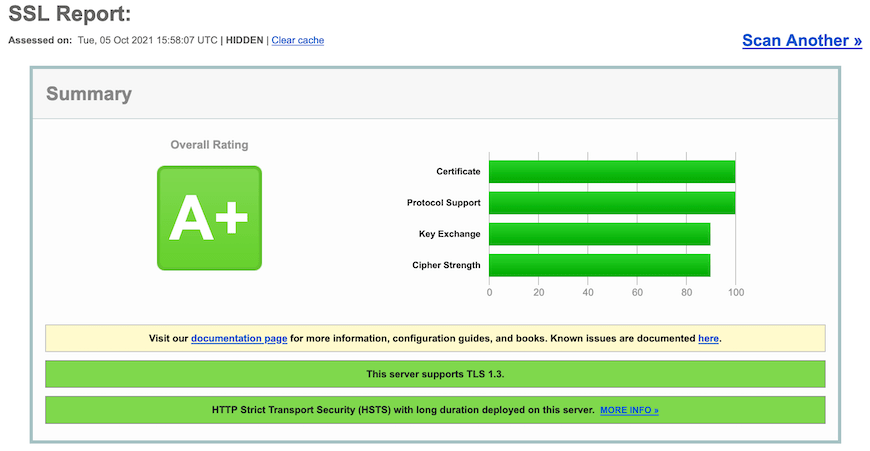
Once successfully completed secure Nginx with Let’s Encrypt SSL, now go to ssllabs.com/ssltest/, and run an SSL test on your domain:

Congratulations! You have successfully installed LEMP. Thanks for using this tutorial for installing the LEMP Stack on Ubuntu 22.04 LTS Jammy Jellyfish system. For additional help or useful information, we recommend you check the official LEMP website.