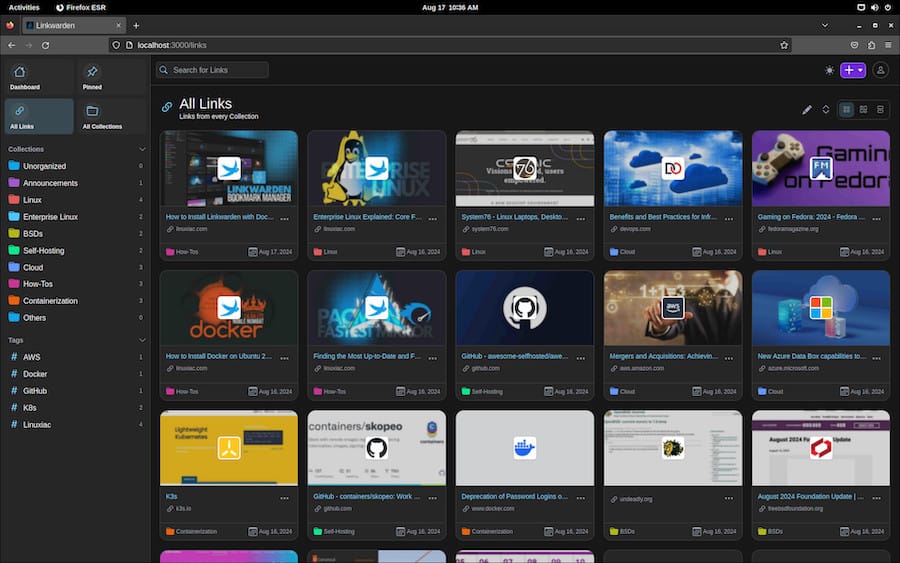
How To Install Linkwarden on Ubuntu 24.04 LTS

In this tutorial, we will show you how to install Linkwarden on Ubuntu 24.04 LTS. Linkwarden is a self-hosted, open-source bookmark and link management platform designed to help users organize their web resources efficiently. It offers a clean, intuitive interface that allows for easy categorization, tagging, and searching of bookmarks. Unlike traditional browser-based bookmark systems, Linkwarden provides advanced features such as collaboration tools, public and private collections, and detailed metadata for each saved link.
This article assumes you have at least basic knowledge of Linux, know how to use the shell, and most importantly, you host your site on your own VPS. The installation is quite simple and assumes you are running in the root account, if not you may need to add ‘sudo‘ to the commands to get root privileges. I will show you the step-by-step installation of the Linkwarden on Ubuntu 24.04 (Noble Numbat). You can follow the same instructions for Ubuntu 22.04 and any other Debian-based distribution like Linux Mint, Elementary OS, Pop!_OS, and more as well.
Prerequisites
- A server running one of the following operating systems: Ubuntu and any other Debian-based distribution like Linux Mint.
- It’s recommended that you use a fresh OS install to prevent any potential issues.
- Basic familiarity with the command line interface.
- SSH access to the server (or just open Terminal if you’re on a desktop).
- Sufficient storage space for the Linkwarden application.
- At least 2GB of RAM (4GB recommended).
- Minimum 10GB of free disk space.
- An active internet connection. You’ll need an internet connection to download the necessary packages and dependencies.
- An Ubuntu 24.04 system with root access or a user with sudo privileges.
Install Linkwarden on Ubuntu 24.04
Step 1. Updating the Package Repository.
To ensure a smooth installation process, start by updating your system packages and installing the necessary dependencies. Open a terminal and run the following commands:
sudo apt update
sudo apt upgrade
Next, install the required software packages:
sudo apt install git nodejs npm postgresql
Verify the installations by checking the versions:
git --version
node --version
npm --version
psql --version
Step 2. Installing Linkwarden.
- Method 1: Docker Installation
Docker provides an easy and isolated environment for running Linkwarden. This method is recommended for users who prefer a quick setup and simplified management.
First, install Docker by following these steps:
sudo apt install docker.io docker-compose
sudo systemctl enable --now docker
sudo usermod -aG docker $USER
Pull the latest Linkwarden Docker image:
docker pull ghcr.io/linkwarden/linkwarden:latest
Create a directory for Linkwarden and set up the environment file:
mkdir ~/linkwarden
cd ~/linkwarden
nano .env
Add the following content to the .env file, adjusting values as needed:
POSTGRES_DB=linkwarden
POSTGRES_USER=linkwardenuser
POSTGRES_PASSWORD=your_secure_password
NEXTAUTH_SECRET=your_nextauth_secret
NEXTAUTH_URL=http://localhost:3000
Save and close the file.
Next, create a docker-compose.yml file:
nano docker-compose.yml
Add the following content:
version: '3'
services:
  linkwarden:
    image: ghcr.io/linkwarden/linkwarden:latest
    ports:
      - "3000:3000"
    env_file:
      - .env
    depends_on:
      - db
  db:
    image: postgres:13
    volumes:
      - ./pgdata:/var/lib/postgresql/data
    env_file:
      - .env
Save the file and start the containers:
docker-compose up -d
Linkwarden should now be accessible at http://localhost:3000.
- Method 2: Manual Installation
For users who prefer more control over the installation process or need to customize certain aspects, manual installation is the way to go.
Start by cloning the Linkwarden repository:
git clone https://github.com/linkwarden/linkwarden.git
cd linkwarden
Create a new PostgreSQL database and user for Linkwarden:
sudo -u postgres psql
In the PostgreSQL prompt, run:
CREATE DATABASE linkwarden;
CREATE USER linkwardenuser WITH PASSWORD 'your_secure_password';
GRANT ALL PRIVILEGES ON DATABASE linkwarden TO linkwardenuser;
\q
Create a .env file in the Linkwarden directory:
nano .env
Add the following content, adjusting values as needed:
DATABASE_URL=postgresql://linkwardenuser:your_secure_password@localhost:5432/linkwarden
NEXTAUTH_SECRET=your_nextauth_secret
NEXTAUTH_URL=http://localhost:3000
Next, install dependencies and build the application:
npm install
npm run build
Start the Linkwarden server:
npm start
The application should now be accessible at http://localhost:3000.

Congratulations! You have successfully installed Linkwarden. Thanks for using this tutorial for installing the Linkwarden on the Ubuntu 24.04 LTS system. For additional help or useful information, we recommend you check the official Linkwarden website.