How To Install ManageEngine OpManager on Fedora 42
![]()
Managing enterprise network infrastructure requires robust monitoring solutions that deliver real-time visibility into network performance, device health, and security threats. ManageEngine OpManager stands as one of the leading network monitoring platforms, offering comprehensive monitoring capabilities for networks of all sizes. Installing this powerful tool on Fedora 42 provides system administrators with a stable, secure Linux foundation for their network monitoring operations.
Fedora 42 represents an excellent choice for OpManager deployment due to its cutting-edge technology stack, robust security features, and excellent hardware compatibility. The combination of OpManager’s enterprise-grade monitoring capabilities with Fedora’s reliability creates an optimal environment for network operations centers and IT departments seeking professional-grade monitoring solutions.
This comprehensive guide walks through every aspect of installing ManageEngine OpManager on Fedora 42, from initial system preparation to advanced configuration options. Whether you’re a seasoned Linux administrator or new to network monitoring platforms, these detailed instructions ensure successful deployment and optimal performance of your monitoring infrastructure.
Understanding ManageEngine OpManager
ManageEngine OpManager delivers comprehensive network monitoring, fault management, and performance analysis capabilities designed for modern enterprise environments. This unified monitoring platform provides real-time visibility into network devices, servers, applications, and services across distributed infrastructures.
The platform excels in automated network discovery, utilizing SNMP, WMI, CLI, and other protocols to identify and map network topology automatically. OpManager’s fault management system provides intelligent alerting, root cause analysis, and escalation procedures that minimize network downtime and improve incident response times.
OpManager offers three primary editions: Standard, Professional, and Enterprise. The Standard edition supports up to 250 devices and includes basic monitoring features. Professional edition extends support to 500 devices while adding advanced features like NCM (Network Configuration Manager) integration. Enterprise edition provides unlimited device monitoring with complete ManageEngine suite integration.
Running OpManager on Linux environments like Fedora 42 offers several advantages over Windows deployments. Linux provides superior stability, enhanced security, lower resource overhead, and better scalability for large-scale monitoring operations. Additionally, Linux environments typically offer more flexible customization options and better integration with existing Unix-based infrastructure.
The platform’s monitoring capabilities encompass network devices, servers, applications, and services through multiple protocols including SNMP v1/v2c/v3, WMI, SSH, Telnet, and custom scripts. OpManager also supports advanced features like traffic analysis, configuration backup, compliance reporting, and business service monitoring.
System Requirements and Prerequisites
Hardware Requirements
Successful OpManager deployment on Fedora 42 requires adequate hardware resources to ensure optimal performance and scalability. The minimum CPU requirement includes a dual-core processor running at 2.0 GHz or higher, though quad-core processors are recommended for environments monitoring more than 100 devices.
Memory requirements scale based on the number of monitored devices and polling frequency. A minimum of 4GB RAM supports basic installations monitoring up to 250 devices. Medium-scale deployments (250-500 devices) require 8GB RAM, while enterprise installations monitoring 1000+ devices need 16GB or more RAM for optimal performance.
Storage requirements depend on data retention policies and the number of monitored devices. OpManager requires a minimum of 10GB free disk space for basic installation and initial operation. Production environments should allocate 50GB or more to accommodate historical data, logs, and system growth. SSD storage significantly improves database performance and web interface responsiveness.
Network interface requirements include at least one dedicated network interface card (NIC) with 100Mbps or higher bandwidth. Gigabit ethernet connections are recommended for environments with high device counts or frequent polling intervals.
Software Requirements
Fedora 42 provides excellent compatibility with ManageEngine OpManager, supporting all core functionality and advanced features. The operating system’s modern kernel and updated system libraries ensure optimal performance and security for network monitoring operations.
OpManager includes a bundled Java Runtime Environment (JRE), eliminating the need for separate Java installation or configuration. The bundled JRE is specifically optimized for OpManager operations and ensures compatibility across different deployment scenarios.
Database options include PostgreSQL (default) and Microsoft SQL Server. PostgreSQL provides excellent performance for most deployments and requires no additional licensing costs. MSSQL support is available for organizations with existing Microsoft database infrastructure or specific compliance requirements.
Web browser requirements for the management interface include modern browsers supporting HTML5, CSS3, and JavaScript. Recommended browsers include Firefox 90+, Chrome 90+, Edge 90+, and Safari 14+. Internet Explorer is not supported in recent OpManager versions.
Network Prerequisites
OpManager utilizes several network ports for communication and management functions. The default web interface operates on port 8060 (HTTP) and 8443 (HTTPS). Database communications use PostgreSQL default port 5432 or MSSQL port 1433 depending on database selection.
SNMP communications require UDP ports 161 (SNMP) and 162 (SNMP Trap) for device monitoring and fault management. Additional ports may be required for specific monitoring protocols like WMI (135, 445) or SSH (22) depending on monitored device types.
Firewall configuration must accommodate these communication requirements while maintaining security best practices. Network Time Protocol (NTP) synchronization ensures accurate timestamps for monitoring data and correlation analysis.
DNS resolution capabilities are essential for proper device discovery and monitoring operations. Both forward and reverse DNS lookups should function correctly to ensure accurate device identification and reporting.
Pre-Installation Preparation
System Updates and Security
Before installing OpManager, ensure Fedora 42 systems are fully updated with the latest security patches and system components. Execute the following commands to update the system:
sudo dnf update -y
sudo dnf upgrade -y
Security hardening should include disabling unnecessary services, configuring appropriate user accounts, and implementing basic access controls. SELinux configuration requires careful consideration as OpManager installation and operation may require specific policy adjustments.
Create a dedicated user account for OpManager operations if required by organizational security policies. While OpManager can run as root, dedicated service accounts provide better security isolation and audit capabilities.
System time synchronization ensures accurate monitoring data and proper correlation of events across the infrastructure. Configure NTP or chrony services to maintain accurate system time:
sudo systemctl enable chronyd
sudo systemctl start chronyd
Downloading OpManager
ManageEngine OpManager installation files are available through the official ManageEngine website and authorized distribution channels. Download the 64-bit Linux binary (ManageEngine_OpManager_64bit.bin) appropriate for your licensing requirements.
Verify file integrity using checksums or digital signatures provided by ManageEngine. This verification step ensures the installation file hasn’t been corrupted or tampered with during download.
Register for ManageEngine technical support during the download process to ensure access to updates, patches, and technical assistance. This registration provides valuable support resources throughout the OpManager lifecycle.
Store the installation binary in a secure location with appropriate file permissions. The /tmp directory is suitable for temporary storage during installation, but production environments should use dedicated directories with proper access controls.
Environment Configuration
Prepare the installation directory structure before beginning the OpManager installation process. The default installation directory (/opt/ManageEngine/OpManager) provides a logical location that follows Linux filesystem hierarchy standards.
Create the installation directory with appropriate permissions:
sudo mkdir -p /opt/ManageEngine
sudo chown root:root /opt/ManageEngine
sudo chmod 755 /opt/ManageEngine
Configure hosts file entries for local hostname resolution if required by your network environment. This configuration ensures OpManager can properly resolve local hostnames and communicate with monitored devices.
Network configuration verification includes testing connectivity to managed devices, verifying SNMP community strings, and confirming firewall rules allow necessary communications.
Installation Method 1: GUI Installation Wizard
Preparation Steps
The GUI installation wizard provides an intuitive interface for OpManager installation on systems with desktop environments. This method is ideal for initial installations and environments where graphical interfaces are available.
Make the installation binary executable using the chmod command:
sudo chmod +x ManageEngine_OpManager_64bit.binEnsure the installation process runs with root privileges to access system directories and configure services properly. Desktop environment prerequisites include X11 display capabilities and sufficient screen resolution for the installation wizard interface.
For remote installations over SSH, configure X11 forwarding to display the GUI wizard on the local workstation:
ssh -X username@fedora-serverInstallation Wizard Process
Launch the installation wizard by executing the binary file directly:
sudo ./ManageEngine_OpManager_64bit.binThe installation wizard presents a series of configuration screens guiding you through the setup process. Accept the license agreement after carefully reviewing the terms and conditions. ManageEngine’s licensing terms include important information about usage restrictions and support entitlements.
Registration for technical support requires providing contact information including name, email address, and company details. This registration enables access to patches, updates, and technical support throughout the OpManager lifecycle.
Language selection offers multiple options for the installation interface and subsequent OpManager operation. Choose the appropriate language for your organization’s requirements and user preferences.
Installation directory selection defaults to /opt/ManageEngine/OpManager but can be customized based on organizational standards or storage requirements. Ensure the selected directory has adequate space and appropriate permissions for OpManager operation.
Web server port configuration defaults to 8060 for HTTP access. This port can be modified during installation to accommodate network security policies or avoid conflicts with existing services. HTTPS configuration is available post-installation through the web interface.
Database selection offers PostgreSQL (recommended) or Microsoft SQL Server options. PostgreSQL provides excellent performance and eliminates additional licensing requirements. MSSQL integration is available for organizations with existing Microsoft database infrastructure.
Monitor the installation progress through the wizard interface and review any error messages or warnings that appear during the process. The installation typically completes within 10-15 minutes depending on system performance and selected options.
Post-Installation Verification
After successful installation, verify the OpManager directory structure contains all necessary files and directories. The installation should create the following key directories:
- /opt/ManageEngine/OpManager/bin (executable files)
- /opt/ManageEngine/OpManager/conf (configuration files)
- /opt/ManageEngine/OpManager/logs (log files)
- /opt/ManageEngine/OpManager/mysql (database files)
Check file permissions to ensure proper security settings and operational access. The OpManager service should have appropriate read/write permissions for its directories while maintaining system security.
Verify initial service status by checking for running OpManager processes:
ps aux | grep OpManagerReview initial log files for any error messages or warnings that might indicate configuration issues:
sudo tail -f /opt/ManageEngine/OpManager/logs/wrapper.logInstallation Method 2: Console Mode Installation
When to Use Console Mode
Console mode installation provides an alternative for systems without graphical desktop environments or remote servers accessed through SSH connections. This method is particularly useful for automated deployments, minimal system installations, and scenarios where GUI access is not available or desired.
Headless server installations, container deployments, and automated provisioning scenarios benefit from console-mode installation. This approach also supports scripted installations and infrastructure-as-code deployment methodologies.
Console installation offers identical functionality to GUI installation while providing better automation capabilities and reduced resource requirements during the installation process.
Console Installation Process
Execute the installation binary with the console mode option:
sudo ./ManageEngine_OpManager_64bit.bin -i consoleThe console installer presents text-based prompts for each configuration option. Navigate through the license agreement using keyboard controls (Space to scroll, q to quit, accept to continue).
Registration process through the command line interface requires typing contact information accurately. Double-check email addresses and company information to ensure proper support account creation.
Location and country selection affects time zone configuration and regional settings for the OpManager installation. Choose the appropriate geographic location for accurate time stamps and localization.
Installation directory specification follows the same conventions as GUI installation. Type the full path for custom installation directories or press Enter to accept the default location.
Web server port configuration allows customization of the HTTP port for web interface access. The default port 8060 is suitable for most installations unless conflicts exist with other services.
Monitor console output during installation to identify any errors or warnings. The console provides detailed progress information and error messages that can help troubleshoot installation issues.
Silent mode installation supports fully automated deployments using response files or command-line parameters. This capability enables integration with configuration management systems and automated provisioning workflows.
Troubleshooting Console Installation
Common console installation errors include permission issues, missing dependencies, and display problems. Ensure the installation runs with root privileges and all required system packages are installed.
Permission-related issues often stem from incorrect file ownership or insufficient access rights to the installation directory. Verify directory permissions and ownership before attempting installation.
Display and terminal requirements include proper terminal emulation and character encoding support. Some terminal emulators may not display installation prompts correctly, requiring adjustment of terminal settings or alternative access methods.
Console installation logging provides detailed information for debugging installation problems. Review log files in /tmp or the installation directory for specific error messages and resolution guidance.
Post-Installation Configuration
Initial Service Configuration
Creating systemd service files enables proper service management and automatic startup configuration for OpManager. This configuration ensures OpManager starts automatically after system boot and integrates properly with Fedora’s service management framework.
Create a systemd service file for OpManager:
sudo nano /etc/systemd/system/opmanager.serviceAdd the following service configuration:
[Unit]
Description=ManageEngine OpManager
After=network.target

[Service]
Type=forking
User=root
ExecStart=/opt/ManageEngine/OpManager/bin/run.sh
ExecStop=/opt/ManageEngine/OpManager/bin/shutdown.sh
Restart=always
RestartSec=10

[Install]
WantedBy=multi-user.target
Enable and start the OpManager service:
sudo systemctl daemon-reload
sudo systemctl enable opmanager
sudo systemctl start opmanager
Service management commands provide control over OpManager operation:
sudo systemctl status opmanager    # Check service status
sudo systemctl restart opmanager   # Restart service
sudo systemctl stop opmanager      # Stop service
Log rotation configuration prevents log files from consuming excessive disk space. Configure logrotate for OpManager logs:
sudo nano /etc/logrotate.d/opmanagerAdd log rotation configuration:
/opt/ManageEngine/OpManager/logs/*.log {
    daily
    rotate 30
    compress
    delaycompress
    missingok
    notifempty
    create 644 root root
}
Web Interface Setup
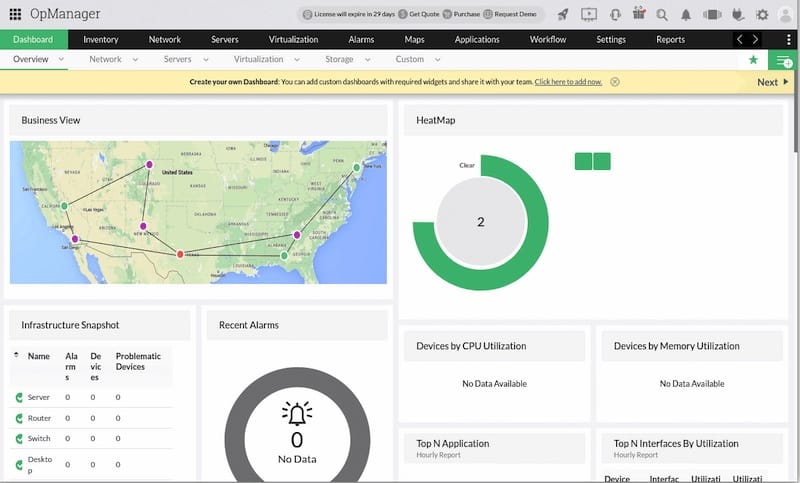
Access the OpManager web interface using a web browser pointed to http://server-ip:8060. The initial login uses default credentials (admin/admin) which must be changed immediately for security purposes.
The initial configuration wizard guides you through essential setup steps including license activation, network discovery configuration, and basic security settings. Follow the wizard prompts to configure your monitoring environment properly.
License activation requires entering your license key obtained from ManageEngine. The license determines available features and monitoring capacity for your OpManager installation.
Network discovery setup defines the IP ranges and discovery methods for automatic device detection. Configure SNMP community strings, WMI credentials, and other access parameters for comprehensive device discovery.
User account management enables creation of additional administrative and operator accounts with appropriate permission levels. Implement role-based access control to maintain security and operational efficiency.
Network and Security Configuration
Firewall configuration must allow OpManager communications while maintaining network security. Configure firewalld rules for OpManager ports:
sudo firewall-cmd --permanent --add-port=8060/tcp
sudo firewall-cmd --permanent --add-port=8443/tcp
sudo firewall-cmd --permanent --add-port=162/udp
sudo firewall-cmd --reload
HTTPS/SSL certificate configuration enhances security for web interface access. OpManager supports custom SSL certificates for production environments requiring encrypted communications.
Generate a self-signed certificate for testing purposes:
sudo openssl req -x509 -newkey rsa:4096 -keyout /opt/ManageEngine/OpManager/conf/server.key -out /opt/ManageEngine/OpManager/conf/server.crt -days 365 -nodesDatabase security settings include configuring appropriate access controls and backup procedures for the OpManager database. Regular database maintenance ensures optimal performance and data integrity.
SNMP community string configuration enables device monitoring through SNMP protocols. Configure community strings, security levels, and access controls based on your network security policies.
Starting and Managing OpManager Service
Service Management
OpManager service management utilizes both systemd commands and native OpManager scripts for operational control. Understanding both methods ensures flexible management options and troubleshooting capabilities.
Start OpManager using systemctl:
sudo systemctl start opmanagerAlternative manual startup using OpManager scripts:
sudo /opt/ManageEngine/OpManager/bin/run.shService status monitoring provides real-time information about OpManager operation:
sudo systemctl status opmanager -lThe OpManager process hierarchy includes multiple Java processes for different operational components. Monitor these processes to understand system resource utilization and identify potential performance issues:
ps aux | grep java | grep OpManagerMemory and resource monitoring helps optimize OpManager performance and identify capacity planning requirements. Use tools like htop, top, or iotop to monitor system resource utilization.
Service log interpretation requires understanding OpManager’s logging structure and common message patterns. Key log files include:
- wrapper.log (service startup and shutdown)
- stderr.log (error messages)
- stdout.log (general operation messages)
- nms.log (network monitoring activities)
Web Client Access
Access the OpManager web interface through any compatible web browser using the server’s IP address and configured port (default 8060). The URL format is http://server-ip:8060 for HTTP access or https://server-ip:8443 for HTTPS.
Default login credentials (admin/admin) provide initial access but must be changed immediately for security purposes. The initial login triggers a password change requirement ensuring basic security compliance.
Browser compatibility requirements include modern browsers supporting HTML5, CSS3, and JavaScript. Disable popup blockers and ensure JavaScript is enabled for full functionality.
Remote access configuration may require additional firewall rules or VPN connectivity depending on network security policies. Consider implementing secure access methods for remote administration.
Mobile access capabilities allow basic monitoring and alerting functions through mobile web browsers. While full functionality requires desktop browsers, mobile access provides essential monitoring capabilities for on-call administrators.
Common Troubleshooting and Solutions
Installation Issues
Permission denied errors during installation typically indicate insufficient privileges or incorrect file permissions. Ensure the installation runs with root privileges and the installation binary has execute permissions.
Resolution steps for permission issues:
sudo chmod +x ManageEngine_OpManager_64bit.bin
sudo chown root:root ManageEngine_OpManager_64bit.bin
Database connection failures during installation may result from port conflicts, insufficient system resources, or configuration errors. Verify no other services are using the database port and adequate memory is available.
Port conflict resolution requires identifying conflicting services and either stopping them or configuring OpManager to use alternative ports:
sudo netstat -tlnp | grep :8060
sudo lsof -i :8060
Java-related installation problems often stem from incompatible Java versions or corrupted Java installations. OpManager includes a bundled JRE, but system Java configurations may interfere with installation.
IPv6 configuration issues can cause installation failures on systems with IPv6 enabled but not properly configured. Disable IPv6 or configure it properly to resolve these issues:
echo 'net.ipv6.conf.all.disable_ipv6 = 1' | sudo tee -a /etc/sysctl.conf
sudo sysctl -p
Service Startup Problems
OpManager startup failures require systematic troubleshooting to identify root causes. Common issues include insufficient system resources, database connectivity problems, and configuration errors.
Check system resources before startup:
free -h          # Check available memory
df -h            # Check disk space
ulimit -n        # Check file descriptor limits
Database connectivity issues prevent OpManager from starting properly. Verify database service status and connection parameters:
sudo systemctl status postgresql
sudo -u postgres psql -c "\l"
Port binding problems occur when other services use OpManager’s required ports. Identify and resolve port conflicts:
sudo ss -tlnp | grep 8060
sudo fuser 8060/tcp
Memory and resource constraints can prevent proper OpManager startup. Increase available memory or adjust OpManager memory allocation settings in the configuration files.
Log file analysis provides detailed information about startup failures. Review wrapper.log and stderr.log for specific error messages:
sudo tail -f /opt/ManageEngine/OpManager/logs/wrapper.log
sudo grep -i error /opt/ManageEngine/OpManager/logs/*.log
Performance and Monitoring Issues
Slow web interface response indicates performance bottlenecks that may stem from insufficient system resources, database performance issues, or network connectivity problems.
Performance optimization steps include:
# Monitor system performance
top
iotop
netstat -i

# Check database performance
sudo -u postgres psql opmanager -c "SELECT * FROM pg_stat_activity;"
High CPU or memory usage requires investigation of OpManager processes and system configuration. Adjust polling intervals, reduce monitored device counts, or increase system resources as needed.
Network discovery problems often result from incorrect SNMP community strings, firewall restrictions, or device configuration issues. Verify SNMP connectivity manually:
snmpwalk -v2c -c public device-ip 1.3.6.1.2.1.1.5.0SNMP polling issues may indicate network connectivity problems, device configuration errors, or OpManager configuration issues. Test SNMP connectivity independently to isolate problems.
Database performance optimization includes regular maintenance, proper indexing, and adequate resource allocation. Monitor database performance and implement optimization strategies as needed.
Best Practices and Security Considerations
Security Hardening
Immediate password changes for all default accounts represent the first and most critical security step. Change the default admin password to a strong, unique password following organizational security policies.
Implement HTTPS/SSL encryption for all web interface communications. Configure trusted SSL certificates for production environments to prevent man-in-the-middle attacks and ensure secure communications.
Network access restrictions using firewall rules limit OpManager access to authorized networks and users. Implement network segmentation and access controls based on the principle of least privilege.
Configure firewall rules for secure access:
sudo firewall-cmd --permanent --add-rich-rule='rule family="ipv4" source address="192.168.1.0/24" port protocol="tcp" port="8060" accept'
sudo firewall-cmd --reload
User privilege management ensures appropriate access levels for different roles and responsibilities. Create separate accounts for administrators, operators, and read-only users with appropriate permission levels.
Regular security updates and patches maintain protection against known vulnerabilities. Implement a patch management process that includes testing and deployment procedures for OpManager updates.
Audit logging configuration enables security monitoring and compliance reporting. Configure comprehensive logging for user actions, configuration changes, and access attempts.
Performance Optimization
Database maintenance and optimization ensure optimal OpManager performance as the monitoring environment grows. Implement regular database maintenance procedures including index optimization, statistics updates, and data archiving.
Database maintenance commands:
sudo -u postgres psql opmanager -c "VACUUM ANALYZE;"
sudo -u postgres psql opmanager -c "REINDEX DATABASE opmanager;"
Memory allocation tuning optimizes OpManager performance for specific hardware configurations and monitoring requirements. Adjust Java heap sizes and system memory allocation based on monitoring load and available resources.
Network polling interval optimization balances monitoring frequency with system performance. Adjust polling intervals based on device criticality, available bandwidth, and performance requirements.
Log file management and rotation prevent disk space exhaustion while maintaining adequate logging for troubleshooting and audit purposes. Implement automated log rotation and archival procedures.
Backup and disaster recovery planning ensures business continuity for critical monitoring infrastructure. Implement regular backup procedures for OpManager configuration, database, and system files.
Backup configuration example:
#!/bin/bash
# OpManager backup script
BACKUP_DIR="/backup/opmanager/$(date +%Y%m%d)"
mkdir -p $BACKUP_DIR

# Backup configuration files
cp -r /opt/ManageEngine/OpManager/conf $BACKUP_DIR/

# Backup database
sudo -u postgres pg_dump opmanager > $BACKUP_DIR/opmanager_db.sql

# Create archive
tar -czf $BACKUP_DIR.tar.gz $BACKUP_DIR
rm -rf $BACKUP_DIR
Advanced Configuration and Integration
Enterprise Features
Central and Probe server architecture enables distributed monitoring for large-scale networks spanning multiple locations. This configuration distributes monitoring load across multiple servers while providing centralized management and reporting.
Configure central server as the primary management interface and reporting platform. Probe servers handle device monitoring for specific network segments or geographic locations, reporting data back to the central server.
Distributed monitoring setup requires careful planning of network architecture, communication paths, and data synchronization. Consider bandwidth requirements, latency constraints, and failover procedures when designing distributed monitoring architectures.
High availability configuration ensures continuous monitoring operations even during server failures or maintenance activities. Implement clustering, load balancing, or hot standby configurations based on availability requirements.
Load balancing considerations include distributing monitoring load across multiple servers and ensuring consistent performance during peak usage periods. Configure load balancers to distribute web interface access and monitoring operations effectively.
Integration with other ManageEngine products creates comprehensive IT management solutions. OpManager integrates with ServiceDesk Plus, ADAudit Plus, EventLog Analyzer, and other ManageEngine tools for unified IT operations management.
Customization Options
Custom monitoring templates enable tailored monitoring for specific device types, applications, or business requirements. Create custom templates for unique monitoring scenarios not covered by default templates.
Alert and notification configuration ensures appropriate escalation procedures and communication methods for different types of incidents. Configure email, SMS, and integration-based notifications for comprehensive incident management.
Dashboard customization provides role-specific views and key performance indicators for different user groups. Create executive dashboards, operational dashboards, and technical dashboards tailored to specific audiences.
Report generation and scheduling automate regular reporting requirements for management, compliance, and operational purposes. Configure automated reports for availability, performance, capacity planning, and compliance documentation.
API integration possibilities enable custom applications, automation workflows, and integration with existing IT management tools. Utilize OpManager’s REST API for custom development and system integration projects.
Third-party tool integration expands OpManager capabilities through connections with ticketing systems, automation platforms, and business applications. Configure webhook notifications, API integrations, and data exports for comprehensive IT ecosystem integration.
Congratulations! You have successfully installed ManageEngine. Thanks for using this tutorial for installing the ManageEngine OpManager on Fedora 42 Linux system. For additional help or useful information, we recommend you check the official ManageEngine website.