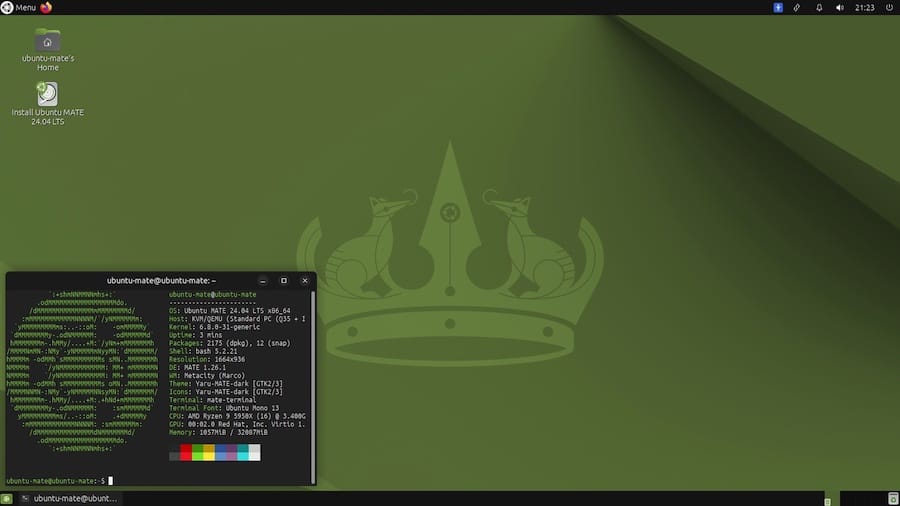
How To Install Mate Desktop on Ubuntu 24.04 LTS

In this tutorial, we will show you how to install Mate Desktop on Ubuntu 24.04 LTS. The MATE desktop environment is a popular choice among Linux users who seek a lightweight, customizable, and user-friendly interface. As a fork of the classic GNOME 2, MATE retains the traditional desktop experience while providing modern features and enhancements. This article will guide you through the process of installing MATE on Ubuntu 24.04, ensuring that you have a smooth and efficient experience.
Understanding MATE Desktop
What is MATE?
MATE is an open-source desktop environment that originated as a continuation of GNOME 2 after its transition to GNOME 3. It aims to provide a familiar and traditional desktop experience, making it an excellent option for users who prefer simplicity and efficiency. With its intuitive interface and extensive customization options, MATE caters to both new users and seasoned Linux veterans.
Why Choose MATE?
Choosing the right desktop environment can significantly impact your overall experience with Ubuntu. Here are some reasons why MATE stands out:
- Lightweight Performance: MATE is designed to be resource-efficient, making it ideal for older hardware or systems with limited resources.
- User-Friendly Interface: Its familiar layout helps users transition smoothly from other operating systems, such as Windows or older versions of Linux.
- Customizability: Users can easily modify themes, icons, and layouts to create a personalized workspace.
Prerequisites for Installation
System Requirements
Before installing MATE on your Ubuntu system, ensure that your hardware meets the following minimum requirements:
- Processor: 1 GHz dual-core processor or better
- RAM: At least 1 GB (2 GB recommended)
- Disk Space: Minimum of 10 GB free disk space
- Graphics: A graphics card capable of 1024×768 resolution
Preparing Your System
To ensure a smooth installation process, it’s essential to prepare your system adequately:
-
- Update Your System: Run the following commands in the terminal to update your package lists and upgrade existing packages:
sudo apt update && sudo apt upgrade -y- Backup Important Data: Always back up your data before making significant changes to your system. Use tools like Timeshift or simply copy important files to an external drive.
Installing MATE Desktop on Ubuntu 24.04
Step 1: Update Your System
The first step in installing MATE is ensuring that your current Ubuntu installation is up-to-date. Open a terminal window and execute the following command:
sudo apt update && sudo apt upgrade -yStep 2: Install MATE Desktop
To install the MATE desktop environment, run the following command in your terminal:
sudo apt install ubuntu-mate-desktopThis command installs the complete MATE desktop environment along with essential applications. During installation, you may be prompted to choose a display manager.
Step 3: Choose a Display Manager
You will be presented with options for display managers during installation. The two most common choices are LightDM and GDM3. LightDM is recommended for its lightweight nature and compatibility with MATE.
- Select LightDM when prompted by using the arrow keys and pressing Enter.
Step 4: Reboot Your System
Once the installation is complete, reboot your system to apply changes. Use the following command:
sudo rebootStep 5: Select MATE at Login
After rebooting, you will reach the login screen. Before entering your password, click on the gear icon or session menu located near your username. From there, select “MATE” as your desktop environment. Then log in as usual.

Customizing Your MATE Desktop Experience
Basic Customization Options
MATE offers numerous customization options to tailor your desktop environment according to your preferences:
- Themes and Icons: Access the “Appearance” settings from the main menu to change themes and icons easily.
- Pannels and Applets: Right-click on panels to add or remove applets like weather widgets or system monitors.
- Main Menu Customization: Modify applications in the main menu by accessing “Main Menu” from the system settings.
Essential Applications in MATE
MATE comes bundled with several essential applications that enhance productivity:
- Caja: The file manager that allows you to browse files and folders efficiently.
- Pluma: A simple yet powerful text editor suitable for coding and note-taking.
- Atril: A document viewer for PDFs and other document formats.
Installing Additional Software
You can install additional software using either the terminal or Ubuntu Software Center. For example, to install VLC media player, use this command:
sudo apt install vlcTroubleshooting Common Issues
Installation Problems
If you encounter issues during installation, consider these troubleshooting steps:
-
- Error Messages: Note any error messages displayed during installation; they often provide clues about what went wrong.
- No Internet Connection: Ensure you have a stable internet connection before starting the installation process.
- Purge Installation Files: If problems persist, you might need to remove partially installed packages using:
sudo apt purge ubuntu-mate-desktopPerformance Issues
If you experience sluggish performance after installing MATE, consider these optimization tips:
- Avoid Resource-Heavy Applications: Limit running applications that consume excessive resources simultaneously.
- Tweak Visual Effects: Disable unnecessary visual effects in “Appearance” settings under “Windows” tab.
Selecting Back to GNOME or Another DE
If you decide that MATE isn’t for you, switching back to GNOME or another desktop environment is straightforward:
- Selecting GNOME at Login: Log out of your current session and choose GNOME from the session menu at the login screen before logging back in.
Congratulations! You have successfully installed Mate Desktop. Thanks for using this tutorial for installing the Mate desktop environment on Ubuntu 24.04 LTS system. For additional help or useful information, we recommend you check the official Mate Desktop website.