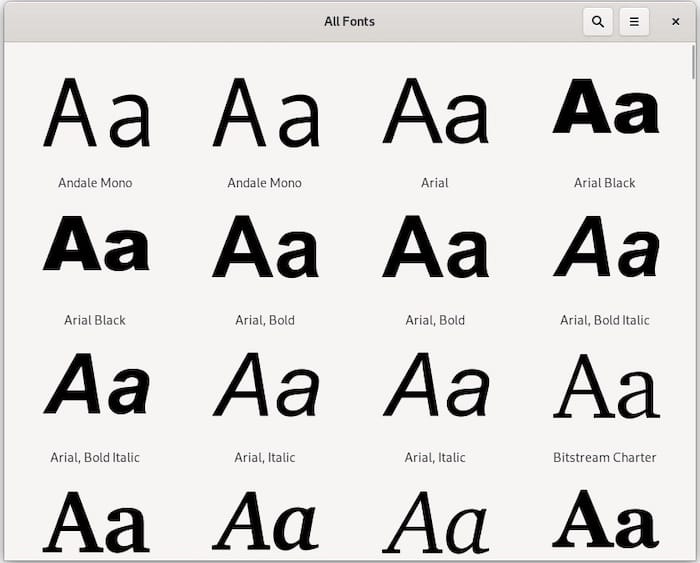
How To Install Microsoft Fonts on AlmaLinux 9

In the world of document creation and design, fonts play a crucial role in conveying information effectively. Microsoft fonts, such as Times New Roman, Arial, and Verdana, have become industry standards due to their widespread use and readability. However, these fonts are not included by default in many Linux distributions, including AlmaLinux 9, due to licensing restrictions. This guide will walk you through the process of installing Microsoft fonts on AlmaLinux 9, ensuring compatibility and consistency across different operating systems.
Understanding Microsoft Fonts
Microsoft Core Fonts are a collection of typefaces that have been widely distributed with Microsoft products since the 1990s. These fonts have become ubiquitous in document creation, web design, and various other applications. Some of the most commonly used Microsoft fonts include:
- Times New Roman
- Arial
- Verdana
- Calibri
- Cambria
- Comic Sans MS
- Courier New
- Georgia
- Impact
- Tahoma
These fonts are not included in Linux distributions by default due to licensing issues. Microsoft owns the rights to these fonts, and users must agree to the end-user license agreement before installation and use.
Prerequisites for Installation
Before we begin the installation process, ensure that you have the following:
- Root or sudo privileges on your AlmaLinux 9 system
- An active internet connection
- Terminal access
It’s also recommended to update your system packages before proceeding with the installation. Open a terminal and run the following command:
sudo dnf updateInstalling Microsoft Fonts Using RPM Package
The most straightforward method to install Microsoft fonts on AlmaLinux 9 is by using the mscorefonts2 RPM package. This package automates the process of downloading and installing the fonts on your system.
Step 1: Install Required Dependencies
First, we need to install some necessary tools and dependencies. Run the following command in your terminal:
sudo dnf install curl cabextract xorg-x11-font-utils fontconfigThis command installs:
- curl: A tool for transferring data using various protocols
- cabextract: A utility to extract Microsoft cabinet files
- xorg-x11-font-utils: X.Org X11 font utilities
- fontconfig: A library for configuring and customizing font access
Step 2: Download and Install the mscorefonts2 RPM Package
Now, we’ll download and install the mscorefonts2 package using a single command:
sudo rpm -i https://downloads.sourceforge.net/project/mscorefonts2/rpms/msttcore-fonts-installer-2.6-1.noarch.rpmThis command downloads the RPM package and initiates the installation process. During the installation, you may be prompted to accept the Microsoft End-User License Agreement (EULA). Read through the agreement and accept it to continue the installation.
Step 3: Verify the Installation
After the installation process completes, you can verify if the fonts were installed correctly by running the following command:
fc-match TimesNewRomanIf the installation was successful, you should see output similar to:
TimesNewRoman.ttf: "Times New Roman" "Regular"This indicates that the Times New Roman font is now available on your system.

Alternative Method: Extracting Fonts from Windows ISO
If you have access to a Windows ISO file, you can extract the Microsoft fonts directly from it. This method can be useful if you want to ensure you have the latest versions of the fonts or if you encounter issues with the RPM package method.
Step 1: Obtain a Windows ISO
You can download a Windows ISO from the official Microsoft website. Make sure you have the legal right to use the Windows ISO before proceeding.
Step 2: Install p7zip
We’ll need p7zip to extract the fonts from the ISO file. Install it using the following command:
sudo dnf install p7zipStep 3: Extract Fonts from ISO
Once you have the Windows ISO file, follow these steps to extract the fonts:
1. Create a directory to mount the ISO:
sudo mkdir /mnt/windows_iso2. Mount the ISO file:
sudo mount -o loop path/to/your/windows.iso /mnt/windows_iso3. Create a directory for the fonts:
sudo mkdir -p /usr/share/fonts/WindowsFonts4. Copy the fonts from the mounted ISO to the new directory:
sudo cp /mnt/windows_iso/Windows/Fonts/*.ttf /usr/share/fonts/WindowsFonts/5. Unmount the ISO:
sudo umount /mnt/windows_iso6. Remove the temporary mount directory:
sudo rmdir /mnt/windows_isoConfiguring Font Cache
After installing the fonts using either method, it’s important to update the font cache to ensure the new fonts are recognized by the system.
Run the following command to update the font cache:
sudo fc-cache -fvThis command forces a rescan of all fonts and verbosely displays the files it processes. It may take a few moments to complete.
Troubleshooting Common Issues
While installing Microsoft fonts on AlmaLinux 9 is generally straightforward, you may encounter some issues. Here are some common problems and their solutions:
1. Fonts Not Appearing in Applications
If you’ve installed the fonts but they’re not appearing in your applications, try the following:
- Restart the application
- Log out and log back into your system
- Ensure the font cache was updated correctly
2. License Agreement Prompt Not Appearing
If you don’t see the license agreement prompt during installation, it may be hidden behind other windows. Check all open windows or try running the installation command in a different terminal emulator.
3. Installation Fails Due to Network Issues
If the installation fails due to network problems, ensure you have a stable internet connection and try the installation again. If the issue persists, you can try downloading the RPM package manually and installing it locally.
4. Conflicts with Existing Fonts
In some cases, you may experience conflicts with existing fonts on your system. If this occurs, you can try removing the conflicting fonts or renaming them to avoid clashes.
Congratulations! You have successfully installed Microsoft Fonts. Thanks for using this tutorial for installing the latest version of Microsoft Fonts on AlmaLinux 9. For additional help or useful information, we recommend you check the official Microsoft website.