How To Install Monitorix on Fedora 39

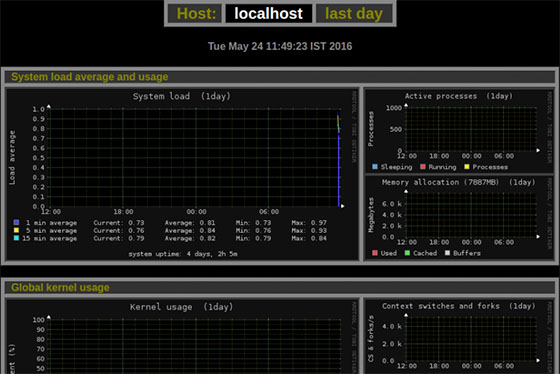
In this tutorial, we will show you how to install Monitorix on Fedora 39. Monitorix boasts a wide array of features that make it a versatile tool for any system administrator. It provides insights into system load average and usage, kernel usage, network activity, and more. With Monitorix, you can keep a close eye on your system’s performance and make informed decisions about resource allocation, system upgrades, and troubleshooting.
This article assumes you have at least basic knowledge of Linux, know how to use the shell, and most importantly, you host your site on your own VPS. The installation is quite simple and assumes you are running in the root account, if not you may need to add ‘sudo‘ to the commands to get root privileges. I will show you the step-by-step installation of the Monitorix monitoring tool on a Fedora 39.
Prerequisites
Before diving into the installation process, let’s ensure that you have everything you need:
- A server running one of the following operating systems: Fedora 39.
- It’s recommended that you use a fresh OS install to prevent any potential issues.
- You will need access to the terminal to execute commands. Fedora 39 provides the Terminal application for this purpose. It can be found in your Applications menu.
- A network connection or internet access to download the Monitorix repository.
- A
non-root sudo useror access to theroot user. We recommend acting as anon-root sudo user, however, as you can harm your system if you’re not careful when acting as the root.
Install Monitorix on Fedora 39
Step 1. First, we need to update all system packages. This ensures that we’re working with the latest software, which includes important security patches and performance improvements. Open your terminal and run the following command:
sudo dnf clean all
sudo dnf update
Step 2. Enabling the EPEL Repository.
The EPEL (Extra Packages for Enterprise Linux) repository is a Fedora Special Interest Group that creates, maintains, and manages a high-quality set of additional packages for Enterprise Linux. To enable the EPEL repository on Fedora 39, execute the following command:
sudo dnf install https://dl.fedoraproject.org/pub/epel/epel-release-latest-9.noarch.rpm
Step 3. Installing Required Packages.
Monitorix requires several packages to function correctly. Install these packages using the following command:
sudo dnf install rrdtool perl-libwww-perl perl-MailTools perl-CGI perl-DBI perl-XML-Simple
Step 4. Installing Monitorix on Fedora 39.
With the EPEL repository enabled and the necessary packages installed, you can now install Monitorix using the following command:
sudo dnf install monitorix
Step 5. Monitorix Configuration.
Monitorix’s main configuration file is located at ‘/etc/monitorix/monitorix.conf‘. This file contains various options that you can modify to suit your needs. For instance, you can specify the network devices you want to monitor, set the refresh rate of the graphs, and more.
After configuring Monitorix, you need to add it to the system start-up and start the service. Use the following commands:
sudo systemctl enable monitorix
sudo systemctl start monitorix
You can check the status of the Monitorix service with the following command:
sudo systemctl status monitorix
Step 6. Accessing Monitorix.
Monitorix comes with a built-in HTTP server, allowing you to access its dashboard through a web browser. By default, Monitorix is accessible at ‘http://your-IP-address:8080/monitorix‘.

Congratulations! You have successfully installed Monitorix. Thanks for using this tutorial for installing the Monitorix monitoring tool on your Fedora 39 system. For additional or useful information, we recommend you check the official Monitorix website.