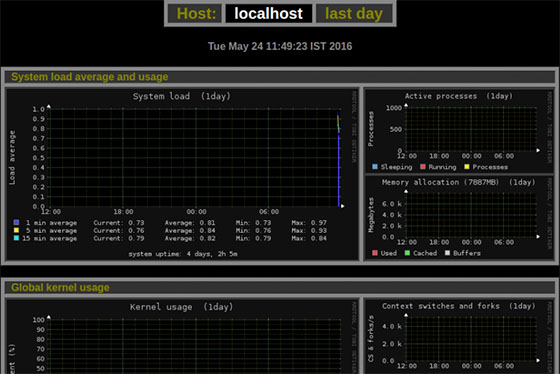
In this tutorial, we will show you how to install and configuration of Monitorix on your Ubuntu 16.04 server. For those of you who didn’t know, For those of you who didn’t know, Monitorix is a free, open-source, lightweight system monitoring tool designed to monitor servers, services, and devices. Monitorix allows to monitor overall system performance and also helps in detecting bottlenecks, failures, unwanted long response times, and other abnormal activities.
This article assumes you have at least basic knowledge of Linux, know how to use the shell, and most importantly, you host your site on your own VPS. The installation is quite simple and assumes you are running in the root account, if not you may need to add ‘sudo‘ to the commands to get root privileges. I will show you the step-by-step installation of the Monitorix Network Monitoring Tool on a Ubuntu 16.04 (Xenial Xerus) server.
Prerequisites
- A server running one of the following operating systems: Ubuntu 16.04 (Xenial Xerus).
- It’s recommended that you use a fresh OS install to prevent any potential issues.
- SSH access to the server (or just open Terminal if you’re on a desktop).
- A
non-root sudo useror access to theroot user. We recommend acting as anon-root sudo user, however, as you can harm your system if you’re not careful when acting as the root.
Monitorix features
- Global kernel usage
- An unlimited number of network ports are supported.
- An unlimited number of Apache servers are supported.
- Ability to define the number of graphs per row.
- Ability to enable traffic monthly reports.
- Ability to zoom in on any graph.
- Ability to show network metrics in MBytes/sec or Mbits/sec.
- Monitors Disk drive temperatures and health.
- Filesystem usage and I/O activity of filesystems.
- Network traffic usage up to 10 network devices.
- Netstat statistics.
- System services demand (SSH, ProFTPD, Samba, CUPS, Fail2ban, IMAP, POP3, SMTP, etc…)
- Squid Proxy Web Cache statistics.
- Built-in HTTP server.
- MTA Mail statistics including input and output connections
- Network port traffic including TCP, UDP, etc.
Install Monitorix on Ubuntu 16.04
Step 1. First add the Monitorix Repository, open /etc/apt/sources.list file as shown below.
nano /etc/apt/sources.list
Place the cursor to the end of the file and add this line and save the file and exit from the file.
deb http://apt.izzysoft.de/ubuntu generic universe
Once the repository is added, we have to download (or add) the PGP key and “install” it into the system as shown below:
wget http://apt.izzysoft.de/izzysoft.asc
Go to the directory where the .asc file is saved and run the following command:
sudo apt-key add izzysoft.asc
Now, make sure that all your system packages are up-to-date by running the following apt-get commands in the terminal:
apt-get update
Step 2. Installing Monitorix.
After updating the repository, run the following command to install Monitorix:
apt-get -y install monitorix apache2-utils
Step 3. Configure Monitorix.
To configure Monitorix, open /etc/monitorix/monitorix.conf file as shown below:
nano /etc/monitorix/monitorix.conf
Search for the following lines:
<auth>
 enabled = n
 msg = Monitorix: Restricted access
 htpasswd = /var/lib/monitorix/htpasswd
 </auth>
And enable authentication by changing it to “y”.
<auth>
 enabled = y
 msg = Monitorix: Restricted access
 htpasswd = /var/lib/monitorix/htpasswd
 </auth>
Save the file and exit. Once configured, we have to restart the Monitorix service:
systemctl start monitorix
Create the password for Monitorix:
htpasswd -d -c /var/lib/monitorix/htpasswd admin
Step 4. Accessing MediaWiki.
Monitorix will be available on HTTP port 8080 by default. Open your favorite browser and navigate to http://your-domain.com:8080/monitorix/ or http://server-ip:8080/monitorix/. If you are using a firewall, please open port 80 to enable access to the control panel.

Congratulations! You have successfully installed Monitorix. Thanks for using this tutorial for installing Monitorix Network Monitoring Tool in Ubuntu 16.04 LTS (Xenial Xerus) systems. For additional help or useful information, we recommend you to check the official Monitorix website.