How To Install Moodle on Fedora 41

Moodle is a powerful open-source learning management system (LMS) that enables educators to create engaging online courses. Installing Moodle on Fedora 41 can enhance your educational environment, providing a flexible platform for both teachers and students. This guide will walk you through the entire installation process, from setting up your Fedora environment to configuring Moodle for optimal performance.
Prerequisites for Installation
System Requirements
Before diving into the installation, ensure your system meets the following minimum hardware specifications:
- Processor: Dual-core CPU or higher.
- RAM: At least 2 GB (4 GB recommended).
- Disk Space: Minimum of 1 GB for Moodle plus additional space for course materials.
Software Requirements
Moodle requires several software components to function correctly. Ensure you have the following installed:
- Apache Web Server: The most commonly used web server for hosting Moodle.
- PHP: Version 7.2 or higher is required for Moodle 4.x.
- MySQL or MariaDB: A relational database management system to store Moodle data.
- PHP Extensions: Several extensions are required, including php-mysqlnd, php-json, php-gd, php-mbstring, php-zip, and php-intl.
Setting Up the Fedora Environment
Updating the System
Start by ensuring your Fedora system is up to date. Open a terminal and run the following command:
sudo dnf update -yInstalling Required Packages
Next, install the necessary packages for Apache, PHP, and MySQL. Execute the following command in your terminal:
sudo dnf install httpd php php-mysqlnd php-json php-gd php-mbstring php-zip php-intl mysql-server -yStarting and Enabling Services
After installation, start and enable the Apache and MySQL services to ensure they run on boot:
sudo systemctl start httpd
sudo systemctl enable httpd
sudo systemctl start mysqld
sudo systemctl enable mysqld
You can verify that Apache is running by visiting http://localhost. You should see a test page indicating that Apache is working correctly.
Configuring MySQL Database for Moodle
Creating a Database and User
Moodle requires a dedicated database. Log into MySQL using the root account:
mysql -u root -pYou will be prompted to enter your MySQL root password. Once logged in, create a database and user specifically for Moodle with the following commands:
CREATE DATABASE moodle;
CREATE USER 'moodleuser'@'localhost' IDENTIFIED BY 'yourpassword';
GRANT ALL PRIVILEGES ON moodle.* TO 'moodleuser'@'localhost';
FLUSH PRIVILEGES;
This creates a new database named “moodle” and a user “moodleuser” with full privileges on that database. Be sure to replace ‘yourpassword‘ with a strong password of your choice.
Configuring Database Settings
The database user must have adequate privileges to manage Moodle’s data. Ensure you have set up security measures such as strong passwords and limiting user access based on necessity.
Downloading and Installing Moodle
Downloading Moodle
Moodle can be downloaded from its official website or via Git. To download the latest version directly from the terminal, use the following commands:
wget https://download.moodle.org/latest.zip
unzip latest.zip -d /var/www/html/
This command fetches the latest version of Moodle and extracts it into the web server’s root directory.
Extracting Moodle Files
If you downloaded Moodle as a tarball instead of a zip file, you could extract it using:
sudo tar xzf moodle-latest-*.tgz -C /var/www/html/
sudo mv /var/www/html/moodle-* /var/www/html/moodle
This places all Moodle files in the `/var/www/html/moodle` directory, which is where Apache serves files from.
Configuring Moodle
Setting Up Configuration File
Moodle’s configuration file needs to be set up before you can access it through a web browser. Navigate to the Moodle directory and copy the sample configuration file:
cd /var/www/html/moodle
sudo cp config-dist.php config.php
sudo nano config.php
Edit `config.php` using your preferred text editor (in this case, `nano`). You’ll need to configure several key parameters such as:
- $CFG->dbtype: Set this to ‘
mysqli‘. - $CFG->dbname: Use ‘
moodle‘ (the name of your database). - $CFG->dbuser: Set this to ‘
moodleuser‘. - $CFG->dbpass: Enter your chosen password here.
- $CFG->wwwroot: Set this to your server’s URL (e.g.,
http://yourdomain.com/moodle). - $CFG->dataroot: Set this path to where you will store uploaded files (e.g.,
/var/www/moodledata).
Setting Permissions for Moodle
File Permissions Setup
Moodle requires specific permissions for its directories to function correctly. Set ownership and permissions with these commands:
sudo chown -R apache:apache /var/www/html/moodle
sudo chmod -R 755 /var/www/html/moodle
sudo mkdir /var/www/moodledata
sudo chown -R apache:apache /var/www/moodledata
sudo chmod -R 755 /var/www/moodledata
This ensures that Apache has access to read and write files necessary for Moodle’s operation.
Completing the Installation via Web Interface
Accessing the Installation Page
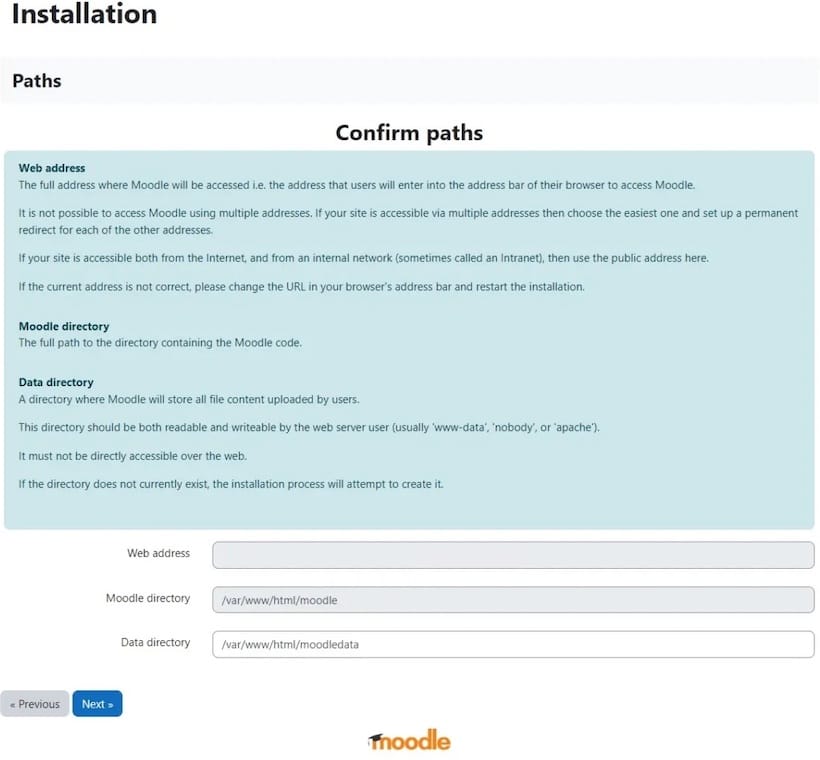
Your installation is almost complete! Open a web browser and navigate to your server’s URL followed by `/moodle`. For example: http://localhost/moodle.

Installation Wizard Walkthrough
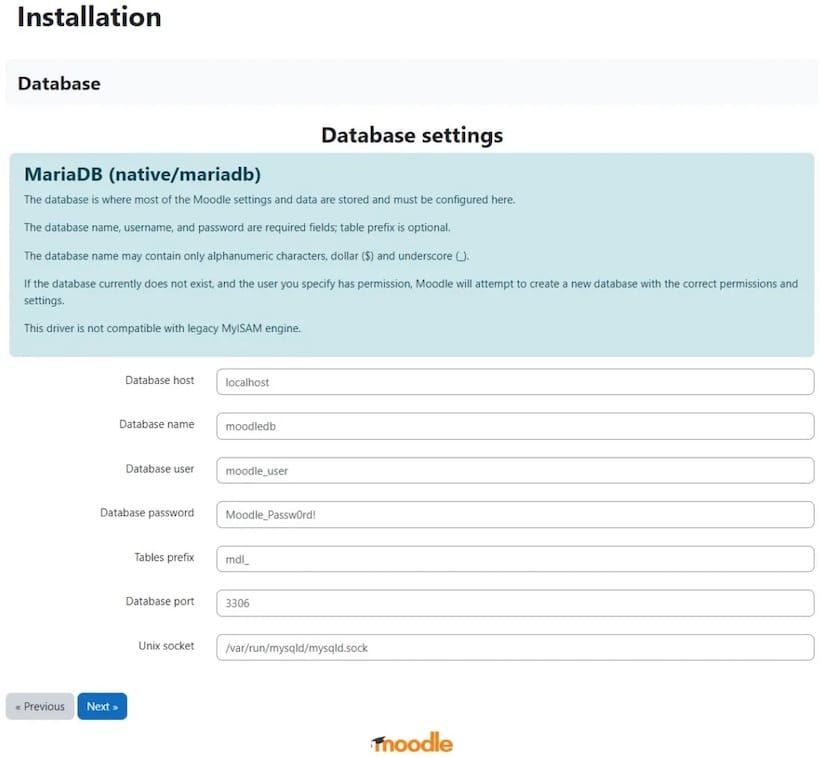
The installation wizard will guide you through several steps. Key points include:
- Selecting your preferred language.
- Acknowledging prerequisites; ensure all checks are passed before proceeding.
- Selecting database type (MySQL/MariaDB) and entering credentials created earlier.
- Certain settings such as site name, admin username, password, and email address will be required.
- You may also configure email settings if necessary at this point.
The wizard will finalize the setup by installing plugins and configuring settings. Once complete, you’ll be prompted to log in as an administrator.

Troubleshooting Tips
- If you encounter issues accessing the installation page, ensure that Apache is running and listening on port 80.
- If there are problems with database connectivity, double-check your `
config.php` settings for accuracy. - Error messages related to permissions often indicate incorrect ownership or permission settings on files/directories; revisit those commands if necessary.
- If PHP extensions are missing during installation checks, install them using DNF package manager as shown earlier.
- You can check logs in `
/var/log/httpd/` for any server-related errors that may provide insights into issues.
Additonal Resources
- Moodle Documentation: Comprehensive guides on features and troubleshooting.
- Moodle Community Forums: Engage with other users for tips and support.
- Your Linux Distribution Documentation: For Fedora-specific configurations and updates.
Congratulations! You have successfully installed Moodle. Thanks for using this tutorial for installing Moodle Learning Platform or course management system on Fedora system. For additional help or useful information, we recommend you check the official Moodle website.