In this tutorial, we will show you how to install Munin on Ubuntu 20.04 LTS. For those of you who didn’t know, Munin is a web-based tool to monitor system and network statistics. Munin shows this information through Graphs. It helps the system administrators to collect various system information that can be viewed via a web interface such as processor load, hard disk usage, network traffic, access to server services on one or more computers, and more.
This article assumes you have at least basic knowledge of Linux, know how to use the shell, and most importantly, you host your site on your own VPS. The installation is quite simple and assumes you are running in the root account, if not you may need to add ‘sudo‘ to the commands to get root privileges. I will show you the step-by-step installation of the Munin server monitoring on Ubuntu 20.04 (Focal Fossa). You can follow the same instructions for Ubuntu 18.04, 16.04, and any other Debian-based distribution like Linux Mint.
Prerequisites
- A server running one of the following operating systems: Ubuntu 20.04, 18.04, 16.04, and any other Debian-based distribution like Linux Mint.
- It’s recommended that you use a fresh OS install to prevent any potential issues.
- SSH access to the server (or just open Terminal if you’re on a desktop).
- A
non-root sudo useror access to theroot user. We recommend acting as anon-root sudo user, however, as you can harm your system if you’re not careful when acting as the root.
Install Munin on Ubuntu 20.04 LTS Focal Fossa
Step 1. First, make sure that all your system packages are up-to-date by running the following apt commands in the terminal.
sudo apt update
sudo apt upgrade
Step 2. Installing Apache and other dependencies.
Run the following command below to install Apache and other required packages:
sudo apt install apache2 libcgi-fast-perl libapache2-mod-fcgid
Step 3. Installing Munin on Ubuntu 20.04.
By default, Munin is available on Ubuntu base repository, Now install Munin to your Ubuntu system using the following command below:
sudo apt install munin
Step 4. Configure Munin.
We can start with editing the Munin configuration file /etc/munin/munin.conf:
nano /etc/munin/munin.conf
Modify the following lines with the delete uncommenting # symbol:
dbdir /var/lib/munin
htmldir /var/cache/munin/www
logdir /var/log/munin
rundir /var/run/munin
Step 5. Configure Apache.
Now we editing Munin’s Apache configuration:
cd /etc/apache2/conf-enabled
ln -s /etc/munin/apache24.conf munin.conf
Make sure you comment out the line Require local and add Require all granted and Options FollowSymLinks SymLinksIfOwnerMatch instead (otherwise you will only be able to access the Munin output from localhost):
nano /etc/munin/apache24.conf
Modify the following line:
Alias /munin /var/cache/munin/www
<Directory /var/cache/munin/www>
 # Require local
 Require all granted
 Options FollowSymLinks SymLinksIfOwnerMatch
</Directory>

ScriptAlias /munin-cgi/munin-cgi-graph /usr/lib/munin/cgi/munin-cgi-graph
<Location /munin-cgi/munin-cgi-graph>
 # Require local
 Require all granted
 Options FollowSymLinks SymLinksIfOwnerMatch
 <IfModule mod_fcgid.c>
 SetHandler fcgid-script
 </IfModule>
 <IfModule !mod_fcgid.c>
 SetHandler cgi-script
 </IfModule>
</Location>
Save and close a file, then restart the Apache and Muninservice using the following command:
sudo systemctl restart apache2
sudo systemctl restart munin-node
Step 6. Accessing Munin Server Web interface.
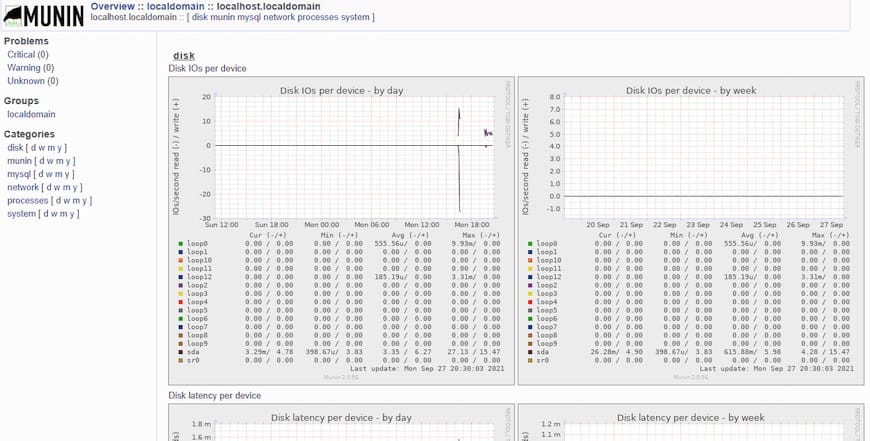
Once successfully installed, now we go to http://your-server-ip-address/munin/ in your browser, and you see the first statistics:

Congratulations! You have successfully installed Munin. Thanks for using this tutorial for installing the Munin server monitoring on Ubuntu 20.04 LTS Focal Fossa system. For additional help or useful information, we recommend you check the official Munin website.