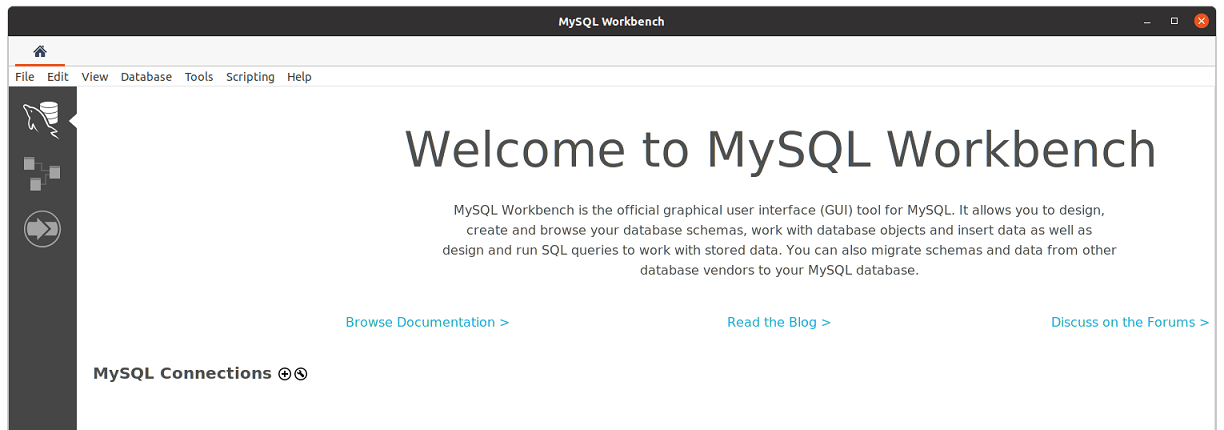
How To Install MySQL Workbench on Ubuntu 24.04 LTS

MySQL Workbench is a powerful and versatile tool for database administrators and developers working with MySQL databases. It provides a comprehensive set of features for database design, modeling, development, and administration. As Ubuntu 24.04 continues to gain popularity among developers and system administrators, it’s crucial to understand how to install and utilize MySQL Workbench on this platform.
In this guide, we’ll walk you through the process of installing MySQL Workbench on Ubuntu 24.04, from updating your system to configuring and using the application. Whether you’re a seasoned database professional or just starting your journey with MySQL, this article will provide you with the knowledge and steps necessary to get MySQL Workbench up and running on your Ubuntu system.
Prerequisites
Before we dive into the installation process, let’s ensure you have everything you need to successfully install MySQL Workbench on Ubuntu 24.04:
- A computer running Ubuntu 24.04 LTS (Long Term Support)
- An active internet connection for downloading packages
- A user account with sudo privileges
- At least 2GB of RAM and 5GB of free disk space
- Basic familiarity with the Linux command line interface
If you’re using an older version of Ubuntu, consider upgrading to 24.04 to ensure compatibility and access to the latest features. Make sure your system meets these requirements before proceeding with the installation.
Updating the System
Before installing any new software, it’s crucial to update your Ubuntu system to ensure you have the latest security patches and package information. This step helps prevent potential conflicts and ensures a smooth installation process.
To update your system, open a terminal and run the following commands:
sudo apt update
sudo apt upgrade -y
The first command updates the package lists, while the second upgrades all installed packages to their latest versions. The “-y” flag automatically answers “yes” to any prompts during the upgrade process.
Installing MySQL Server
While it’s possible to use MySQL Workbench without a local MySQL server, having one installed on your system allows for easier testing and development. Let’s install MySQL Server before proceeding with MySQL Workbench.
To install MySQL Server, run the following command in your terminal:
sudo apt install mysql-server -yDuring the installation, you may be prompted to set a root password for MySQL. Choose a strong, unique password and make sure to remember it, as you’ll need it later when configuring MySQL Workbench.
Once the installation is complete, verify that MySQL Server is running by executing:
sudo systemctl status mysqlYou should see output indicating that the MySQL service is active and running. If it’s not running, you can start it with:
sudo systemctl start mysqlInstalling MySQL Workbench
Now that we have MySQL Server installed, let’s proceed with installing MySQL Workbench. There are two primary methods to install MySQL Workbench on Ubuntu 24.04: using the Ubuntu Software Center or the APT package manager.
Method 1: Using Ubuntu Software Center
- Open the Ubuntu Software Center from your applications menu.
- In the search bar, type “MySQL Workbench”.
- Click on the MySQL Workbench entry in the search results.
- Click the “Install” button and enter your password when prompted.
- Wait for the installation to complete.
Method 2: Using APT Package Manager
For those who prefer using the command line, follow these steps:
- Open a terminal window.
- Run the following command to install MySQL Workbench:
sudo apt install mysql-workbench -yThis command will download and install MySQL Workbench along with any necessary dependencies.
To verify that MySQL Workbench has been installed successfully, you can run:
mysql-workbench --versionThis should display the version number of MySQL Workbench installed on your system.
Configuring MySQL Workbench
After successfully installing MySQL Workbench, it’s time to configure it for use with your MySQL Server. Follow these steps to set up your first connection:
- Launch MySQL Workbench from your applications menu or by typing
mysql-workbenchin the terminal. - On the home screen, click the “+” icon next to “MySQL Connections” to create a new connection.
- In the “Setup New Connection” dialog:
- Enter a name for your connection (e.g., “Local MySQL Server”)
- Set the hostname to “localhost” if you’re connecting to a local MySQL server
- Enter the port number (default is 3306)
- Enter your MySQL username (usually “root” for a local installation)
- Click “Test Connection” to verify that MySQL Workbench can connect to your MySQL Server.
- If prompted, enter your MySQL root password.
- If the test is successful, click “OK” to save the connection.
You should now see your new connection on the MySQL Workbench home screen. Double-click it to connect to your MySQL Server and start working with your databases.

Basic Usage of MySQL Workbench
Now that you have MySQL Workbench installed and configured, let’s explore some basic operations you can perform:
Creating a New Schema
- Connect to your MySQL Server using the connection you created earlier.
- In the Navigator panel, right-click on “Schemas” and select “Create Schema”.
- Enter a name for your new schema and click “Apply”.
- Review the SQL statement that will be executed and click “Apply” again to create the schema.
Creating Tables
- Expand your newly created schema in the Navigator panel.
- Right-click on “Tables” and select “Create Table”.
- Enter a name for your table and define its columns, data types, and constraints.
- Click “Apply” to create the table.
Running SQL Queries
- Click on the “SQL Editor” tab or select “File” > “New Query Tab”.
- Write your SQL query in the editor.
- Click the lightning bolt icon or press Ctrl+Enter to execute the query.
- View the results in the panel below the editor.
These basic operations will help you get started with MySQL Workbench. As you become more comfortable with the tool, you can explore its more advanced features for database design, administration, and performance tuning.
Troubleshooting Common Issues
While installing and using MySQL Workbench on Ubuntu 24.04, you may encounter some common issues. Here are solutions to a few of them:
Connection Errors
If you’re unable to connect to your MySQL Server:
- Verify that the MySQL service is running:
sudo systemctl status mysql - Check your MySQL credentials and ensure you’re using the correct username and password.
- Confirm that the MySQL server is listening on the expected port (usually 3306).
Performance Issues
If MySQL Workbench is running slowly:
- Close unnecessary connections and query tabs.
- Limit the number of rows returned in query results.
- Increase the memory allocated to MySQL Workbench in its preferences.
Compatibility Problems
If you experience compatibility issues:
- Ensure your MySQL Server and MySQL Workbench versions are compatible.
- Check for any known issues with your specific versions in the MySQL documentation.
- Consider upgrading both MySQL Server and MySQL Workbench to their latest stable versions.
Updating and Maintaining MySQL Workbench
To keep MySQL Workbench running smoothly and securely, it’s important to keep it updated and properly maintained:
Checking for Updates
Ubuntu’s package manager will automatically check for updates. To manually check and install updates, run:
sudo apt update
sudo apt upgrade
Best Practices for Maintenance
- Regularly backup your database schemas and important data.
- Keep your Ubuntu system and MySQL packages up to date.
- Monitor system resources and MySQL performance regularly.
- Review and optimize your database queries and structures periodically.
Advanced Features of MySQL Workbench
As you become more proficient with MySQL Workbench, you may want to explore its advanced features:
Data Modeling
MySQL Workbench provides robust tools for creating and manipulating database models visually. You can design tables, relationships, and even generate SQL scripts from your models.
Database Administration
The tool offers a comprehensive set of administration features, including user management, server configuration, and backup/restore functionality.
Performance Tuning Tools
MySQL Workbench includes performance reports, query explain plans, and other tools to help you optimize your database performance.
Congratulations! You have successfully installed MySQL Workbench. Thanks for using this tutorial for installing MySQL Workbench on Ubuntu 24.04 LTS system. For additional help or useful information, we recommend you check the official MySQL website.