How To Install Nessus Scanner on Rocky Linux 10

Installing and configuring Nessus Scanner on Rocky Linux 10 provides organizations with powerful vulnerability assessment capabilities. This comprehensive guide walks you through every step of the installation process, from system preparation to creating your first security scan.
Understanding Nessus Scanner
Nessus Scanner represents one of the most widely-used vulnerability assessment tools in cybersecurity today. Developed by Tenable, this robust scanning platform helps security professionals identify vulnerabilities, configuration issues, and compliance gaps across network infrastructure.
The scanner operates by conducting comprehensive security assessments of networks, systems, and applications. It maintains an extensive database of known vulnerabilities and security checks, regularly updated to address emerging threats. Nessus Essentials provides free scanning for up to 16 IP addresses, making it ideal for small businesses and home labs, while Nessus Professional offers unlimited scanning capabilities for enterprise environments.
Rocky Linux 10 serves as an excellent platform for Nessus deployment due to its enterprise-grade stability, security features, and Red Hat Enterprise Linux compatibility. The operating system’s robust architecture ensures reliable scanner performance while maintaining the security standards required for vulnerability assessment operations.
Prerequisites and System Requirements
Before installing Nessus Scanner on Rocky Linux 10, verify your system meets the necessary requirements. Your system should have a minimum of 2 GB RAM and 2 GB of available disk space, though 4 GB RAM and 10 GB disk space are recommended for optimal performance.
Network connectivity is essential for downloading installation packages and plugin updates. The system requires outbound internet access on port 443 (HTTPS) for license activation and plugin downloads. Ensure your firewall permits these connections.
You’ll need a non-root user account with sudo privileges for secure installation practices. Administrative access is required for package installation and service configuration, but running Nessus as root is strongly discouraged for security reasons.
SELinux configuration may require adjustment during installation. While Rocky Linux 10 ships with SELinux in enforcing mode by default, some installations may need SELinux set to permissive mode to ensure proper Nessus operation.
Pre-Installation Setup
Begin by creating a dedicated system user for Nessus operations. This enhances security by isolating the scanner from other system processes:
sudo useradd -r -s /bin/false nessusUpdate your Rocky Linux 10 system to ensure all packages are current:
sudo dnf update -y
sudo dnf install curl wget -y
Check your system’s SELinux status and configure it if necessary:
sestatusIf SELinux enforcement interferes with Nessus operation, temporarily set it to permissive mode:
sudo setenforce 0
sudo sed -i 's/SELINUX=enforcing/SELINUX=permissive/g' /etc/selinux/config
Verify your system architecture to ensure compatibility:
uname -mMost modern systems use x86_64 architecture, which is fully supported by Nessus Scanner.
Downloading Nessus Scanner
Navigate to the official Tenable Nessus download page. Create a free account to access Nessus Essentials, which provides scanning capabilities for up to 16 IP addresses.
During registration, provide accurate contact information as Tenable will email your activation code to the registered address. This activation code is required for initial scanner configuration.
Download the appropriate RPM package for Rocky Linux 10. Use the direct download method for systems with internet access:
cd /tmp
curl -O https://www.tenable.com/downloads/api/v1/public/pages/nessus/downloads/[VERSION]/Nessus-[VERSION]-el7.x86_64.rpm
Replace [VERSION] with the current Nessus version number. For headless servers without direct internet access, download the package on a connected machine and transfer it using SCP:
scp Nessus-*.rpm user@rocky-server:/tmp/Verify the download integrity by checking the file size and ensuring the download completed successfully:
ls -lh /tmp/Nessus-*.rpmInstalling Nessus via RPM Package
Install the downloaded RPM package using the DNF package manager, which provides better dependency resolution than rpm:
sudo dnf install ./Nessus-*.rpm -yAlternatively, use the traditional rpm command:
sudo rpm -Uvh Nessus-*.rpmThe installation process creates the necessary directory structure under /opt/nessus/ and installs all required components. During installation, you’ll see confirmation messages indicating successful package deployment.
Verify the installation by checking the installed files:
rpm -ql NessusThis command lists all files installed by the Nessus package, confirming successful installation. The installation creates several key directories:
/opt/nessus/sbin/– Contains the Nessus daemon executable/opt/nessus/etc/– Configuration files directory/opt/nessus/var/– Variable data and plugin storage/opt/nessus/lib/– Library files and dependencies
Configuring Nessus Service
Start the Nessus daemon service to begin the initialization process:
sudo systemctl start nessusdEnable automatic startup to ensure Nessus starts with the system:
sudo systemctl enable nessusdVerify the service status to confirm proper operation:
sudo systemctl status nessusdThe service should display as “active (running)” with no error messages. If the service fails to start, check the system logs for diagnostic information:
sudo journalctl -u nessusd -fMonitor the service during initial startup, as plugin compilation can take considerable time. The Nessus daemon must complete plugin initialization before accepting web interface connections.
Confirm the service is listening on the default port:
sudo netstat -tlnp | grep 8834You should see the Nessus daemon listening on port 8834.
Firewall Configuration
Configure the Rocky Linux 10 firewall to allow access to the Nessus web interface. Open port 8834/tcp for HTTPS connections:
sudo firewall-cmd --zone=public --add-port=8834/tcp --permanent
sudo firewall-cmd --reload
Verify the firewall rule was applied correctly:
sudo firewall-cmd --zone=public --list-portsPort 8834 should appear in the output. For enhanced security, consider restricting access to specific IP addresses or network ranges:
sudo firewall-cmd --zone=public --add-rich-rule='rule family="ipv4" source address="192.168.1.0/24" port protocol="tcp" port="8834" accept' --permanent
sudo firewall-cmd --reload
This example allows access only from the 192.168.1.0/24 network range. Adjust the network address to match your administrative network.
Test connectivity to ensure the firewall configuration allows proper access:
telnet localhost 8834A successful connection confirms the firewall permits traffic on port 8834.
Initial Nessus Web Setup
Access the Nessus web interface by navigating to https://your-server-ip:8834 in a web browser. You’ll encounter an SSL certificate warning since Nessus uses a self-signed certificate by default. Accept the security exception to proceed.
The initial setup wizard guides you through scanner configuration. Select “Nessus Essentials” as your product type unless you have a Professional license.
Enter the activation code received via email during registration. This code activates your Nessus Essentials license and enables scanning capabilities for up to 16 IP addresses.
Create an administrative user account with a strong password. This account provides full access to scanner configuration and scan management:
- Username: Choose a memorable administrator username
- Password: Use a complex password with mixed case, numbers, and symbols
- Confirm Password: Re-enter the password for verification
Click “Continue” to begin the plugin download and compilation process. This step is time-intensive, often requiring 30-60 minutes depending on internet connection speed and system performance. The process downloads the complete Nessus plugin database and compiles it for your system.

Monitor the progress indicator and avoid interrupting this process. Plugin compilation is essential for scanner functionality, as plugins contain the vulnerability detection logic.
Nessus CLI Configuration
The Nessus Command Line Interface (nessuscli) provides powerful administrative capabilities beyond the web interface. Access nessuscli from the installation directory:
sudo /opt/nessus/sbin/nessuscliAdd nessuscli to your system PATH for convenient access:
echo 'export PATH="$PATH:/opt/nessus/sbin"' >> ~/.bashrc
source ~/.bashrc
Common nessuscli commands include:
User Management:
sudo nessuscli adduser
sudo nessuscli rmuser username
sudo nessuscli chpasswd username
Plugin Management:
sudo nessuscli update
sudo nessuscli plugin list
System Information:
sudo nessuscli managed status
sudo nessuscli fix --reset-all
The CLI enables automation scenarios and advanced configuration options not available through the web interface. System administrators often use nessuscli for scripted deployments and maintenance tasks.
Creating Your First Vulnerability Scan
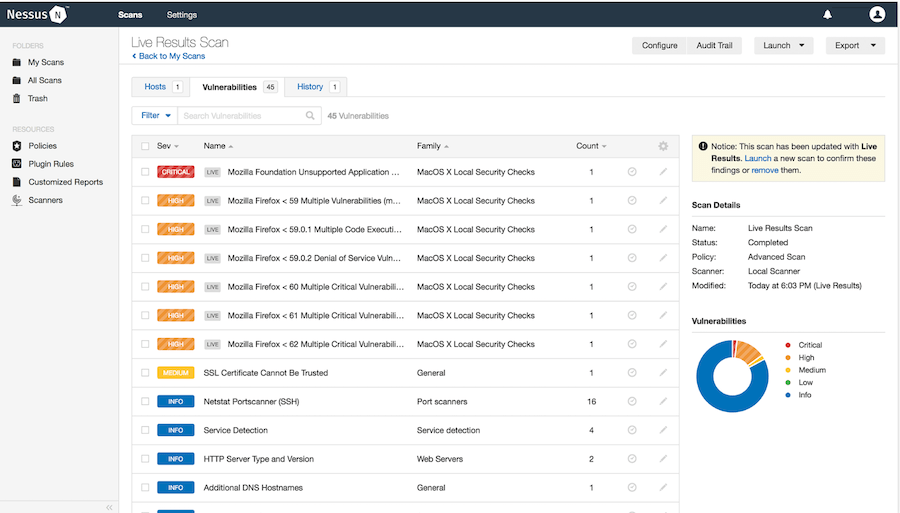
After completing initialization, log into the Nessus web interface using your administrator credentials. The dashboard provides an overview of scanner status and recent scan activity.
Click “Create a new scan” to access the scan template selection page. Choose “Basic Network Scan” for general vulnerability assessment, which provides comprehensive security testing suitable for most environments.
Configure scan parameters:
Scan Details:
- Name: Provide a descriptive scan name (e.g., “Internal Network Security Assessment”)
- Description: Add relevant details about the scan purpose and scope
- Folder: Organize scans using folder structure for better management
Target Configuration:
- Targets: Enter IP addresses, ranges, or hostnames to scan
- Examples: 192.168.1.100, 192.168.1.1-50, server.domain.com
Review Discovery Settings to customize scan behavior:
- Port Scan Range: Default covers common ports; expand for comprehensive assessment
- Network Ping: Enable for live host detection
- Service Detection: Identifies running services and versions
Configure Assessment Settings based on your requirements:
- General: Enable basic vulnerability checks
- Web Applications: Scan for web-specific vulnerabilities
- Compliance: Add compliance checks if required
Launch the scan by clicking the “Launch” button. Monitor scan progress through the dashboard, which displays completion percentage and discovered hosts.
Security Best Practices and Optimization
Implement robust security measures to protect your Nessus installation. Change default passwords regularly and enforce strong password policies for all user accounts.
Configure role-based access control to limit user permissions based on job responsibilities:
- Administrator: Full system access and configuration rights
- Standard User: Scan creation and execution permissions
- Guest: Read-only access to scan results
Regular updates are crucial for maintaining scanner effectiveness. Enable automatic plugin updates to ensure current vulnerability detection:
sudo /opt/nessus/sbin/nessuscli update --plugins-onlyPerformance optimization becomes important for large network scans:
- Adjust concurrent host scanning limits
- Configure scan throttling to reduce network impact
- Schedule intensive scans during off-peak hours
Implement backup procedures for scan configurations and historical data:
sudo cp -r /opt/nessus/var/nessus/ /backup/nessus-backup-$(date +%Y%m%d)Network segmentation considerations include isolating the scanner in a dedicated security network segment and restricting scan traffic through appropriate firewall rules.
Troubleshooting Common Issues
Service startup problems often relate to insufficient system resources or configuration conflicts. Check available memory and disk space:
free -h
df -h
If Nessus fails to start, examine service logs for specific error messages:
sudo journalctl -u nessusd --since "1 hour ago"Web interface accessibility issues typically involve firewall configuration or SSL certificate problems. Verify the service is listening on the correct port and firewall rules permit access.
Plugin download failures may result from network connectivity issues or proxy configuration problems. Test internet connectivity and DNS resolution:
curl -I https://plugins.nessus.org/
nslookup plugins.nessus.org
Performance issues during scanning can be addressed by adjusting scan policies and reducing concurrent scan targets. Monitor system resources during scans to identify bottlenecks.
License activation problems require verification of the activation code and internet connectivity to Tenable’s licensing servers. Ensure outbound HTTPS connections are permitted through your firewall.
Maintenance and Updates
Establish a regular maintenance schedule to keep your Nessus installation current and secure. System updates for Rocky Linux 10 should be applied regularly:
sudo dnf update -yPlugin updates can be configured for automatic download or manually triggered:
sudo /opt/nessus/sbin/nessuscli updateMonitor plugin update status through the web interface under Settings > Software Updates. The interface displays the last update time and available plugin count.
Version upgrades require downloading new installation packages and following upgrade procedures. Always backup configuration data before major version upgrades.
Performance monitoring helps identify resource constraints and optimization opportunities. Monitor disk usage in /opt/nessus/var/ and system memory utilization during scan operations.
Backup strategies should include configuration files, scan policies, and scan results. Implement automated backups to ensure data protection:
#!/bin/bash
BACKUP_DIR="/backup/nessus"
DATE=$(date +%Y%m%d_%H%M%S)
sudo tar -czf "$BACKUP_DIR/nessus-backup-$DATE.tar.gz" /opt/nessus/var/
Congratulations! You have successfully installed Nessus. Thanks for using this tutorial for installing the Nessus vulnerability scanner on your Rocky Linux 10 system. For additional help or useful information, we recommend you check the official Nessus website.