How To Install NetBox on Ubuntu 22.04 LTS

In this tutorial, we will show you how to install NetBox on Ubuntu 22.04 LTS. Netbox is a powerful open-source web application designed to help manage and document computer networks. Initially conceived by the network engineering team at DigitalOcean, Netbox now serves as a vital tool for numerous system administrators and network engineers worldwide.
This article assumes you have at least basic knowledge of Linux, know how to use the shell, and most importantly, you host your site on your own VPS. The installation is quite simple and assumes you are running in the root account, if not you may need to add ‘sudo‘ to the commands to get root privileges. I will show you the step-by-step installation of the NetBox modern networks on Ubuntu 22.04 (Jammy Jellyfish). You can follow the same instructions for Ubuntu 22.04 and any other Debian-based distribution like Linux Mint, Elementary OS, Pop!_OS, and more as well.
Prerequisites
- A server running one of the following operating systems: Ubuntu 22.04, 20.04, and any other Debian-based distribution like Linux Mint.
- SSH access to the server (or just open Terminal if you’re on a desktop).
- Basic knowledge of the Linux command-line interface (CLI). This guide assumes you’re comfortable with executing commands in a terminal.
- An active internet connection. You’ll need an internet connection to download the necessary packages and dependencies for NetBox.
- A
non-root sudo useror access to theroot user. We recommend acting as anon-root sudo user, however, as you can harm your system if you’re not careful when acting as the root.
Install NetBox on Ubuntu 22.04 LTS Jammy Jellyfish
Step 1. Before we dive into the installation process, ensure that your Ubuntu 22.04 LTS system is up-to-date. You can do this by running the following commands:
sudo apt update
sudo apt upgrade
Step 2. Installing Required Packages.
First, we need to install Python3, pip, and other necessary packages. Run the following commands:
sudo apt install python3 python3-pip python3-venv build-essential libxml2-dev libxslt1-dev zlib1g-dev libsasl2-dev libldap2-dev
Step 3. Set Up PostgreSQL.
Netbox uses PostgreSQL as its database backend. Install PostgreSQL and its related packages with the following command:
sudo apt install postgresql libpq-dev
Next, create a new PostgreSQL database and user for Netbox. Access the PostgreSQL shell with the command sudo -u postgres psql and run the following commands:
CREATE DATABASE netbox;
CREATE USER netbox WITH PASSWORD 'your-strong-password';
GRANT ALL PRIVILEGES ON DATABASE netbox TO netbox;
\q
Step 4. Installing Redis.
Redis is used for caching in Netbox. Install it using the following command:
sudo apt install redis-server
After installation, verify that Redis is running:
sudo systemctl status redis-server
Step 5. Installing Netbox on Ubuntu 22.04.
Download the latest version of Netbox from the official GitHub repository. As of writing, the latest version is v3.6.8. Adjust the version number as necessary:
wget https://github.com/netbox-community/netbox/archive/refs/tags/v3.6.8.tar.gz
Rename the extracted directory to ‘netbox‘:
sudo mv /opt/netbox-3.6.8 /opt/netbox
Step 6. Configure Netbox
Navigate to the Netbox configuration directory and copy the example configuration file:
cd /opt/netbox/netbox/netbox/
cp configuration.example.py configuration.py
Open the configuration file with a text editor and edit the following parameters:
ALLOWED_HOSTS = ['your-server-ip', 'your-domain.com']
DATABASE = {
    'NAME': 'netbox',
    'USER': 'netbox',
    'PASSWORD': 'your-strong-password',
    'HOST': 'localhost',
    'PORT': '',
}
SECRET_KEY = 'your-secret-key'
Replace ‘your-server-ip‘, ‘your-domain.com‘, and ‘your-strong-password‘ with your server IP, domain name, and the password you set for the PostgreSQL user, respectively. Generate a secret key for Netbox using an online secret key generator.
Step 7. Set Up Gunicorn.
Gunicorn is a Python WSGI HTTP server that we will use to serve Netbox. Install it within a Python virtual environment:
cd /opt/netbox/
python3 -m venv netbox-venv
source netbox-venv/bin/activate
pip install gunicorn
Step 8. Configure Static Files.
Netbox uses static files like CSS and JavaScript to render the web interface. Collect these files using the following commands:
pip install -r requirements.txt
python3 manage.py collectstatic
Apply the database migrations:
python3 manage.py migrate
Create a superuser account for Netbox:
python3 manage.py createsuperuser
Finally, test the installation by starting the Netbox server:
gunicorn -c /opt/netbox/gunicorn_config.py netbox.wsgi
Step 9. Accessing NetBox Web Interface.
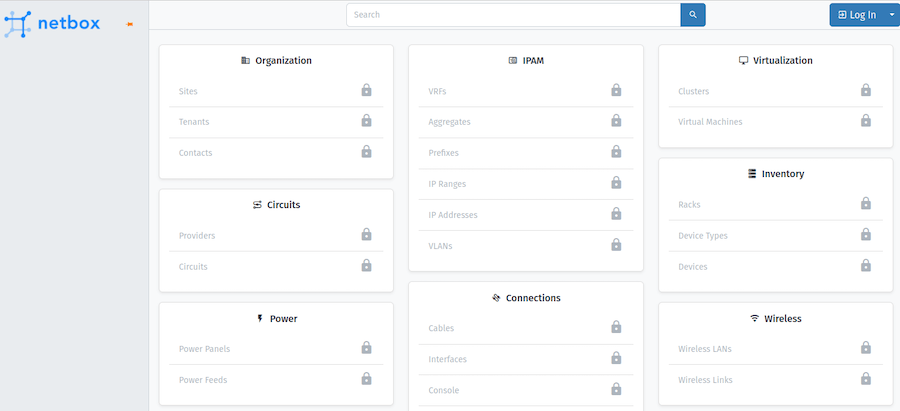
Once successfully installed, You should now be able to access Netbox via a web browser at http://your-server-ip:8000.

Congratulations! You have successfully installed NetBox. Thanks for using this tutorial for installing NetBox modern networks on Ubuntu 22.04 LTS Jammy Jellyfish system. For additional help or useful information, we recommend you check the official NetBox website.