In this tutorial, we will show you how to install Nginx on Debian 11. For those of you who didn’t know, Nginx is a free, open-source web server that provides HTTP, reverse proxy, caching, and load-balancing functionality. It’s a great alternative to Apache, and it’s easy to set up.
This article assumes you have at least basic knowledge of Linux, know how to use the shell, and most importantly, you host your site on your own VPS. The installation is quite simple and assumes you are running in the root account, if not you may need to add ‘sudo‘ to the commands to get root privileges. I will show you the step-by-step installation of the Nginx web server on a Debian 11 (Bullseye).
Prerequisites
- A server running one of the following operating systems: Debian 11 (Bullseye).
- It’s recommended that you use a fresh OS install to prevent any potential issues.
- SSH access to the server (or just open Terminal if you’re on a desktop).
- An active internet connection. You’ll need an internet connection to download the necessary packages and dependencies for Nginx.
- A
non-root sudo useror access to theroot user. We recommend acting as anon-root sudo user, however, as you can harm your system if you’re not careful when acting as the root.
Install Nginx on Debian 11 Bullseye
Step 1. Before we install any software, it’s important to make sure your system is up to date by running the following apt commands in the terminal:
sudo apt update
sudo apt upgrade
sudo apt install curl gnupg2 ca-certificates lsb-release
Step 2. Installing Nginx on Debian 11.
Now we run the following command below to install Nginx to your Debian system:
sudo apt install nginx
Output:
root@idroot.us:~# sudo apt install nginx
Reading package lists... Done
Building dependency tree... Done
Reading state information... Done
The following additional packages will be installed:
  geoip-database libgeoip1 libnginx-mod-http-geoip
  libnginx-mod-http-image-filter
  libnginx-mod-http-xslt-filter libnginx-mod-mail
  libnginx-mod-stream libnginx-mod-stream-geoip
  nginx-common nginx-core
  Suggested packages:
  geoip-bin fcgiwrap nginx-doc
After the installation is complete, start Nginx and add it to automatically start on your system start-up using:
sudo systemctl start nginx
sudo systemctl enable nginx
Verify the installation:
nginx -v
Step 3. Configure Firewall.
Now add firewall rules to allow connections as well as HTTP (port 80) and HTTPS (port 443) traffic:
sudo ufw allow 'Nginx HTTP'
sudo ufw allow 'Nginx HTTPS'
Step 4. Accessing Nginx Web Server.
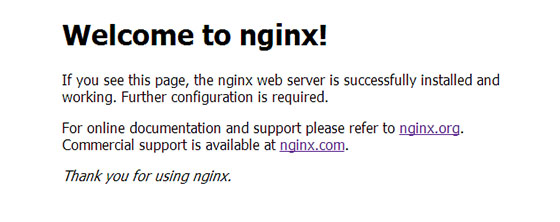
Once successfully installed, you should be able to view the test Nginx web page through your web browser:
http://your-server-ip-address

Congratulations! You have successfully installed Nginx. Thanks for using this tutorial for installing the latest version of the Nginx web server on Debian 11 Bullseye. For additional help or useful information, we recommend you check the official Nginx website.