In this tutorial, we will show you how to install Nginx with Let’s Encrypt SSL on Fedora 35. For those of you who didn’t know, Let’s Encrypt is a non-profit Certificate Authority (CA) managed by the Internet Security Research Group. It provides free SSL certificates for your domains to secure data on the transport layer. The certificate is valid for 90 days, during which renewal can take place at any time. The offer is accompanied by an automated process designed to overcome manual creation, validation, signing, installation, and renewal of certificates for secure websites.
This article assumes you have at least basic knowledge of Linux, know how to use the shell, and most importantly, you host your site on your own VPS. The installation is quite simple and assumes you are running in the root account, if not you may need to add ‘sudo‘ to the commands to get root privileges. I will show you the step-by-step installation of the Nginx with Let’s Encrypt SSL on a Fedora 35.
Prerequisites
- A server running one of the following operating systems: Fedora Linux.
- It’s recommended that you use a fresh OS install to prevent any potential issues.
- SSH access to the server (or just open Terminal if you’re on a desktop).
- An active internet connection. You’ll need an internet connection to download the necessary packages and dependencies for Nginx.
- A
non-root sudo useror access to theroot user. We recommend acting as anon-root sudo user, however, as you can harm your system if you’re not careful when acting as the root.
Install Nginx with Let’s Encrypt SSL on Fedora 35
Step 1. Before proceeding, update your Fedora operating system to make sure all existing packages are up to date. Use this command to update the server packages:
sudo dnf upgrade
sudo dnf update
Step 2. Installing Nginx on Fedora 35.
By default, Nginx is available on Fedora 35 base repository. Now run the following command below to install Nginx to your Fedora system:
sudo dnf install nginx
Verify the installation using this command:
nginx -v
Next, after installation is complete we need to start the Nginx server to start operating. We do that with the following command below:
sudo systemctl start nginx
sudo systemctl enable nginx
sudo systemctl status nginx
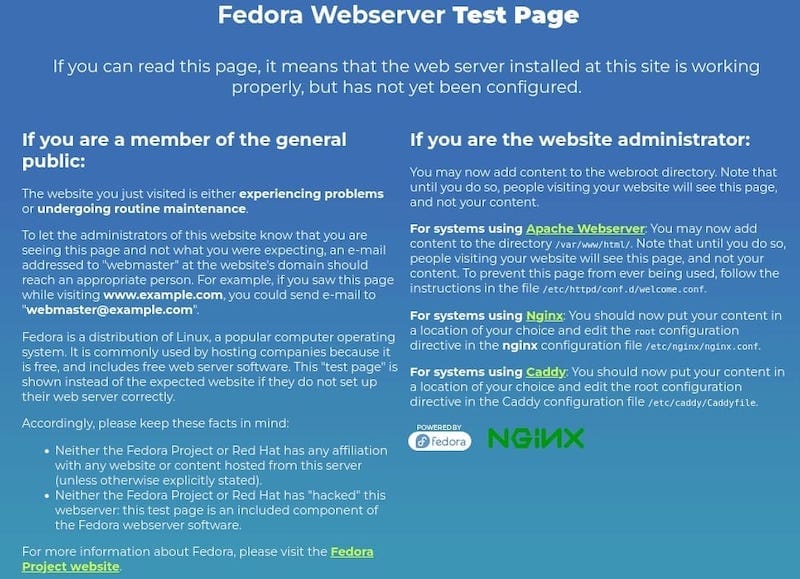
Let us go ahead and run the Nginx web server test page. Go to your web browser and visit your domain or your IP address:
http://your-server-ip-address
Output:

Step 3. Configure Firewall.
If using firewalld enable HTTP and HTTPS in the firewall:
sudo firewall-cmd --permanent --add-service=http
sudo firewall-cmd --permanent --add-service=https
sudo firewall-cmd --reload
Step 4. Secure Nginx with Let’s Encrypt SSL Free Certificate.
The Certbot is a command-line tool used to simplify the process of obtaining and renewing Let’s Encrypt SSL certificates for your website. Now install the Certbot package using the following command below:
sudo dnf install python3-certbot-nginx
After that, run the following command to start the creation of your certificate:
sudo certbot --nginx --agree-tos --redirect --hsts --staple-ocsp --email you@your-domian.com -d www.your-domian.com
Output:
- - - - - - - - - - - - - - - - - - - - - - - - - - - - - - - - - - - - - - - -
Congratulations! You have successfully enabled
https://your-domain.com
- - - - - - - - - - - - - - - - - - - - - - - - - - - - - - - - - - - - - - - -

IMPORTANT NOTES:
 - Congratulations! Your certificate and chain have been saved at:
   /etc/letsencrypt/live/your-domain.com/fullchain.pem
   Your key file has been saved at:
   /etc/letsencrypt/live/your-domain.com/privkey.pem
   Your certificate will expire on 2021-12-29. To obtain a new or
   tweaked version of this certificate in the future, simply run
   certbot again with the "certonly" option. To non-interactively
   renew *all* of your certificates, run "certbot renew"
 - If you like Certbot, please consider supporting our work by:

   Donating to ISRG / Let's Encrypt:   https://letsencrypt.org/donate
   Donating to EFF:                    https://eff.org/donate-le
If you want you can set a cron job to renew the certificates automatically. Certbot offers a script that does this automatically, and you can first test to make sure everything is working by performing a dry run:
sudo certbot renew --dry-run
Step 5. Test Let’s Encrypt SSL Certificate.
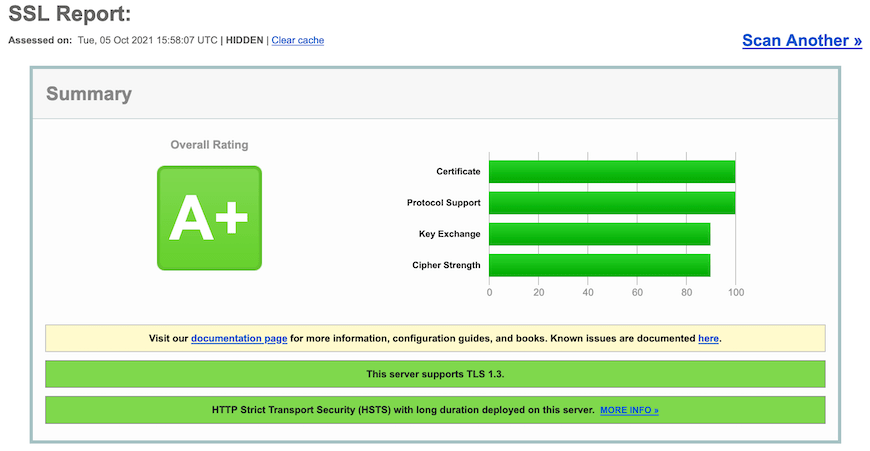
Test your SSL certificate for problems and its security ratings by going to the below URL ssllabs.com/ssltest/ and running an SSL test on your domain:

Congratulations! You have successfully installed Nginx with free SSL. Thanks for using this tutorial for installing the Nginx web server with Let’s Encrypt SSL on your Fedora 35 system. For additional help or useful information, we recommend you check the official Nginx website.