![]()
In this tutorial, we will show you how to install Odoo on CentOS 8. For those of you who didn’t know, Odoo is one of the most popular and most powerful Open Source ERP business software based on the Python programming language. It is a web-based fully-featured application and comes with Open Source CRM, Point of Sales, Human Resource Management, Point of Sales, Billing and Accounting, Event Management, Email Marketing, Order Tracking, etc. This application is helpful to maintain ERP in any business.
This article assumes you have at least basic knowledge of Linux, know how to use the shell, and most importantly, you host your site on your own VPS. The installation is quite simple and assumes you are running in the root account, if not you may need to add ‘sudo‘ to the commands to get root privileges. I will show you the step-by-step installation of Odoo on a CentOS 8 server.
Prerequisites
- A server running one of the following operating systems: CentOS 8.
- It’s recommended that you use a fresh OS install to prevent any potential issues.
- A
non-root sudo useror access to theroot user. We recommend acting as anon-root sudo user, however, as you can harm your system if you’re not careful when acting as the root.
Install Odoo on CentOS 8
Step 1. First, let’s start by ensuring your system is up-to-date.
sudo dnf install epel-release
sudo dnf update
Step 2. Installing Dependencies.
Install Python 3, Git, and all the libraries and tools required to build Odoo from source:
sudo dnf install python3 python3-devel git gcc redhat-rpm-config libxslt-devel bzip2-devel openldap-devel libjpeg-devel freetype-devel
Step 3. Create an Odoo User.
We will create a new system user and group that we need to run the Odoo service. The home directory we will define in the /opt/odoo13 directory:
sudo useradd -m -U -r -d /opt/odoo13 -s /bin/bash odoo13
Step 4. Installing PostgreSQL database.
PostgreSQL is available in the default repositories. Now, Install PostgreSQL packages using the following command:
sudo dnf install @postgresql:10
sudo dnf install postgresql-contrib
Once the installation is complete, the PostgreSQL installation will not be enabled for automatic-start or have the database initialized automatically. To make your database installation complete, you need to perform the following steps:
sudo postgresql-setup initdb
Start the PostgreSQL service and enable it to start on boot:
sudo systemctl enable --now postgresql
You can verify the installation using the below command:
$ sudo -u postgres psql -c "SELECT version();"
Step 5. Installing Wkhtmltopdf.
Odoo requires the wkhtmltopdf package, which is an open-source tool that converts the HTML format to PDF so that Odoo can print PDF reports:
sudo dnf install https://github.com/wkhtmltopdf/wkhtmltopdf/releases/download/0.12.5/wkhtmltox-0.12.5-1.centos8.x86_64.rpm
Step 6. Installing Odoo on CentOS 8.
First, start by cloning the Odoo source code from the Odoo GitHub repository:
sudo su - odoo13
git clone https://www.github.com/odoo/odoo --depth 1 --branch 13.0 /opt/odoo13/odoo
Next, create a new Python virtual environment for the Odoo installation:
cd /opt/odoo13
python3 -m venv venv
Once the virtual environment is created, we can activate it with this next command:
source venv/bin/activate
Then, install the required Python modules:
pip3 install -r odoo/requirements.txt
Once the installation is complete, deactivate the environment:
deactivate && exit
We will create a new directory for the custom modules and change its ownership to the ‘odoo’ user:
mkdir /opt/odoo13/odoo-custom-addons
chown odoo: /opt/odoo13/odoo-custom-addons
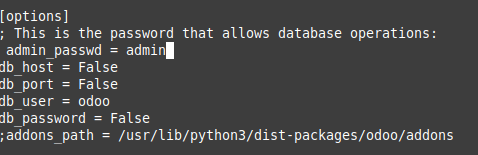
The next step is to create a configuration file for the new Odoo instance:
sudo nano /etc/odoo13.conf
[options]
; This is the password that allows database operations:
admin_passwd = admin_strong_passwd
db_host = False
db_port = False
db_user = odoo13
db_password = False
addons_path = /opt/odoo13/odoo/addons, /opt/odoo13/odoo-custom-addons
Step 7. Create a systemd Unit File.
We will create a service unit file so that we can run Odoo as a service, open your text editor and create a file named odoo13.service inside the /etc/systemd/system/ directory:
sudo nano /etc/systemd/system/odoo13.service
Add the following content:
[Unit]
Description=Odoo13
Requires=postgresql.service
After=network.target postgresql.service

[Service]
Type=simple
SyslogIdentifier=odoo13
PermissionsStartOnly=true
User=odoo13
Group=odoo13
ExecStart=/opt/odoo13/venv/bin/python3 /opt/odoo13/odoo/odoo-bin -c /etc/odoo13.conf
StandardOutput=journal+console

[Install]
WantedBy=multi-user.target
Once the file is saved and closed, we will reload the daemon:
sudo systemctl daemon-reload
sudo systemctl enable --now odoo13
sudo systemctl status odoo13
Step 8. Configure Firewall for Odoo.
Modify the firewall rules to allow visitors to access Odoo using PostgreSQL’s default communicating port 8069:
firewall-cmd --zone=public --permanent --add-service=http
firewall-cmd --zone=public --permanent --add-port=8069/tcp
firewall-cmd --reload
Step 9. Accessing Odoo.
Odoo will be available on HTTP port 8069 by default. Open your favorite browser and navigate to http://your-domain.com:8069 or http://<your_server_IP_address>:8069.

Congratulations! You have successfully installed Odoo. Thanks for using this tutorial for installing Odoo’s open-source ERP and CRM on your CentOS 8 system. For additional help or useful information, we recommend you check the official Odoo website.
[su_box title=”VPS Manage Service Offer” style=”bubbles” box_color=”#000000″ radius=”10″]If you don’t have time to do all of this stuff, or if this is not your area of expertise, we offer a service to do “VPS Manage Service Offer”, starting from $10 (Paypal payment). Please contact us to get the best deal![/su_box]