How To Install OnlyOffice on Fedora 41

OnlyOffice is a powerful and versatile office suite that offers compatibility with Microsoft Office formats and provides a range of collaborative features. For Fedora 41 users looking to enhance their productivity, installing OnlyOffice can be a game-changer. This comprehensive guide will walk you through various methods to install OnlyOffice on Fedora 41, ensuring you find the approach that best suits your needs.
Fedora 41, known for its cutting-edge features and stability, provides an excellent platform for running OnlyOffice. Whether you’re a developer, student, or professional, OnlyOffice offers a robust set of tools for document creation, spreadsheet management, and presentation design. In this article, we’ll explore multiple installation methods, from using RPM packages to deploying via containers, ensuring you can get OnlyOffice up and running on your Fedora 41 system with ease.
Prerequisites
Before we dive into the installation process, let’s ensure your system meets the necessary requirements:
- A Fedora 41 system with up-to-date packages
- An active internet connection
- Terminal access
- Root or sudo privileges
It’s also recommended to have at least 2 GB of RAM and 2 GB of free disk space to ensure smooth operation of OnlyOffice.
Method 1: RPM Package Installation
The RPM package installation is often the most straightforward method for Fedora users. Let’s go through the process step-by-step.
Step 1: Update Your System
First, ensure your Fedora 41 system is up-to-date:
sudo dnf upgrade --refreshThis command will refresh your package lists and upgrade all installed packages to their latest versions.
Step 2: Download the OnlyOffice RPM Package
Next, download the OnlyOffice Desktop Editors RPM package:
wget https://download.onlyoffice.com/install/desktop/editors/linux/onlyoffice-desktopeditors.x86_64.rpmThis command fetches the latest version of OnlyOffice Desktop Editors specifically designed for 64-bit Linux systems.
Step 3: Install OnlyOffice
Now, install the downloaded RPM package using DNF:
sudo dnf install ./onlyoffice-desktopeditors.x86_64.rpmDNF will automatically handle any dependencies required for OnlyOffice.
Step 4: Launch OnlyOffice
After installation, you can launch OnlyOffice from the application menu or by using the terminal command:
onlyoffice-desktopeditorsMethod 2: Flatpak Installation
Flatpak offers a universal package management solution that works across different Linux distributions. Here’s how to install OnlyOffice using Flatpak on Fedora 41.
Step 1: Ensure Flatpak is Installed
Fedora 41 comes with Flatpak pre-installed, but if you’ve removed it, you can reinstall it using:
sudo dnf install flatpakStep 2: Add the Flathub Repository
Add the Flathub repository to access a wide range of Flatpak applications:
flatpak remote-add --if-not-exists flathub https://flathub.org/repo/flathub.flatpakrepoStep 3: Install OnlyOffice via Flatpak
Install OnlyOffice Desktop Editors using Flatpak:
flatpak install flathub org.onlyoffice.desktopeditorsStep 4: Run OnlyOffice
Launch OnlyOffice using:
flatpak run org.onlyoffice.desktopeditorsMethod 3: Docker/Podman Deployment
For users who prefer containerized applications, deploying OnlyOffice using Docker or Podman is an excellent option. Fedora 41 comes with Podman pre-installed, which is a daemonless container engine compatible with Docker containers.
Step 1: Install Podman (if not already installed)
Ensure Podman is installed on your system:
sudo dnf install podmanStep 2: Pull the OnlyOffice Docker Image
Pull the OnlyOffice Document Server image:
podman pull onlyoffice/documentserver:latestStep 3: Create Necessary Directories
Create directories for OnlyOffice data:
sudo mkdir -p /app/onlyoffice/DocumentServer/{logs,data,lib,db}Step 4: Run the OnlyOffice Container
Launch the OnlyOffice container:
sudo podman run -i -t -d -p 80:80 -p 443:443 --restart=always \
-v /app/onlyoffice/DocumentServer/logs:/var/log/onlyoffice:Z \
-v /app/onlyoffice/DocumentServer/data:/var/www/onlyoffice/Data:Z \
-v /app/onlyoffice/DocumentServer/lib:/var/lib/onlyoffice:Z \
-v /app/onlyoffice/DocumentServer/db:/var/lib/postgresql:Z \
onlyoffice/documentserver:latest
Step 5: Verify Installation
Check if OnlyOffice is running correctly:
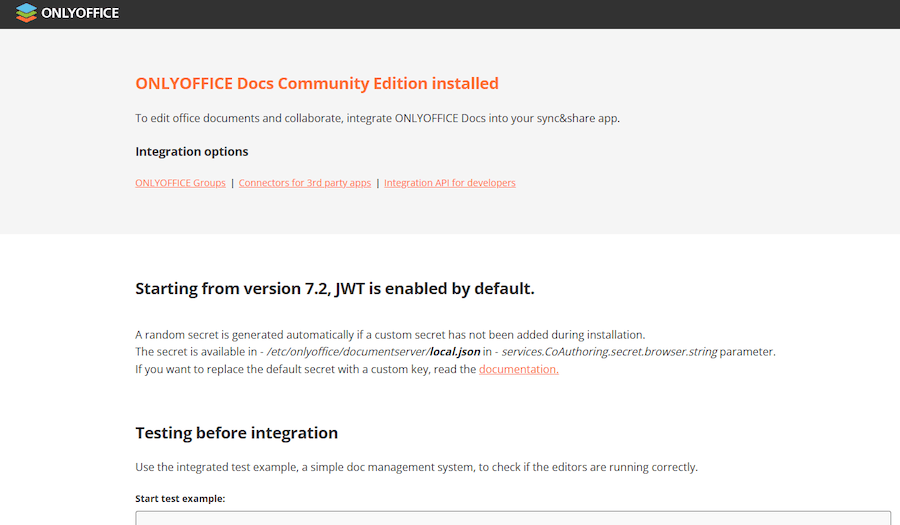
sudo podman exec $(sudo podman ps -q) sudo supervisorctl start ds:exampleIf successful, you can access OnlyOffice by navigating to `http://localhost` in your web browser.

Method 4: Building from Source
For advanced users who want complete control over the installation process, building OnlyOffice from source is an option. However, this method is more complex and time-consuming.
Step 1: Install Dependencies
Install necessary build dependencies:
sudo dnf groupinstall "Development Tools" "Development Libraries"
sudo dnf install git nodejs npm
Step 2: Clone the Repository
Clone the OnlyOffice Desktop Editors repository:
git clone https://github.com/ONLYOFFICE/DesktopEditors.git
cd DesktopEditors
Step 3: Build OnlyOffice
Build the application:
npm install
npm run build
This process may take a considerable amount of time depending on your system’s specifications.
Step 4: Install OnlyOffice
Install the built application:
sudo npm run installConfiguration and Optimization
After installing OnlyOffice, you may want to optimize its performance and configure it to suit your needs.
Performance Tweaks
- Increase cache size in OnlyOffice settings for faster document loading
- Enable hardware acceleration if your system supports it
- Adjust the number of undo/redo steps to balance between functionality and memory usage
Integration with Fedora
Ensure OnlyOffice is set as the default application for office documents:
xdg-mime default onlyoffice-desktopeditors.desktop application/vnd.openxmlformats-officedocument.wordprocessingml.document
xdg-mime default onlyoffice-desktopeditors.desktop application/vnd.openxmlformats-officedocument.spreadsheetml.sheet
xdg-mime default onlyoffice-desktopeditors.desktop application/vnd.openxmlformats-officedocument.presentationml.presentation
Collaborative Features Setup
OnlyOffice offers powerful collaboration tools. To set up collaborative editing:
- Configure the document server (if using the Docker/Podman method)
- Set up user authentication
- Configure sharing settings
- Ensure proper network configuration for remote access
Maintenance and Updates
Keeping OnlyOffice up-to-date is crucial for security and performance.
Updating RPM Installation
sudo dnf update onlyoffice-desktopeditorsUpdating Flatpak Installation
flatpak update org.onlyoffice.desktopeditorsUpdating Docker/Podman Installation
podman pull onlyoffice/documentserver:latest
podman stop $(podman ps -q --filter ancestor=onlyoffice/documentserver)
podman rm $(podman ps -a -q --filter ancestor=onlyoffice/documentserver)
# Re-run the container with the updated image
Troubleshooting
If you encounter issues during installation or use of OnlyOffice on Fedora 41, try these troubleshooting steps:
- Check system logs:
journalctl -xe - Verify dependencies:
sudo dnf deplist onlyoffice-desktopeditors - Clear cache: Remove
~/.config/onlyoffice - For Docker/Podman issues, check container logs:
podman logs [container_id]
Congratulations! You have successfully installed OnlyOffice. Thanks for using this tutorial for installing the OnlyOffice on Fedora 41 system. For additional help or useful information, we recommend you check the OnlyOffice website.