How To Install OnlyOffice on Fedora 42

OnlyOffice stands as a powerful open-source office suite offering a robust alternative to traditional office software on Linux. With Fedora 42’s excellent compatibility, you can enjoy a seamless experience with this feature-rich productivity solution. This guide explores various installation methods, from simple package installations to containerized deployments, helping you select the approach that best fits your needs.
Understanding OnlyOffice
OnlyOffice comes in two main variants: Desktop Editors and Document Server. The Desktop Editors package provides traditional word processing, spreadsheet, and presentation applications similar to Microsoft Office or LibreOffice. The Document Server version enables collaborative editing through a web interface, perfect for team environments.
A key strength of OnlyOffice is its exceptional compatibility with Microsoft Office formats. Documents created in Word, Excel, or PowerPoint can be opened, edited, and saved with minimal formatting issues. This compatibility extends to DOCX, XLSX, and PPTX formats, making OnlyOffice ideal for collaborating with colleagues using Microsoft products.
Prerequisites for Installation
Before proceeding with installation, ensure your Fedora 42 system meets these requirements:
- 64-bit system architecture (x86_64)
- At least 4GB of RAM (8GB recommended for optimal performance)
- 2GB of available disk space
- A dual-core processor or better
- Updated system packages
To update your system, open a terminal and run:
sudo dnf upgrade --refreshThis command fetches the latest package information and upgrades all installed packages. It’s recommended to back up important data before proceeding with any installation.
Method 1: Installing OnlyOffice via RPM Package
The RPM installation method provides native integration with Fedora’s package management system.
Updating Fedora Packages
Start by ensuring your system is fully updated:
sudo dnf clean all
sudo dnf update
These commands clear the DNF package manager cache and update all installed packages.
Downloading and Installing the OnlyOffice RPM
Download the OnlyOffice RPM package directly:
wget https://download.onlyoffice.com/install/desktop/editors/linux/onlyoffice-desktopeditors.x86_64.rpmThen install it using DNF:
sudo dnf install onlyoffice-desktopeditors.x86_64.rpmAlternatively, you can install directly from the OnlyOffice repository:
sudo dnf install https://download.onlyoffice.com/repo/centos/main/noarch/onlyoffice-repo.noarch.rpm
sudo dnf install onlyoffice-desktopeditors
This simpler approach works well on Fedora despite using repositories designed for CentOS/RHEL.
Method 2: Installing OnlyOffice via Flatpak
Flatpak provides a containerized installation method with excellent security isolation.
Verifying Flatpak Installation
Fedora 42 comes with Flatpak pre-installed. Verify with:
flatpak --versionIf not installed, add it:
sudo dnf install flatpakEnabling Flathub Repository
Add the Flathub repository:
flatpak remote-add --if-not-exists flathub https://flathub.org/repo/flathub.flatpakrepoInstallation Commands
Install OnlyOffice with:
flatpak install flathub org.onlyoffice.desktopeditorsAfter installation, launch OnlyOffice from your application menu or with:
flatpak run org.onlyoffice.desktopeditorsThis method offers excellent isolation from your system, enhancing security and preventing dependency conflicts.
Method 3: Installing OnlyOffice via Podman
For collaborative environments, you may want to install OnlyOffice Document Server using Podman, Fedora’s native container solution.
Setting up Required Directories
Create directories for persistent storage:
sudo mkdir -p /app/onlyoffice/DocumentServer/logs
sudo mkdir -p /app/onlyoffice/DocumentServer/data
sudo mkdir -p /app/onlyoffice/DocumentServer/lib
sudo mkdir -p /app/onlyoffice/DocumentServer/db
Running the OnlyOffice Container
Deploy the container with:
sudo podman run -i -t -d -p 80:80 -p 443:443 --restart=always \
  -v /app/onlyoffice/DocumentServer/logs:/var/log/onlyoffice:Z \
  -v /app/onlyoffice/DocumentServer/data:/var/www/onlyoffice/Data:Z \
  -v /app/onlyoffice/DocumentServer/lib:/var/lib/onlyoffice:Z \
  -v /app/onlyoffice/DocumentServer/db:/var/lib/postgresql:Z \
  -u root onlyoffice/documentserver:latest
This command maps necessary ports and creates volume mounts for persistent data. Note that rootless deployment is not recommended for OnlyOffice Document Server.
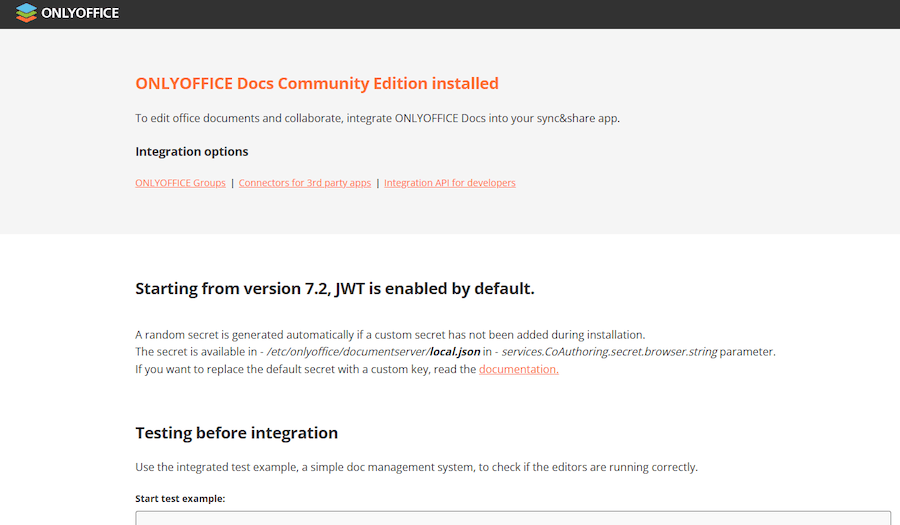
To verify the installation is working, visit http://localhost in your web browser.

Method 4: Installing OnlyOffice via Docker
While Podman is Fedora’s native container solution, Docker remains popular across various Linux distributions.
Docker Installation Prerequisites
Install Docker if not already available:
sudo dnf install docker
sudo systemctl enable docker
sudo systemctl start docker
Pulling and Running the Container
Pull the OnlyOffice Document Server image:
sudo docker pull onlyoffice/documentserver:latestThen run the container with the same parameters as the Podman example:
sudo docker run -i -t -d -p 80:80 -p 443:443 --restart=always \
  -v /app/onlyoffice/DocumentServer/logs:/var/log/onlyoffice \
  -v /app/onlyoffice/DocumentServer/data:/var/www/onlyoffice/Data \
  -v /app/onlyoffice/DocumentServer/lib:/var/lib/onlyoffice \
  -v /app/onlyoffice/DocumentServer/db:/var/lib/postgresql \
  onlyoffice/documentserver:latest
This provides the full collaborative Document Server experience.
Method 5: Installing OnlyOffice via Snap
Snap packages offer another universal installation method with automatic updates.
Ensuring Snap Support
Install Snap support on Fedora 42:
sudo dnf install snapd
sudo systemctl enable --now snapd.socket
sudo ln -s /var/lib/snapd/snap /snap
Log out and back in to update your session paths.
Installation Commands
Install OnlyOffice Desktop Editors:
sudo snap install onlyoffice-desktopeditorsOr for Document Server:
sudo snap install onlyoffice-dsThe Snap method provides simplified management and automatic updates.
Integration with Nextcloud
OnlyOffice Document Server can integrate with Nextcloud to provide collaborative document editing.
After installing OnlyOffice Document Server and Nextcloud:
- In Nextcloud, install the “ONLYOFFICE” app
- Navigate to Settings > Administration > ONLYOFFICE
- Configure the Document Server address
- Set up a secret key for JWT authentication
- Configure internal addresses if needed
This integration enables collaborative editing directly within your Nextcloud instance.
Security Considerations
For production environments, implement these security measures:
Enabling HTTPS
Create or obtain SSL certificates:
sudo mkdir -p /app/onlyoffice/DocumentServer/data/certsPlace your certificates in this directory:
sudo cp your-certificate.crt /app/onlyoffice/DocumentServer/data/certs/onlyoffice.crt
sudo cp your-private-key.key /app/onlyoffice/DocumentServer/data/certs/onlyoffice.key
Self-signed certificates can be created with OpenSSL, but aren’t recommended for production use.
JWT Implementation
JSON Web Tokens (JWT) protect documents from unauthorized access. Configure JWT by setting a shared secret key between OnlyOffice and integrated services like Nextcloud.
Troubleshooting Common Issues
If you encounter problems:
- Installation failures: Update your system, check for dependency conflicts, and ensure sufficient disk space
- Connection issues: Verify port availability and firewall settings
- Format compatibility: Install additional fonts with
sudo dnf install google-noto-sans-fonts google-noto-serif-fonts - Performance issues: Check resource utilization with
toporhtopand adjust container resource limits if needed
For Document Server issues, check logs in /app/onlyoffice/DocumentServer/logs/.
Congratulations! You have successfully installed OnlyOffice. Thanks for using this tutorial for installing the OnlyOffice on Fedora 42 Linux system. For additional help or useful information, we recommend you check the OnlyOffice website.