How To Install Open WebUI on Ubuntu 24.04 LTS

Open WebUI is a powerful tool designed for managing large language models (LLMs) effectively. As the demand for AI-driven applications continues to grow, having a user-friendly interface to interact with these models becomes essential. This article provides a comprehensive, step-by-step guide to installing Open WebUI on Ubuntu 24.04, ensuring you have everything you need to get started.
Prerequisites
System Requirements
Before diving into the installation process, ensure that your system meets the following minimum hardware specifications:
- RAM: At least 8 GB recommended for optimal performance.
- CPU: A modern multi-core processor.
- Disk Space: Minimum of 20 GB free disk space.
Software Requirements
You will need to have Ubuntu 24.04 installed on your machine. Additionally, it is crucial to install either Docker or Podman, as these tools facilitate the deployment of applications in containers. Furthermore, if you plan to use Ollama with Open WebUI, make sure to install it as well.
Network Requirements
An active internet connection is necessary for downloading dependencies and updates during the installation process.
Step 1: Installing Docker or Podman
Why Use Docker/Podman?
Docker and Podman are popular containerization tools that simplify application deployment and management. They allow you to run applications in isolated environments, ensuring that dependencies do not conflict with each other. This makes them ideal for running Open WebUI and other applications seamlessly.
Installing Docker
- Update Package Index:
sudo apt update - Install Docker:
sudo apt install docker.io - Start and Enable Docker Service:
sudo systemctl start docker
sudo systemctl enable docker
Installing Podman (Optional)
- Update Package Index:
sudo apt update - Install Podman:
sudo apt install podman
Step 2: Installing Ollama
Overview of Ollama
Ollama is a command-line tool that simplifies working with large language models. It integrates seamlessly with Open WebUI, allowing users to manage models efficiently.
Installation Steps
- Using the Installation Script:
curl -fsSL https://ollama.com/install.sh | sh - Verifying Installation:Check if Ollama is installed correctly by running:
ollama --version
Step 3: Installing Open WebUI Using Docker
Pulling the Open WebUI Image
The next step is to download the Open WebUI Docker image from the repository. This image contains all the necessary files and configurations needed to run Open WebUI.
- Pull the Image:
docker pull ghcr.io/open-webui/open-webui:main
Running the Open WebUI Container
You can now run the Open WebUI container using Docker. This command will set up the environment and expose it through port 3000 on your localhost.
- Run the Container:
docker run -d -p 3000:8080 --add-host=host.docker.internal:host-gateway -v open-webui:/app/backend/data --name open-webui --restart always ghcr.io/open-webui/open-webui:main
Accessing Open WebUI
Your Open WebUI instance should now be running. To access it, open your web browser and navigate to http://localhost:3000. Here, you can begin interacting with large language models through a graphical interface.

Step 4: Manual Installation of Open WebUI
Cloning the Repository
If you prefer not to use Docker, you can manually install Open WebUI by cloning its repository from GitHub.
- Clone the Repository:
git clone https://github.com/open-webui/open-webui.git
Setting Up Environment Variables
A configuration file is necessary for setting up environment variables required by Open WebUI. You can create this file by copying an example provided in the repository.
- Create Environment Configuration:
cd open-webui
cp .env.example .env
Installing Dependencies
The next step involves installing Node.js and npm if they are not already installed on your system. These are essential for managing JavaScript packages needed by Open WebUI.
-
- If Node.js is not installed, run:
wget -qO- https://deb.nodesource.com/setup_14.x | sudo -E bash -
sudo apt install -y nodejs
npm install --global npm@latest
npm install
npm run build
npm start
Step 5: Configuring Open WebUI
User Accounts Setup
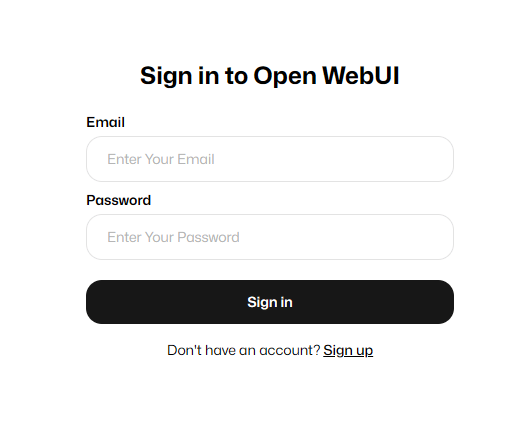
The first time you access Open WebUI, you’ll be prompted to create an admin account. Follow the on-screen instructions to set up your credentials securely.
Main Dashboard Configuration Options
The dashboard provides various settings that allow you to customize your experience. You can adjust model parameters, manage user roles, and configure system settings directly from this interface.
Add Models to Open WebUI
You can browse available models and add them within the interface easily. The process typically involves selecting a model from a list and configuring its parameters according to your needs.
Troubleshooting Common Issues
Installation Issues
- If you encounter errors during installation, ensure that all prerequisites are met and that your system is fully updated by running:
sudo apt update && sudo apt upgrade -y - If Docker fails to start, check its service status:
sudo systemctl status docker
Error Accessing Open WebUI Interface
- If you cannot access the web interface at `
http://localhost:3000`, ensure that the container is running:docker ps - If it’s not listed, check logs for errors:
docker logs open-webui
Congratulations! You have successfully installed Open WebUI. Thanks for using this tutorial for installing Open WebUI on the Ubuntu 24.04 LTS system. For additional help or useful information, we recommend you check the Open WebUI website.