In this tutorial, we will show you how to install OpenLiteSpeed on CentOS 8. For those of you who didn’t know, OpenLiteSpeed is an open-source HTTP server developed by LiteSpeed Technologies. OpenLiteSpeed is a high-performance and lightweight HTTP server which comes with a Web Gui administration interface. As far as Linux web servers are concerned, OpenLiteSpeed has some interesting features that make it a solid choice for many installations. It features Apache compatible rewrite rules, a web administration interface, and customized PHP processing optimized for the server.
This article assumes you have at least basic knowledge of Linux, know how to use the shell, and most importantly, you host your site on your own VPS. The installation is quite simple and assumes you are running in the root account, if not you may need to add ‘sudo‘ to the commands to get root privileges. I will show you the step-by-step installation of the OpenLiteSpeed web server on a CentOS 8.
Prerequisites
- A server running one of the following operating systems: CentOS 8.
- It’s recommended that you use a fresh OS install to prevent any potential issues.
- SSH access to the server (or just open Terminal if you’re on a desktop).
- A
non-root sudo useror access to theroot user. We recommend acting as anon-root sudo user, however, as you can harm your system if you’re not careful when acting as the root.
Install OpenLiteSpeed on CentOS 8
Step 1. First, let’s start by ensuring your system is up-to-date.
sudo dnf clean all
sudo dnf update
Step 2. Installing OpenLitespeed on CentOS 8.
Now we install the RPM package to add the OpenLiteSpeed for the CentOS repository:
sudo rpm -Uvh http://rpms.litespeedtech.com/centos/litespeed-repo-1.1-1.el8.noarch.rpm
Once we have the OpenLiteSpeed repository enabled on the system, we can install the latest version of the OpenLiteSpeed web server using the following command:
sudo dnf install openlitespeed
Once the installation is completed, you can check the status of the webserver using the command:
sudo systemctl start lsws
sudo systemctl status lsws
Step 3. Installing MariaDB on CentOS 8.
MariaDB is a drop-in replacement for MySQL. It is a robust, scalable, and reliable SQL server that comes with a rich set of enhancements. We will also be using yum to install MariaDB:
sudo dnf install mariadb-server
By default, MariaDB is not hardened. You can secure MariaDB using the mysql_secure_installation script. you should read and below each step carefully which will set a root password, remove anonymous users, disallow remote root login, and remove the test database and access to secure MariaDB:
mysql_secure_installation
To log into MariaDB, use the following command (note that it’s the same command you would use to log into a MariaDB database):
mysql -u root -p
Then, restart the MariaDB database server and enable it to start on system start-up using:
sudo systemctl restart mariadb
sudo systemctl status mariadb
sudo systemctl enable mariadb
Step 4. Installing PHP from OpenLiteSpeed.
Run the following command will install LSPHP 7:
sudo dnf install -y lsphp74 lsphp74-mysqlnd lsphp74-process lsphp74-mbstring lsphp74-mcrypt lsphp74-gd lsphp74-opcache lsphp74-bcmath lsphp74-pdo lsphp74-common lsphp74-xml
Step 5. Configure Firewall
If you are running a firewall on the system, make sure to open ports 8088 and 7080 on the CentOS system:
sudo firewall-cmd --zone=public --permanent --add-port=8088/tcp
sudo firewall-cmd --zone=public --permanent --add-port=7080/tcp
sudo firewall-cmd --reload
Step 6. Setting the Administrative Password.
The next step is to create an administrator user who will manage the OpenLiteSpeed administration panel. So, go to the /usr/local/lsws/admin/misc folder:
$ sudo /usr/local/lsws/admin/misc/admpass.sh

Please specify the user name of administrator.
This is the user name required to login the administration Web interface.
User name [admin]: admin
Please specify the administrator's password.
This is the password required to login the administration Web interface.
Password:
Retype password:
Administrator's username/password is updated successfully!
Step 7. Accessing the OpenLiteSpeed web server.
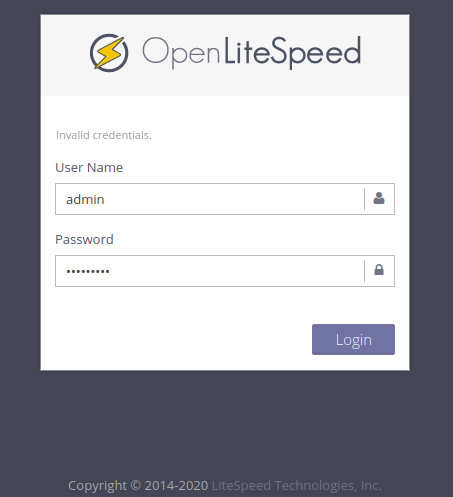
OpenLiteSpeed will be available on HTTP port 7080 by default. Open your favorite browser and navigate to http://server-ip-address:7080 and complete the required steps to finish the installation.

Congratulations! You have successfully installed OpenLiteSpeed. Thanks for using this tutorial for installing the OpenLiteSpeed web server on your CentOS 8 system. For additional help or useful information, we recommend you to check the official OpenLiteSpeed website.