How To Install OpenLiteSpeed on Ubuntu 24.04 LTS

OpenLiteSpeed is a high-performance, open-source web server that offers an excellent alternative to popular options like Apache and Nginx. With its lightweight architecture, advanced caching mechanisms, and user-friendly web interface, OpenLiteSpeed provides a powerful and efficient solution for hosting websites and applications on Ubuntu 24.04. In this comprehensive guide, we’ll walk you through the step-by-step process of installing OpenLiteSpeed on your Ubuntu 24.04 server, ensuring optimal performance and security along the way.
Prerequisites
Before diving into the installation process, it’s crucial to ensure that your Ubuntu 24.04 system meets the necessary requirements. OpenLiteSpeed requires a minimum of 1 GB RAM and a dual-core CPU for optimal performance. Additionally, make sure you have root access or sudo privileges to execute the installation commands. It’s also essential to have a registered domain name and properly configured DNS settings pointing to your server’s IP address.
To begin, update your system packages to their latest versions using the following commands:
sudo apt update
sudo apt upgrade
Step 1: Configure Firewall
Ubuntu 24.04 comes with a built-in firewall called UFW (Uncomplicated Firewall) that helps secure your server by controlling incoming and outgoing network traffic. To allow OpenLiteSpeed to function properly, you need to open the necessary ports. By default, OpenLiteSpeed uses port 8088 for HTTP and 8443 for HTTPS. Run the following commands to allow access to these ports:
sudo ufw allow 8088/tcp
sudo ufw allow 8443/tcp
After configuring the firewall rules, enable UFW to apply the changes:
sudo ufw enableStep 2: Download OpenLiteSpeed
To download the latest version of OpenLiteSpeed, visit the official OpenLiteSpeed website and copy the download link for the Ubuntu 24.04 package. Use the following command to download the package:
wget https://openlitespeed.org/packages/openlitespeed-1.7.16.tgzOnce the download is complete, extract the package using the tar command:
tar xzvf openlitespeed-1.7.16.tgzStep 3: Install OpenLiteSpeed
Navigate to the extracted OpenLiteSpeed directory and run the installation script with sudo privileges:
cd openlitespeed-1.7.16
sudo ./install.sh
During the installation process, you’ll be prompted to select the installation directory and configure various settings. It’s recommended to use the default options unless you have specific requirements. The installer will also ask you to set up an administrator username and password for accessing the OpenLiteSpeed web interface. Choose a strong and secure password to protect your server.
Once the installation is complete, you’ll see a confirmation message indicating that OpenLiteSpeed has been successfully installed on your Ubuntu 24.04 system.
Step 4: Start OpenLiteSpeed Server
To start the OpenLiteSpeed server, use the following command:
sudo systemctl start lswsTo ensure that OpenLiteSpeed starts automatically on system boot, enable the service using:
sudo systemctl enable lswsYou can check the status of the OpenLiteSpeed service to verify that it’s running correctly:
sudo systemctl status lswsStep 5: Access OpenLiteSpeed Web Interface
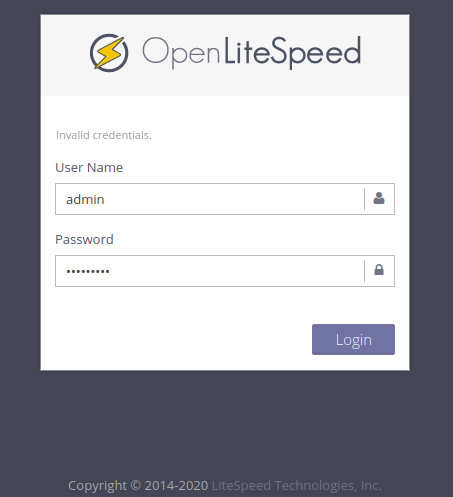
OpenLiteSpeed provides a user-friendly web interface for managing your server and configuring various settings. To access the web interface, open a web browser and enter your server’s IP address or domain name followed by the default OpenLiteSpeed port (8088). For example:
http://your_server_ip:8088You’ll be prompted to enter the administrator username and password you set during the installation process. Once logged in, you can explore the various configuration options and customize your OpenLiteSpeed server according to your needs.

Step 6: Configure Listeners
OpenLiteSpeed uses listeners to handle incoming HTTP and HTTPS requests. By default, OpenLiteSpeed is configured to listen on port 8088 for HTTP and 8443 for HTTPS. If you want to use the standard ports (80 for HTTP and 443 for HTTPS), you need to configure the listeners accordingly.
In the OpenLiteSpeed web interface, navigate to “Listeners” under the “Configuration” menu. Click on the default listener and modify the port settings to your desired values. Make sure to save the changes and restart the OpenLiteSpeed service for the modifications to take effect.
Step 7: Install PHP and MySQL
To run PHP applications on your OpenLiteSpeed server, you need to install PHP with LiteSpeed API support. OpenLiteSpeed provides a script called “lsphp” that simplifies the installation process. Run the following command to install PHP:
sudo apt install lsphp80If your applications require a database server, you can install MySQL using the following command:
sudo apt install mysql-serverAfter installing PHP and MySQL, you need to configure OpenLiteSpeed to use them. In the web interface, go to “External Apps” under the “Configuration” menu and add the installed PHP version. Similarly, configure the MySQL settings under the “Database” section.
Step 8: Test Installation
To verify that your OpenLiteSpeed installation is functioning correctly, create a test PHP file in your web root directory (default: /var/www/html). Create a file named info.php with the following content:
<?php
phpinfo();
?>
Access the file through your web browser by entering your server’s IP address or domain name followed by /info.php. For example:
http://your_server_ip/info.phpIf you see the PHP information page, it means your OpenLiteSpeed server is correctly configured and ready to host your applications.
Congratulations! You have successfully installed OpenLiteSpeed. Thanks for using this tutorial for installing the OpenLiteSpeed web server on Ubuntu 24.04 LTS system. For additional help or useful information, we recommend you check the official OpenLiteSpeed website.