How To Install OpenSearch on Ubuntu 24.04 LTS

OpenSearch is an open-source search and analytics suite that allows users to perform advanced search operations and analyze large volumes of data. Developed by Amazon Web Services (AWS), it is a robust solution for enterprises requiring powerful search capabilities and real-time analytics. This guide provides a comprehensive, step-by-step approach to installing OpenSearch on Ubuntu 24.04, ensuring that you have all the necessary tools and configurations to get started.
Prerequisites
Before diving into the installation process, it’s essential to ensure that your system meets the necessary requirements.
System Requirements
- Ubuntu 24.04 LTS installed.
- Root or sudo user privileges.
- Minimum hardware specifications: 2GB RAM (4GB recommended), 1 CPU core (2 cores recommended), and at least 20GB of disk space.
Software Requirements
- Java Development Kit (JDK) version 11 or higher is required for OpenSearch to function properly.
- Basic command-line tools like curl, lsb-release, gnupg2, and ca-certificates.
Step 1: Update System Packages
Keeping your system packages up-to-date is crucial for avoiding compatibility issues during installation.
sudo apt update
sudo apt upgrade -y
This command updates the package lists and upgrades installed packages to their latest versions.
Step 2: Install Required Dependencies
Before adding the OpenSearch repository, ensure that you have the necessary dependencies installed on your system.
sudo apt install curl lsb-release gnupg2 ca-certificates -y
This command installs essential packages that will help in managing repositories and secure connections during the installation process.
Step 3: Add OpenSearch Repository
The OpenSearch package is not included in the default Ubuntu repositories, so you need to add it manually.
Import GPG Key
The GPG key ensures that the packages you download are authentic and have not been tampered with.
curl -o- https://artifacts.opensearch.org/publickeys/opensearch.pgp | sudo gpg --dearmor --batch --yes -o /usr/share/keyrings/opensearch-keyring
Add the APT Repository
Add the OpenSearch repository to your system using the following command:
echo "deb [signed-by=/usr/share/keyrings/opensearch-keyring] https://artifacts.opensearch.org/releases/bundle/opensearch/2.x/apt stable main" | sudo tee /etc/apt/sources.list.d/opensearch.list
This command creates a new sources list file for OpenSearch, allowing your package manager to find it during installations.
Step 4: Install OpenSearch
Now that you have added the repository, it’s time to install OpenSearch.
Update Package List Again
sudo apt update
Install OpenSearch Package
sudo apt install opensearch -y
This command installs the latest version of OpenSearch available in your added repository. If you need a specific version, you can specify it like this:
sudo apt install opensearch=
Replace with the desired version number, such as `opensearch=2.10.0`.
Step 5: Configure OpenSearch
The default configuration file for OpenSearch is located at `/etc/opensearch/opensearch.yml`. You will need to edit this file to customize your installation according to your needs.
sudo nano /etc/opensearch/opensearch.yml
Edit Configuration Parameters
- network.host: Set this to your server’s IP address or `
0.0.0.0` to listen on all interfaces. - discovery.type: Set this option to `
single-node` if you’re running a single instance of OpenSearch. - plugins.security.disabled: Set this to `
false` if you want security features enabled (recommended for production).
An example configuration might look like this:
# Bind OpenSearch to the correct network interface.
network.host: 0.0.0.0

# Discovery type for single-node setup.
discovery.type: single-node

# Enable security features.
plugins.security.disabled: false
Step 6: Start and Enable OpenSearch Service
After configuring OpenSearch, you need to start its service and enable it to run at boot time.
sudo systemctl start opensearch
sudo systemctl enable opensearch
You can check the status of the OpenSearch service using:
sudo systemctl status opensearch
Step 7: Verify OpenSearch Installation
The final step in confirming your installation is to check if OpenSearch is running correctly. You can do this by making a request to the local server using curl.
curl -X GET http://localhost:9200/
If everything is set up correctly, you should see a JSON response containing information about your OpenSearch instance, including its version number and cluster name.
Step 8: Install and Configure OpenSearch Dashboard
The OpenSearch Dashboard provides a user-friendly interface for managing your data and visualizing search results. To install it, follow these steps:
Add Dashboard Repository
echo "deb https://artifacts.opensearch.org/releases/bundle/opensearch-dashboards/2.x/apt stable main" | sudo tee /etc/apt/sources.list.d/opensearch-dashboards.list
sudo apt update
sudo apt install opensearch-dashboards -y
Start and Enable Dashboard Service
sudo systemctl start opensearch-dashboards
sudo systemctl enable opensearch-dashboards
Accessing the Dashboard
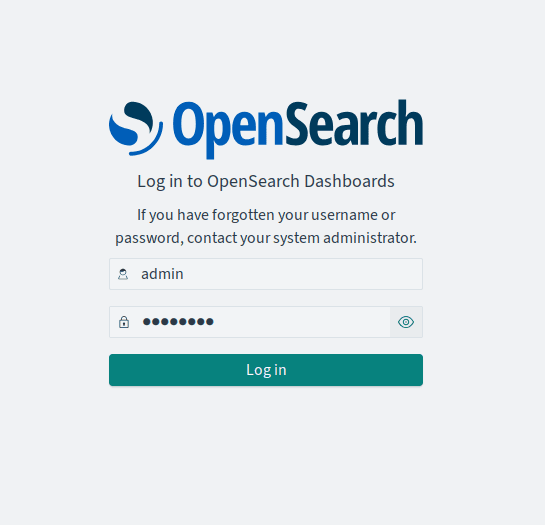
You can access the OpenSearch Dashboard by navigating to http://localhost:5601. The default login credentials are:
- User: admin
- Password: admin (change this in production)

Troubleshooting Tips
- If you encounter issues starting either service, check logs located at `
/var/log/opensearch/` for error messages that can help diagnose problems. - If curl commands fail, ensure that firewall settings allow traffic on port 9200 for OpenSearch and port 5601 for the dashboard.
- If you cannot access the dashboard, verify that the service is running with `
systemctl status opensearch-dashboards` and check network configurations in `opensearch.yml`. - If authentication fails, ensure that you’ve set up user roles correctly within the security settings of OpenSearch.
Add Data Sources in OpenSearch Dashboard
You can connect various data sources to your OpenSearch instance through the dashboard interface. To do this:
- Navigating to Management > Data Sources within the dashboard allows you to configure connections easily.
- You may need plugins depending on your data source type; refer to official documentation for specific instructions on connecting services like Amazon S3 or Prometheus.
- Your data sources must be configured correctly in `opensearch.yml`, especially if encryption is involved; ensure proper keys are generated and stored securely.
Congratulations! You have successfully installed OpenSearch. Thanks for using this tutorial to install the latest version of OpenSearch on Ubuntu 24.04 LTS. For additional help or useful information, we recommend you check the official OpenSearch website.