How To Install phpMyAdmin on CentOS Stream 10

phpMyAdmin is a powerful web-based tool that simplifies the management of MySQL and MariaDB databases. It provides an intuitive interface for performing various database operations, such as creating databases, executing SQL queries, and managing users. For developers and system administrators using CentOS Stream 10, installing phpMyAdmin can significantly streamline database management tasks. This guide will walk you through the installation process step-by-step, ensuring you have a fully functional phpMyAdmin setup.
Prerequisites for Installation
System Requirements
Before installing phpMyAdmin, ensure your system meets the following requirements:
- Operating System: CentOS Stream 10
- Web Server: Apache HTTP Server
- Database Server: MySQL or MariaDB
- PHP Version: PHP 7.2 or higher
Access Requirements
You will need root or sudo access to your CentOS Stream 10 server. Additionally, SSH access is required to execute commands remotely.
Setting Up the Environment
Update Your System
The first step in preparing your server is to update all existing packages to their latest versions. This ensures that you have the latest security patches and features.
sudo dnf update -yInstall Apache Web Server
The next step is to install the Apache web server, which will serve as the foundation for hosting phpMyAdmin.
sudo dnf install httpd -yAfter installation, start the Apache service and enable it to launch on boot:
sudo systemctl start httpd
sudo systemctl enable httpd
Install PHP and Required Extensions
phpMyAdmin requires PHP along with several extensions for optimal functionality. Install PHP and its necessary extensions using the following command:
sudo dnf install php php-mysqlnd php-mbstring php-xml -yOnce installed, restart Apache to ensure it recognizes the new PHP modules:
sudo systemctl restart httpdInstalling EPEL Repository
What is EPEL?
The Extra Packages for Enterprise Linux (EPEL) repository provides additional packages that are not included in the standard CentOS repositories. It is essential for installing phpMyAdmin.
Installing EPEL on CentOS Stream 10
Add the EPEL repository to your system with the following command:
sudo dnf install epel-release -yInstalling phpMyAdmin
Installation Command
You can now install phpMyAdmin directly from the EPEL repository. Execute this command:
sudo dnf install phpmyadmin -yConfiguration File Location
The main configuration file for phpMyAdmin can be found at /etc/httpd/conf.d/phpMyAdmin.conf. This file controls how Apache serves phpMyAdmin.
Configuring phpMyAdmin
Edit Configuration File
Edit the configuration file to customize access settings. Open it with a text editor such as nano or vi:
sudo nano /etc/httpd/conf.d/phpMyAdmin.confAllowing Remote Access
If you want to allow remote access to phpMyAdmin, locate the lines that restrict access by IP address. Modify them as follows:
# Apache 2.4
Require all granted
# Allow from specific IPs
Require ip YOUR_IP_ADDRESS
# Replace YOUR_IP_ADDRESS with your actual IP address
Security Considerations
It’s crucial to secure your phpMyAdmin installation. Consider implementing the following security measures:
- Password Protection: Use .htaccess files to restrict access.
- IP Whitelisting: Limit access to specific IP addresses.
- SSL Encryption: Enable HTTPS on your server.
Configuring Firewall
Enabling Firewall Services
If you have a firewall enabled on your CentOS Stream 10 server, you need to allow HTTP and HTTPS traffic. Use these commands:
sudo firewall-cmd --add-service=http --permanent
sudo firewall-cmd --add-service=https --permanent
sudo firewall-cmd --reload
Accessing phpMyAdmin
Accessing via Browser
You can now access phpMyAdmin through your web browser by navigating to:
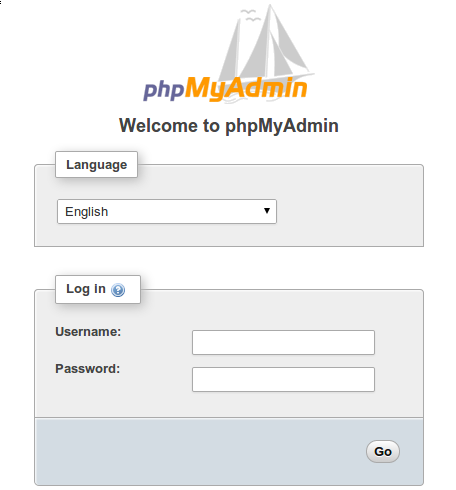
http://YOUR_SERVER_IP/phpmyadminIf everything is configured correctly, you should see the phpMyAdmin login page where you can enter your database credentials.

Troubleshooting Common Issues
If you encounter issues while accessing or using phpMyAdmin, consider these common problems and their solutions:
- Error 403 Forbidden: This often indicates permission issues in your configuration file. Ensure that you’ve set up access correctly in
/etc/httpd/conf.d/phpMyAdmin.conf. - Error Establishing Database Connection: This means there may be an issue with your database credentials or database server status. Double-check your credentials and ensure that MySQL/MariaDB is running.
- No PHP Extensions Loaded: If you see errors regarding missing PHP extensions, ensure that all required extensions are installed and that Apache has been restarted after installation.
- Error: “phpMyAdmin tried to connect to the MySQL server, but the connection failed”: This may be due to incorrect MySQL settings in your configuration file or issues with MySQL/MariaDB itself not running properly.
Congratulations! You have successfully installed phpMyAdmin. Thanks for using this tutorial for installing the latest version of phpMyAdmin on the CentOS Stream 10 system. For additional help or useful information, we recommend you check the official phpMyAdmin website.