In this tutorial, we will show you how to install phpMyAdmin on Debian 11. For those of you who didn’t know, phpMyAdmin is a free, open-source, and web-based application used for managing MySQL or MariaDB databases from the web interface. It is written in PHP and is one of the most popular database administration tools used by web hosting companies to enable novice system administrators to carry out database activities.
This article assumes you have at least basic knowledge of Linux, know how to use the shell, and most importantly, you host your site on your own VPS. The installation is quite simple and assumes you are running in the root account, if not you may need to add ‘sudo‘ to the commands to get root privileges. I will show you the step-by-step installation of phpMyAdmin on a Debian 11 (Bullseye).
Prerequisites
- A server running one of the following operating systems: Debian 11 (Bullseye).
- It’s recommended that you use a fresh OS install to prevent any potential issues.
- SSH access to the server (or just open Terminal if you’re on a desktop).
- A
non-root sudo useror access to theroot user. We recommend acting as anon-root sudo user, however, you can harm your system if you’re not careful when acting as the root.
Install phpMyAdmin on Debian 11 Bullseye
Step 1. Before we install any software, it’s important to make sure your system is up to date by running the following apt commands in the terminal:
sudo apt update
sudo apt upgrade
Step 2. Installing LAMP Stack.
If you don’t have a LAMP stack already installed on your server, you can follow our guide here.
Step 3. Installing phpMyAdmin on Debian 11.
By default, phpMyAdmin isn’t included in Debian 11 Bullseye repository, so you’ll need to manually download the phpMyAdmin from the official website:
wget https://files.phpmyadmin.net/phpMyAdmin/5.1.1/phpMyAdmin-5.1.1-all-languages.tar.gz
Extract the phpMyAdmin tarball using the following command:
tar xvf phpMyAdmin-5.1.1-all-languages.tar.gz
After that, move the phpMyAdmin-5.1.1-all-languages to /usr/share/ directory:
mv phpMyAdmin-5.1.1-all-languages /usr/share/phpmyadmin
Step 4. Configure phpMyAdmin.
Now we create a sub-directory with the following command:
mkdir -p /var/lib/phpmyadmin/tmp
Next, set proper ownership to the phpMyAdmin directory:
chown -R www-data:www-data /var/lib/phpmyadmin
Then, make a copy to the file /usr/share/phpmyadmin/config.inc.php:
cp /usr/share/phpmyadmin/usr/share/phpMyAdmin-5.1.1-all-languages/config.inc.php
After that, edit the config.inc.php file and configure it:
nano /usr/share/phpmyadmin/config.inc.php
Enter a string of 32 random characters in between single quotes:
$cfg['blowfish_secret'] = 'STRINGWORANDOMCHARACTERS';
/* YOU MUST FILL IN THIS FOR COOKIE AUTH! */
Next, install the pwgen and generate a secrete key with the following command:
sudo apt install pwgen
pwgen -s 32 1
Then uncomment this section of the /usr/share/phpmyadmin/config.inc.php the file will look as follows:
 /* Storage database and tables */
 $cfg['Servers'][$i]['pmadb'] = 'phpmyadmin';
 $cfg['Servers'][$i]['bookmarktable'] = 'pma__bookmark';
 $cfg['Servers'][$i]['relation'] = 'pma__relation';
 $cfg['Servers'][$i]['table_info'] = 'pma__table_info';
 $cfg['Servers'][$i]['table_coords'] = 'pma__table_coords';
 $cfg['Servers'][$i]['pdf_pages'] = 'pma__pdf_pages';
 $cfg['Servers'][$i]['column_info'] = 'pma__column_info';
 $cfg['Servers'][$i]['history'] = 'pma__history';
 $cfg['Servers'][$i]['table_uiprefs'] = 'pma__table_uiprefs';
 $cfg['Servers'][$i]['tracking'] = 'pma__tracking';
 $cfg['Servers'][$i]['userconfig'] = 'pma__userconfig';
 $cfg['Servers'][$i]['recent'] = 'pma__recent';
 $cfg['Servers'][$i]['favorite'] = 'pma__favorite';
 $cfg['Servers'][$i]['users'] = 'pma__users';
 $cfg['Servers'][$i]['usergroups'] = 'pma__usergroups';
 $cfg['Servers'][$i]['navigationhiding'] = 'pma__navigationhiding';
 $cfg['TempDir'] = '/var/lib/phpmyadmin/tmp';
Step 5. Create a MariaDB Database and User for phpMyAdmin.
Now we create the configuration storage database and tables by running the following command below:
mariadb < /usr/share/phpmyadmin/sql/create_tables.sql
Next, connect to the MariaDB shell with the following command:
mariadb
Once you are connected, grant all necessary privileges to the phpMyAdmin database:
GRANT SELECT, INSERT, UPDATE, DELETE ON phpmyadmin.* TO 'pma'@'localhost' IDENTIFIED BY 'your-strong-passwd';
GRANT ALL PRIVILEGES ON *.* TO 'john'@'localhost' IDENTIFIED BY 'your-strong-passwd' WITH GRANT OPTION;
exit;
Step 6. Configure Apache for phpMyAdmin.
Create an Apache virtual host configuration file for phpMyAdmin:
nano /etc/apache2/conf-available/phpmyadmin.conf
Add the following line:
Alias /phpmyadmin /usr/share/phpmyadmin

<Directory /usr/share/phpmyadmin>
    Options SymLinksIfOwnerMatch
    DirectoryIndex index.php

    <IfModule mod_php5.c>
        <IfModule mod_mime.c>
            AddType application/x-httpd-php .php
        </IfModule>
        <FilesMatch ".+\.php$">
            SetHandler application/x-httpd-php
        </FilesMatch>

        php_value include_path .
        php_admin_value upload_tmp_dir /var/lib/phpmyadmin/tmp
        php_admin_value open_basedir /usr/share/phpmyadmin/:/etc/phpmyadmin/:/var/lib/phpmyadmin/:/usr/share/php/php-gettext/:/usr/share/php/php-php-gettext/:/usr/share/javascript/:/usr/share/php/tcpdf/:/usr/share/doc/phpmyadmin/:/usr/share/php/phpseclib/
        php_admin_value mbstring.func_overload 0
    </IfModule>
    <IfModule mod_php.c>
        <IfModule mod_mime.c>
            AddType application/x-httpd-php .php
        </IfModule>
        <FilesMatch ".+\.php$">
            SetHandler application/x-httpd-php
        </FilesMatch>

        php_value include_path .
        php_admin_value upload_tmp_dir /var/lib/phpmyadmin/tmp
        php_admin_value open_basedir /usr/share/phpmyadmin/:/etc/phpmyadmin/:/var/lib/phpmyadmin/:/usr/share/php/php-gettext/:/usr/share/php/php-php-gettext/:/usr/share/javascript/:/usr/share/php/tcpdf/:/usr/share/doc/phpmyadmin/:/usr/share/php/phpseclib/
        php_admin_value mbstring.func_overload 0
    </IfModule>

</Directory>

# Authorize for setup
<Directory /usr/share/phpmyadmin/setup>
    <IfModule mod_authz_core.c>
        <IfModule mod_authn_file.c>
            AuthType Basic
            AuthName "phpMyAdmin Setup"
            AuthUserFile /etc/phpmyadmin/htpasswd.setup
        </IfModule>
        Require valid-user
    </IfModule>
</Directory>

# Disallow web access to directories that don't need it
<Directory /usr/share/phpmyadmin/templates>
    Require all denied
</Directory>
<Directory /usr/share/phpmyadmin/libraries>
    Require all denied
</Directory>
<Directory /usr/share/phpmyadmin/setup/lib>
    Require all denied
</Directory>
Save and close the file, then restart the Apache webserver:
a2enconf phpmyadmin.conf
sudo systemctl reload apache2
Step 7. Accessing phpMyAdmin Web Interface.
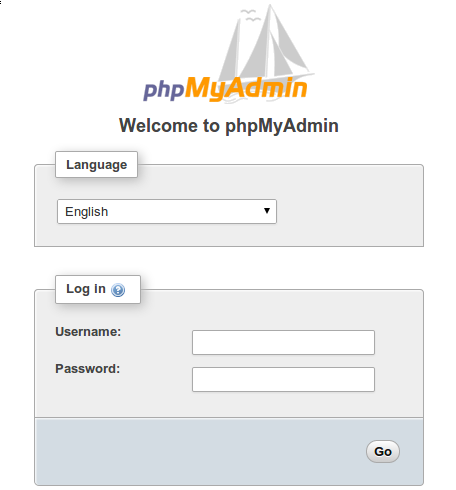
Once successfully installed, open your browser and surf to http://yourserver-ip-address/phpmyadmin/. and your phpMyAdmin will ask you for the user and password of your MySQL installation, you can use root as user and the root MySQL password, or any other MySQL user/password. If you are using a firewall, please open port 80 to enable access to the control panel.

Congratulations! You have successfully installed phpMyAdmin. Thanks for using this tutorial for installing the latest version of phpMyAdmin on Debian 11 Bullseye. For additional help or useful information, we recommend you check the official phpMyAdmin website.