How To Install phpMyAdmin on Debian 12

In this tutorial, we will show you how to install phpMyAdmin on Debian 12. phpMyAdmin is a popular, free, and open-source web-based tool that simplifies the management of MySQL and MariaDB databases. It provides an intuitive graphical user interface (GUI) that allows users to perform various database operations, such as creating, modifying, and deleting databases, tables, fields, and rows.
This article assumes you have at least basic knowledge of Linux, know how to use the shell, and most importantly, you host your site on your own VPS. The installation is quite simple and assumes you are running in the root account, if not you may need to add ‘sudo‘ to the commands to get root privileges. I will show you the step-by-step installation of the phpMyAdmin on a Debian 12 (Bookworm).
Prerequisites
- A server running one of the following operating systems: Debian 12 (Bookworm).
- It’s recommended that you use a fresh OS install to prevent any potential issues.
- SSH access to the server (or just open Terminal if you’re on a desktop).
- Make sure your Debian 12 system is connected to the internet. An active connection is essential for downloading the required packages and updates during the installation.
- A
non-root sudo useror access to theroot user. We recommend acting as anon-root sudo user, however, as you can harm your system if you’re not careful when acting as the root.
Install phpMyAdmin on Debian 12 Bookworm
Step 1. Update Your Debian system.
Before we install any software, it’s important to make sure your system is up to date by running the following apt commands in the terminal:
sudo apt update
sudo apt upgrade
The apt update command refreshes the package list, while apt upgrade installs the available updates. If prompted, confirm the installation by pressing ‘Y’ and then ‘Enter’.
Step 2. Installing the LAMP Stack.
phpMyAdmin requires a web server, PHP, and a database server to function correctly. The most common combination is the LAMP stack, which stands for Linux, Apache, MySQL/MariaDB, and PHP. Let’s install the LAMP stack components:
sudo apt install apache2 mysql-server php libapache2-mod-php
This command installs Apache, MySQL (or MariaDB), and PHP, forming the foundation for phpMyAdmin.
Step 3. Installing phpMyAdmin on Debian 12.
Now, let’s install phpMyAdmin using the following command below:
sudo apt install phpmyadmin
During the installation process, you’ll be prompted to choose a web server to configure automatically. Select Apache and proceed.
Step 4. Configuring Apache to Work with phpMyAdmin
Create a symbolic link to the phpMyAdmin configuration file in the Apache configuration directory:
sudo ln -s /etc/phpmyadmin/apache.conf /etc/apache2/conf-available/phpmyadmin.conf
Enable the phpMyAdmin configuration for Apache:
sudo a2enconf phpmyadmin
To enhance security, we’ll add a password to phpMyAdmin:
sudo htpasswd -c /etc/phpmyadmin/.htpasswd your_username
Edit the phpMyAdmin Apache configuration file:
sudo nano /etc/apache2/conf-available/phpmyadmin.conf
Add the following lines inside the <Directory /usr/share/phpmyadmin> section:
<Directory /usr/share/phpmyadmin>
Options SymLinksIfOwnerMatch
DirectoryIndex index.php
<IfModule mod_php.c>
AddType application/x-httpd-php .php
php_flag magic_quotes_gpc Off
php_flag track_vars On
php_flag register_globals Off
php_admin_flag allow_url_fopen Off
php_value include_path .
php_admin_value upload_tmp_dir /var/lib/phpmyadmin/tmp
php_admin_value open_basedir /usr/share/phpmyadmin/:/etc/phpmyadmin/:/var/lib/phpmyadmin/:/usr/share/php/php-gettext
</IfModule>
</Directory>
Enable the PHP extensions that phpMyAdmin requires:
sudo phpenmod mbstring
sudo phpenmod zip
sudo systemctl restart apache2
Restart the Apache web server to apply the changes:
sudo systemctl restart apache2
Verify that the firewall is active and has the rules you’ve configured:
sudo ufw status
Step 5. Configure Firewall.
If you have a web server (Apache, Nginx) running alongside phpMyAdmin, you should allow HTTP (port 80) and HTTPS (port 443) traffic:
sudo ufw allow OpenSSH
sudo ufw allow 80/tcp
sudo ufw allow 443/tcp
After configuring the rules, enable UFW:
sudo ufw enable
Step 6. Accessing phpMyAdmin Web UI.
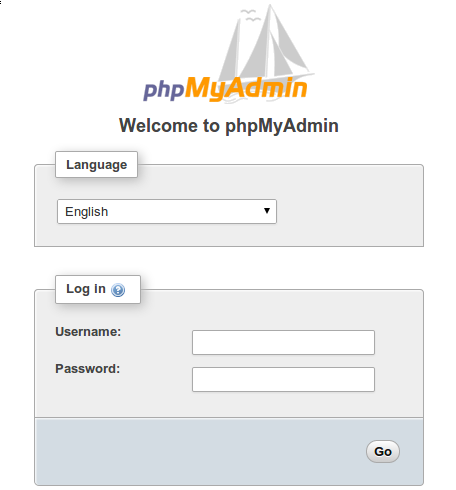
You can now access phpMyAdmin by opening your web browser and entering the following URL:
http://your_server_ip/phpmyadmin

Step 7. Updating phpMyAdmin to the Latest Version.
Keeping phpMyAdmin up to date is crucial for security and performance. Now visit the phpMyAdmin website to check for the latest release.
Download the latest phpMyAdmin version to your server using the wget command. Be sure to replace ‘version’ with the actual version number:
wget https://files.phpmyadmin.net/phpMyAdmin/version/phpMyAdmin-version-all-languages.tar.gz
Extract the downloaded archive and copy its contents to the phpMyAdmin directory:
tar xzf phpMyAdmin-version-all-languages.tar.gz
sudo cp -r phpMyAdmin-version-all-languages/* /usr/share/phpmyadmin/
Update the symbolic link to point to the latest version:
sudo ln -s /usr/share/phpmyadmin /var/www/html/phpmyadmin
For more detailed debugging and log analysis, review Apache’s error logs:
sudo tail -f /var/log/apache2/error.log
Congratulations! You have successfully installed phpMyAdmin. Thanks for using this tutorial to install the latest version of phpMyAdmin on Debian 12 Bookworm. For additional help or useful information, we recommend you check the official phpMyAdmin website.