How To Install phpMyAdmin on Fedora 39

In this tutorial, we will show you how to install phpMyAdmin on Fedora 39. phpMyAdmin is a free and open-source tool written in PHP, designed to handle the administration of MySQL and MariaDB over the Web. It provides a user-friendly graphical interface to perform various database operations, including managing databases, tables, columns, relations, indexes, users, permissions, and executing SQL statements.
This article assumes you have at least basic knowledge of Linux, know how to use the shell, and most importantly, you host your site on your own VPS. The installation is quite simple and assumes you are running in the root account, if not you may need to add ‘sudo‘ to the commands to get root privileges. I will show you the step-by-step installation of the phpMyAdmin on a Fedora 39.
Prerequisites
Before diving into the installation process, let’s ensure that you have everything you need:
- A server running one of the following operating systems: Fedora 39.
- It’s recommended that you use a fresh OS install to prevent any potential issues.
- You will need access to the terminal to execute commands. Fedora 39 provides the Terminal application for this purpose. It can be found in your Applications menu.
- You’ll need an active internet connection to download phpMyAdmin and its dependencies.
- A
non-root sudo useror access to theroot user. We recommend acting as anon-root sudo user, however, as you can harm your system if you’re not careful when acting as the root.
Install phpMyAdmin on Fedora 39
Step 1. First, it’s always a good practice to update your system packages to their latest versions. Open your terminal and execute the following command:
sudo dnf clean all
sudo dnf update
Step 2. Installing Apache.
Apache is a popular open-source web server that we’ll use to serve our phpMyAdmin interface. To install Apache, run the following command:
sudo dnf install httpd
Once installed, start the Apache service and enable it to run at system startup using:
sudo systemctl start httpd
sudo systemctl enable httpd
Step 3. Installing PHP.
phpMyAdmin is written in PHP, so we need to install PHP and some necessary extensions. Execute the following command:
sudo dnf install php php-mbstring php-mysqlnd
Step 4. Installing MariaDB.
MariaDB is a fork of MySQL and one of the most popular open-source databases. Install it using:
sudo dnf install mariadb-server
Start and enable MariaDB with:
sudo systemctl start mariadb
sudo systemctl enable mariadb
Securing your MariaDB installation is crucial to protect your data. Run the security script that comes with MariaDB:
sudo mysql_secure_installation
Follow the prompts to set a root password, remove anonymous users, disallow root login remotely, and remove test databases.
Step 6. Install phpMyAdmin on Fedora 39.
We’ll install phpMyAdmin from the Remi repository, which maintains updated PHP packages. First, add the Remi repository:
sudo dnf install https://rpms.remirepo.net/fedora/remi-release-39.rpm
Next, install phpMyAdmin:
sudo dnf --enablerepo=remi install phpmyadmin
Step 7. Configure Apache for phpMyAdmin
Apache needs to be configured to serve the phpMyAdmin interface. Edit the Apache configuration file for phpMyAdmin:
sudo nano /etc/httpd/conf.d/phpMyAdmin.conf
Ensure the configuration allows connections from your IP address. Save and close the file, then restart Apache:
sudo systemctl restart httpd
Step 8. Accessing phpMyAdmin Web UI.
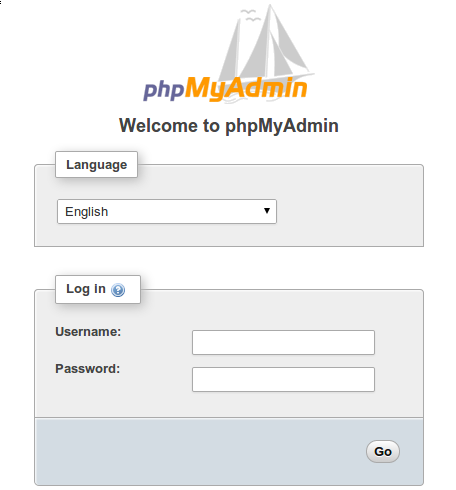
Once successfully installed, You can now access phpMyAdmin by opening a web browser and navigating to http://your_server_ip/phpmyadmin. Use the MariaDB credentials you set earlier to log in.

Congratulations! You have successfully installed phpMyAdmin. Thanks for using this tutorial for installing the phpMyAdmin on your Fedora 39 system. For additional or useful information, we recommend you check the official phpMyAdmin website.