How To Install phpMyAdmin on Fedora 40

In the world of web development and database management, phpMyAdmin stands out as an indispensable tool for administrators and developers alike. This powerful, web-based interface simplifies the process of managing MySQL and MariaDB databases, making it an essential component of many web hosting environments. In this comprehensive guide, we’ll walk you through the process of installing phpMyAdmin alongside the LAMP stack (Linux, Apache, MariaDB, and PHP 8.3) on Fedora 40, one of the most popular and user-friendly Linux distributions available today.
Fedora 40, known for its cutting-edge features and robust security, provides an excellent platform for hosting web applications. By combining it with the LAMP stack and phpMyAdmin, you’ll create a powerful, flexible, and secure environment for your web development projects. Whether you’re a seasoned system administrator or a beginner looking to set up your first web server, this guide will provide you with the knowledge and steps necessary to get your environment up and running smoothly.
Prerequisites
Before we dive into the installation process, let’s ensure you have everything you need to get started:
- A system running Fedora 40 (server or desktop edition)
- Root or sudo access to the system
- A stable internet connection for downloading packages
- Basic familiarity with the Linux command line
It’s crucial to start with a fully updated system. Open your terminal and run the following command to ensure your Fedora 40 installation is up to date:
sudo dnf update -yThis command will fetch the latest package information and install any available updates. The ‘-y’ flag automatically answers “yes” to any prompts, streamlining the update process.
Step 1: Install Apache
Apache is one of the most popular web servers in the world, known for its reliability and flexibility. Let’s start by installing Apache on your Fedora 40 system:
sudo dnf install httpdOnce the installation is complete, start the Apache service and enable it to run at boot:
sudo systemctl start httpd
sudo systemctl enable httpd
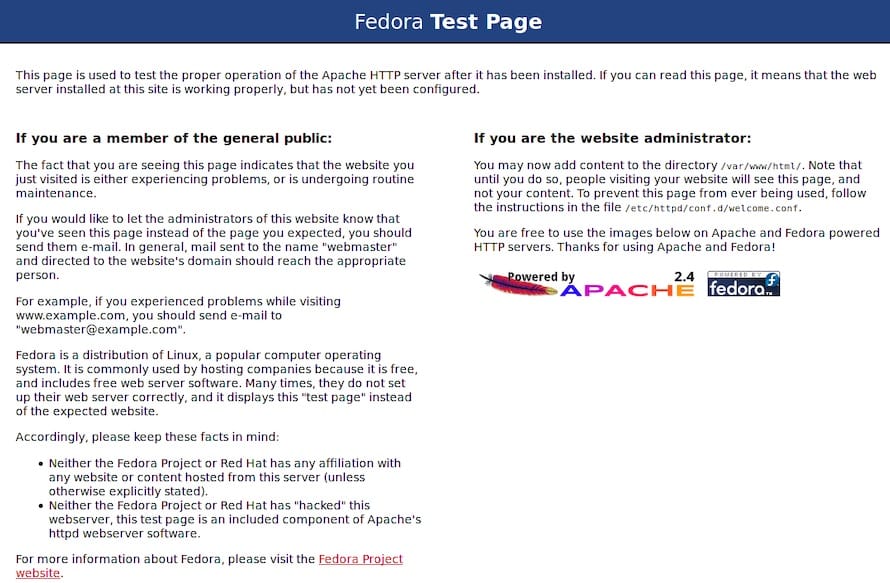
To verify that Apache is running correctly, open a web browser and navigate to http://localhost or http://your_server_ip. You should see the default Apache test page, indicating that the installation was successful.

Step 2: Install MariaDB
MariaDB is a powerful, open-source relational database management system that’s fully compatible with MySQL. It’s an essential component of our LAMP stack. To install MariaDB on Fedora 40, run the following command:
sudo dnf install mariadb-serverAfter the installation completes, start the MariaDB service and enable it to run at system startup:
sudo systemctl start mariadb
sudo systemctl enable mariadb
To secure your MariaDB installation, run the following command and follow the prompts:
sudo mysql_secure_installationThis script will guide you through setting a root password, removing anonymous users, disallowing root login remotely, and removing the test database. It’s recommended to answer “Y” (yes) to all prompts for maximum security.
Step 3: Install PHP 8.3
PHP is the scripting language that powers many dynamic web applications, including phpMyAdmin. Fedora 40 includes PHP 8.3 in its default repositories, making installation straightforward. To install PHP and its necessary extensions, run:
sudo dnf install php php-common php-mysqlnd php-gd php-cli php-mbstringAfter the installation completes, verify the PHP version:
php -vYou should see an output indicating that PHP 8.3 is installed. To ensure Apache can process PHP files, restart the Apache service:
sudo systemctl restart httpdStep 4: Install phpMyAdmin
With the LAMP stack in place, we can now proceed to install phpMyAdmin. Fedora’s repositories include phpMyAdmin, making the installation process straightforward:
sudo dnf install phpmyadminAfter the installation is completed, we need to create a symbolic link to make phpMyAdmin accessible through Apache. Run the following command:
sudo ln -s /usr/share/phpMyAdmin /var/www/html/phpMyAdminThis command creates a symbolic link from the phpMyAdmin installation directory to Apache’s web root, making it accessible via a web browser.
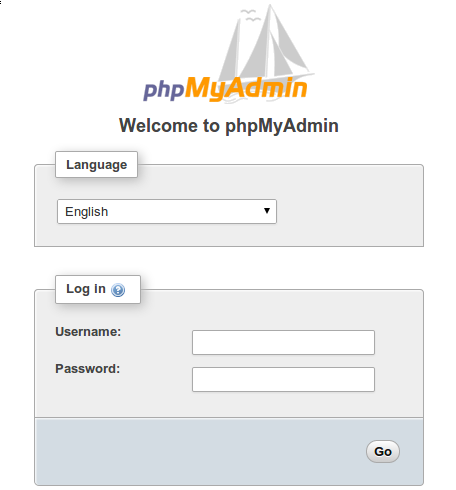
To access phpMyAdmin, open your web browser and navigate to http://localhost/phpMyAdmin or http://your_server_ip/phpMyAdmin. You should see the phpMyAdmin login page. Use the MariaDB root credentials you set up earlier to log in.

Step 5: Secure phpMyAdmin
While phpMyAdmin is now functional, it’s crucial to implement additional security measures to protect your database management interface from unauthorized access.
Restrict Access by IP
One effective way to enhance security is to limit access to phpMyAdmin to specific IP addresses. To do this, edit the phpMyAdmin Apache configuration file:
sudo nano /etc/httpd/conf.d/phpMyAdmin.confFind the <Directory /usr/share/phpMyAdmin/> section and add or modify the following lines:
<Directory /usr/share/phpMyAdmin/>
    # Existing configuration...
    Require ip 127.0.0.1
    Require ip ::1
    Require ip your_local_network
    Require ip your_workstation_IP
</Directory>
Replace your_local_network with your local network range (e.g., 192.168.1.0/24) and your_workstation_IP with the specific IP address of your workstation.
Enable HTTPS
For an additional layer of security, it’s highly recommended to enable HTTPS for your phpMyAdmin interface. This encrypts the data transmitted between your browser and the server, protecting sensitive information like login credentials.
To set up HTTPS, you can use Let’s Encrypt, a free, automated, and open certificate authority. First, install the Certbot tool:
sudo dnf install certbot python3-certbot-apacheThen, run Certbot to obtain and install an SSL certificate:
sudo certbot --apacheFollow the prompts to complete the HTTPS setup. Certbot will automatically configure Apache to use the new SSL certificate.
Troubleshooting and Common Issues
Even with careful installation, you might encounter some issues. Here are solutions to common problems:
Access Denied Errors
If you’re seeing “Access denied” errors when trying to log into phpMyAdmin, ensure that:
- You’re using the correct MariaDB root password.
- The phpMyAdmin configuration file (
/etc/phpMyAdmin/config.inc.php) has the correct database host set (usually ‘localhost’). - The MariaDB user has the necessary privileges. You can grant all privileges to the root user with:
sudo mysql
GRANT ALL PRIVILEGES ON *.* TO 'root'@'localhost' WITH GRANT OPTION;
FLUSH PRIVILEGES;
EXIT;
Apache or MariaDB Service Issues
If you’re having trouble starting Apache or MariaDB, check the service status and logs:
sudo systemctl status httpd
sudo systemctl status mariadb
sudo journalctl -u httpd
sudo journalctl -u mariadb
These commands will provide information about the service status and any error messages that might help identify the problem.
Performance Optimization
To optimize phpMyAdmin performance on Fedora 40:
- Enable PHP OpCache by adding the following to your
php.inifile:
opcache.enable=1

opcache.memory_consumption=128

opcache.interned_strings_buffer=8

opcache.max_accelerated_files=4000

opcache.revalidate_freq=60

opcache.fast_shutdown=1
- Adjust MariaDB’s
my.cnffile to optimize for your server’s resources. - Consider using a caching solution like Redis or Memcached for frequently accessed data.
Congratulations! You have successfully installed phpMyAdmin. Thanks for using this tutorial to set up virtual hosts Apache web server on Fedora 40 system. For additional help or useful information, we recommend you check the official phpMyAdmin website.