How To Install phpMyAdmin on Fedora 41

phpMyAdmin is a popular web-based tool for managing MySQL and MariaDB databases through an intuitive graphical interface. Whether you’re a developer or a system administrator, having phpMyAdmin installed on your server can make database management much easier. In this guide, we’ll walk you through the process of installing phpMyAdmin on Fedora 41, one of the most cutting-edge Linux distributions available today.
Prerequisites
- A server running Fedora 41.
- Root or sudo access to the system.
- A basic understanding of the Linux command-line interface (CLI).
If you meet these prerequisites, you’re ready to begin the installation process.
Step 1: Update Your System
Before installing any new software on your system, it’s essential to ensure that all existing packages are up-to-date. This helps avoid compatibility issues and ensures that you have the latest security patches installed.
sudo dnf updateThis command will refresh your package lists and install any available updates. Depending on your system’s current state, this process may take a few minutes.
Step 2: Install Apache Web Server
phpMyAdmin requires a web server to function. In this case, we’ll use Apache, one of the most widely used web servers in the world. Installing Apache on Fedora is straightforward:
sudo dnf install httpdOnce installed, start the Apache service and enable it to start automatically at boot:
sudo systemctl start httpd
sudo systemctl enable httpd
You’ll also need to configure your firewall to allow HTTP and HTTPS traffic:
sudo firewall-cmd --permanent --add-service=http
sudo firewall-cmd --permanent --add-service=https
sudo firewall-cmd --reload
This ensures that users can access your web server over both HTTP and HTTPS protocols.
Step 3: Install MariaDB Database Server
phpMyAdmin is designed to manage MySQL or MariaDB databases. In this guide, we’ll use MariaDB as it’s the default database server for many Linux distributions, including Fedora.
sudo dnf install mariadb-serverAfter installation, start the MariaDB service and enable it to start at boot:
sudo systemctl start mariadb
sudo systemctl enable mariadb
Next, run the secure installation script to enhance the security of your MariaDB installation:
sudo mysql_secure_installationThis script will prompt you to set a root password (if you haven’t already), remove anonymous users, disable remote root login, and remove test databases. Follow the prompts carefully to secure your database server.
Step 4: Install PHP and Required Extensions
phpMyAdmin is written in PHP, so you’ll need to install PHP along with several extensions required for interacting with MySQL/MariaDB databases.
sudo dnf install php php-mysqlnd php-json php-mbstring php-fpm php-gd php-opcache php-curl php-xmlThis command installs PHP along with necessary extensions like php-mysqlnd, which allows PHP to communicate with MySQL/MariaDB databases. Once installed, verify that PHP is working correctly by checking its version:
php -vYou should see output showing the installed version of PHP.
Step 5: Install phpMyAdmin
The easiest way to install phpMyAdmin on Fedora is by enabling the Remi repository. This repository contains updated versions of many popular software packages that aren’t available in Fedora’s default repositories.
Enable Remi Repository for Fedora 41
sudo dnf install http://rpms.remirepo.net/fedora/remi-release-41.rpmOnce enabled, you can install phpMyAdmin using the following command:
sudo dnf --enablerepo=remi install phpmyadminVerify Installation
rpm -qi phpmyadminThis command will display information about the installed version of phpMyAdmin.
Step 6: Configure Apache for Remote Access
By default, phpMyAdmin can only be accessed from localhost (the machine where it’s installed). If you want to access it remotely from another device on your network or over the internet, you’ll need to modify Apache’s configuration file for phpMyAdmin.
Edit Apache Configuration File for Remote Access
sudo nano /etc/httpd/conf.d/phpMyAdmin.confYou’ll see several sections in this file that look like this:
<Directory /usr/share/phpmyadmin>
   Require local
</Directory>
If you want to allow access from any IP address (not recommended for production environments), replace “Require local” with “Require all granted”. Alternatively, for better security, restrict access by IP address or network range:
<Directory /usr/share/phpmyadmin>
   Require ip your_ip_address/24
</Directory>
Restart Apache Service
sudo systemctl restart httpdThis will apply your changes and allow remote access based on your configuration.
Step 7: Secure Your phpMyAdmin Installation
Your installation is functional at this point but not fully secure. Here are some additional steps you should take to harden your setup:
Password Protecting the Directory (Optional)
You can add an extra layer of security by password-protecting the /phpmyadmin directory using Apache’s basic authentication mechanism. First, create a password file:
sudo htpasswd -c /etc/httpd/.htpasswd username_hereEdit the /etc/httpd/conf.d/phpMyAdmin.conf, adding these lines inside the <Directory> block:
<Directory /usr/share/phpmyadmin>
   AuthType Basic
   AuthName "Restricted Access"
   AuthUserFile /etc/httpd/.htpasswd
   Require valid-user
</Directory>
Enable HTTPS for Secure Connections
If you’re accessing phpMyAdmin over an unsecured HTTP connection, sensitive data like login credentials could be intercepted. To force HTTPS connections in phpMyAdmin, edit its configuration file located at /etc/phpMyAdmin/config.inc.php, adding this line:
$cfg['ForceSSL'] = true;Step 8: Accessing phpMyAdmin Web Interface
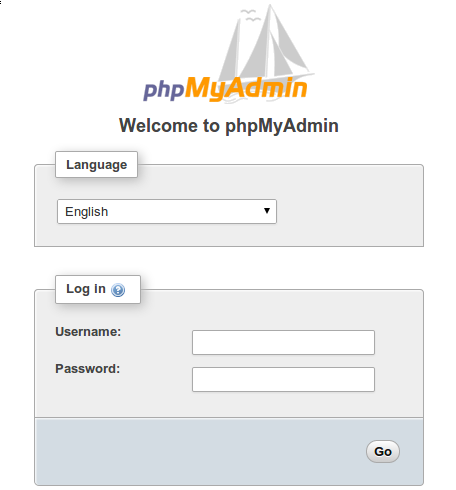
You’re now ready to access phpMyAdmin through a web browser. Open your browser and navigate to:
http://your-server-ip/phpmyadmin/ You’ll be prompted for your MariaDB root username and password (or any other database user credentials).

Troubleshooting Common Issues
Error: Forbidden You don’t have permission to access /phpmyadmin/ on this server.
This error typically occurs due to incorrect permissions in Apache’s configuration file. Ensure that you’ve properly modified the /etc/httpd/conf.d/phpMyAdmin.conf , allowing remote access as needed.
Error: SELinux Blocking Access (Fedora)
If SELinux is enabled on your system and you encounter permission issues when accessing files or services through Apache, execute this command:
sudo setsebool -P httpd_can_network_connect on Congratulations! You have successfully installed phpMyAdmin. Thanks for using this tutorial for installing the latest version of phpMyAdmin on the Fedora 41 system. For additional help or useful information, we recommend you check the official phpMyAdmin website.