How To Install phpMyAdmin on openSUSE

In this tutorial, we will show you how to install phpMyAdmin on openSUSE. phpMyAdmin is a powerful, open-source web-based tool for managing MySQL and MariaDB databases. It provides an intuitive graphical interface that simplifies database administration tasks, such as creating, modifying, and deleting databases, tables, fields, and rows. Additionally, phpMyAdmin supports importing and exporting data, executing SQL queries, and managing user privileges.
This article assumes you have at least basic knowledge of Linux, know how to use the shell, and most importantly, you host your site on your own VPS. The installation is quite simple and assumes you are running in the root account, if not you may need to add ‘sudo‘ to the commands to get root privileges. I will show you the step-by-step installation of the phpMyAdmin on openSUSE.
Prerequisites
- A server running one of the following operating systems: openSUSE (Leap or Tumbleweed)
- It’s recommended that you use a fresh OS install to prevent any potential issues.
- You will need access to the terminal to execute commands. openSUSE provides the Terminal application for this purpose. It can be found in your Applications menu.
- You’ll need an active internet connection to download the phpMyAdmin and its dependencies.
- You’ll need administrative (root) access or a user account with sudo privileges.
Install phpMyAdmin on openSUSE
Step 1. Refresh the repositories to ensure you have access to the latest package versions by running the following command:
sudo zypper refresh
sudo zypper update
Step 2. Installing LAMP Server.
A LAMP (Linux, Apache, MySQL/MariaDB, PHP) server is a collection of open-source software that provides a platform for running dynamic websites and web applications. To install Apache, MySQL, and PHP on openSUSE Linux, follow these steps guides.
Step 3. Installing phpMyAdmin on openSUSE.
Next, install the phpMyAdmin package along with its dependencies by executing:
zypper install phpMyAdmin
Step 4. Configure Apache.
With phpMyAdmin installed, the next step is to configure Apache to serve the phpMyAdmin web interface. Locate the phpMyAdmin Apache configuration file at /etc/apache2/conf.d/phpMyAdmin.conf and open it in a text editor with root privileges.
Uncomment the ‘Alias‘ line and modify it to set the desired URL path for accessing phpMyAdmin. For example:
Alias /phpmyadmin "/usr/share/phpMyAdmin"
Next, adjust the ‘Require IP’ line to allow access from specific IP addresses or all IP addresses. To grant access to all IPs, use:
Require all granted
Note that the httpd.conf file includes a directive that loads the phpMyAdmin configuration file.
Save the changes and restart the Apache web server for the modifications to take effect:
systemctl restart apache2
Step 5. Secure phpMyAdmin.
Securing your phpMyAdmin installation is crucial to prevent unauthorized access. One way to achieve this is by setting up Apache authentication for the /phpmyadmin directory.
Generate a .htpasswd file using the ‘htpasswd‘ command, specifying the username and password for accessing phpMyAdmin:
htpasswd -c /etc/phpMyAdmin/.htpasswd your_username
Open the /etc/apache2/conf.d/phpMyAdmin.conf file and add the following lines to enable Apache authentication:
<Directory "/usr/share/phpMyAdmin">
AuthType Basic
AuthName "phpMyAdmin"
AuthUserFile /etc/phpMyAdmin/.htpasswd
Require valid-user
</Directory>
Restart Apache for the changes to take effect:
systemctl restart apache2
Step 6. Configure phpMyAdmin.
To customize phpMyAdmin’s behavior, you can modify its configuration file located at /etc/phpMyAdmin/config.inc.php. Open the file in a text editor with root privileges.
Set the authentication type to ‘cookie‘ (recommended) by uncommenting and modifying the following line:
$cfg['Servers'][$i]['auth_type'] = 'cookie';
Uncomment the ‘blowfish_secret‘ directive and set it to a random string of at least 32 characters to encrypt cookies:
$cfg['blowfish_secret'] = 'your_random_string_here';
Configure advanced features like the temporary directory, upload/save/import directories, and adjust other settings as needed, such as the default language.
Save the changes made to the configuration file.
Step 7. Access phpMyAdmin Web Interface.
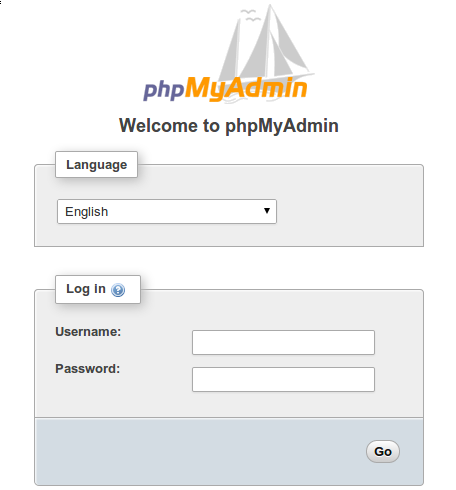
With the installation and configuration complete, you can now access the phpMyAdmin web interface. Open a web browser and navigate to http://server_ip_or_hostname/phpmyadmin, replacing server_ip_or_hostname with your openSUSE server’s IP address or hostname.
You will be prompted to enter the MySQL/MariaDB username and password. Upon successful login, you will be greeted with the phpMyAdmin dashboard, where you can manage your databases, and tables, and perform various administrative tasks.

Take a moment to familiarize yourself with the interface and explore the available features. phpMyAdmin provides a user-friendly way to interact with your databases, execute SQL queries, import and export data, and manage user privileges.
Step 8. Troubleshooting and Tips.
If you encounter issues while accessing the phpMyAdmin web interface, here are some troubleshooting tips:
- Check the Apache error log (
/var/log/apache2/error_log) for any relevant error messages. - Ensure that the file permissions on
/etc/phpMyAdmin/*and/usr/share/phpMyAdmin/*are set correctly. The web server should have read access to these directories and files. - Verify that the MySQL/MariaDB root account has a strong password set. Weak or empty passwords can pose security risks.
Congratulations! You have successfully installed phpMyAdmin. Thanks for using this tutorial for installing the phpMyAdmin on your openSUSE system. For additional or useful information, we recommend you check the official phpMyAdmin website.